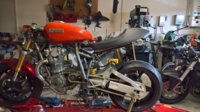
Large Spine Frame XS650 / Egli / Rau / Cafe Racer

Some of my favorite books on Chassis:
Motorcycle Chassis Design: the theory and practice (Tony Foale and Vic Willoughby)
Motorcycle Handling and Chassis Design, the art and science (Tony Foale)
The Racing Motorcycle, A technical guide for constructors (John Bradley)
The Racing Motorcycle, A technical guide for constructors - Volume 2 (John Bradley)
Post War Independent Motorcycle Frame makers (Keith Noakes)​

And a really interesting article from Bikers Station 2014/10 No. 325. A Japanese Magazine / article regarding the relationship between the engine placement and chassis. In Summary, this article focuses on the CG of the ENGINE VS the complete bike CG and all of that in relationship to the virtual roll center.

Skipping a lot of detail there - the following numbers are my interpretation from the above article's photos - so the dimensions may not be precise, but - an interesting reference. I've added Rake/Trail/Seat height and my own bike dimensions at the bottom:

Engine CG - Roll Center_.JPG


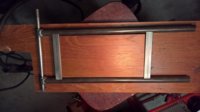
So, how do you figure out where the CG is on an engine? You hang it in two different directions of course!
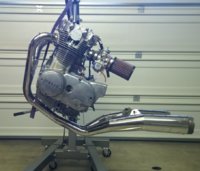
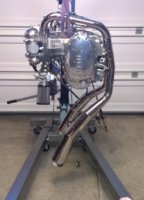
WP_20150623_19_18_44_Pro.jpg WP_20150623_19_38_15_Pro.jpg

And back to the dimensions:
XS650 Specs.jpg

Long story short - mass centralization and keeping it close to the virtual roll center have a major affect on handling. CG/Weight bias forward/rearward, up/down...

Anyway, balancing these points, engine rotation, anti squat, and the fact this engine is NOT a modern representation by any means... the engine location has been decided.
 
I have always found this stuff interesting. The way that they can make an extremely heavy bike like a Honda Goldwing ride and handle like a much lighter machine by keeping the mass down low. A lot of sport bikes also factor in the weight of the rider into the handling equation by placing the seating and controls in such a way that it puts the rider far forward to weight the front wheel as an aid to handling. I have ridden Ducati's and Honda naked sport bikes that position you so far forward that when you are riding the motorcycle isn't even in your field of vision and it is really exhilarating , it's a feeling as close to flying as you can get in wheeled vehicle.
 
Looking good. You build fast, it makes me feel slow. I might have to use the model of the engine when I plan my next bike.
 
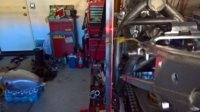
Fabrication started in May of 2016. I only put in a few hours in the garage per month... Family first. ;)
I'm dumping as much info into this thread as fast as I can until I catch it up with current, "real time".

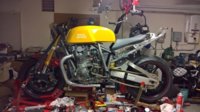
My avatar pic is the bike last weekend. Looks more finished that it really is. Trying to get the seat position and tank, tank line nailed down...

CG, mass centralization, Virtual Roll Center - I still have a lot to do.
 
Ok, I don't feel so bad on mine then. I definitely understand squeezing time here and there.
 
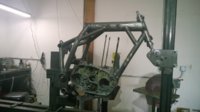
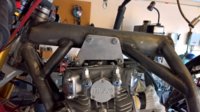
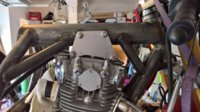
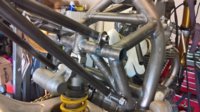
Back to the frame development... The engine is fairly exposed, yet it is packaged very tightly. Tube couplers are used on the down tubes to allow for assembly/disassembly. I bought some pre-made pieces. Relatively expensive compared to the other materials. Great quality, but HEAVY. This is a an area I could have lightened up. Out of convenience and wanting to keep moving forward... Done.

WP_20160919_22_41_09_Pro.jpg
WP_20160925_16_44_42_Rich.jpg
 
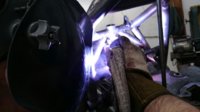
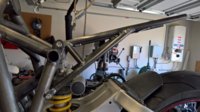
After test fitting, with everything tacked into place... Time for welding. I wanted this frame to look really well, my welds lack something cosmetic... ahem.
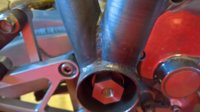
So here is a pic of the frame on Jig - at my friends shop, my friend Tony on the Tig welder and a sample shot of the SAP weld area (excuse the dust)... Not bad!

WP_20161101_17_29_51_Pro.jpg WP_20161101_17_29_51_ProV__E4F6.jpg WP_20171221_15_26_12_Pro - Copy.jpg
 
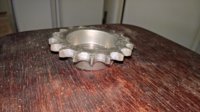
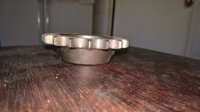
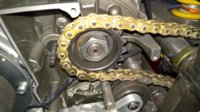
Gary Poh's .75" offset Sprocket was used.

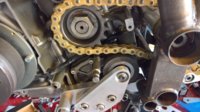
First one was 18tooth, 530 chain. Chain clearance issue I had on the bottom (gear shift shaft), made me rethink the 18th and switched to a 17tooth for more clearance around the Clutch pushrod. Took the opportunity to switch to a 520 chain at the same time.

These sprockets were a bit expensive, great quality though. Lead time on the last one was about 3 months.
So - 2 sprockets... = 6 months of waiting... Of course I could work on some other things... but, for the most part, progress stood still during these times.
I still have the brand new 18 tooth, .75" 530 and 35 tooth 530 rear sprocket. If anyone is interested in purchasing - Contact me offline.
Even with this .75" offset, the engine is still shifted to the left a bit to allow for the 180 rear tire.

WP_20171221_16_03_24_Prob.jpg WP_20171221_16_03_29_Prob.jpg WP_20171221_16_02_58_Prob.jpg

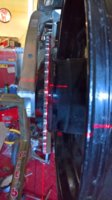
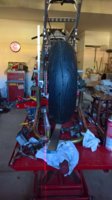
Next, using a newer R6 wheel on the older R6 Swingarm AND the lateral positioning of the engine all needs to be aligned. I bought a laser to help with alignment, wish I would have had it earlier. It was a used FAT MAX by Stanley and projects horizontal and vertical lines. I wish I had this when I was working on the frame earlier. Great tool!

WP_20170129_10_45_36_Pro.jpg WP_20170129_11_33_53_Pro.jpg WP_20170129_11_40_20_Pro.jpg

Front and rear wheels were assessed using the old string method. Everything straight!
 
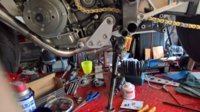
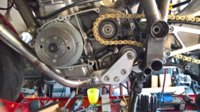
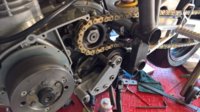
Speaking of Chain clearance issues... I made a rather beefy chain roller, it could have been a tensioner, but location being tight - I decided on just a simple roller. I'm a bit concerned on this and might have to redesign it at some point.

WP_20170709_18_35_52_ProS.jpg WP_20170709_18_36_00_ProS.jpg WP_20170709_18_36_07_ProS.jpg WP_20170709_18_36_12_ProS.jpg
 
Above - you can also see the kick stand. I was planning on using a Ducati kickstand (which bolts onto the flat side of the engine). Ended up using a Honda CBR954RR Kick stand. Same - it bolts onto the side, using the beefy roller bracket/plate - Pretty happy with how it worked out.
 
OK, back to the body work... It's good to have a few different tanks and seat laying about. I have three tanks I'm working with and more than that for seat combinations.

The Royal Enfield Continental GT, in my opinion is a very nice looking gas tank. But - I think it would go better with a squared up seat and it is a bit long. As commented earlier by Mailman, I do want to get the seat as forward as possible.
WP_20170129_22_42_14_Pro.jpg

Of course - a lot of trimming is required yet to get the right heights... Hmmm...
I would never use that R6 seat - but would use a bubble seat of some sort...

I really like the XS650 tank. Testing this out, with a Triumph seat...
WP_20170724_10_55_10_Pro.jpg
This Triumph seat is REALLY NICE, VERY COMFORTABLE!!! But - it's a bit wide looking (long too), especially next to the XS tank.

I have a lot of hesitation ripping tanks apart. I need to push them so far down to line up with the seat...

So - a suggestion by a friend - Lift the seat more to help align the two. Remember that CG / Roll center text earlier... This is not the direction I want to go in. But - this needed to be explored. Back to the drawing board - well, CAD in this case.
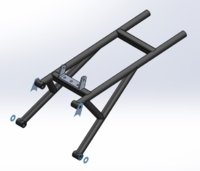
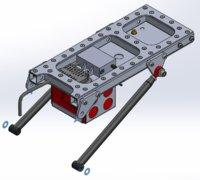
Thought I would play around if more aircraft like construction, riveting together an aluminum sandwich, 1" thick. that also doubles as the electronics tray.
I would make the mounting points adjustable too - to speed up modifications - all I would need to do is make new small plates and also play with the heim joints.
Wq 171218a Seat Subframe - Aluminum Rivet.JPG WP_20171112_21_53_07_Pro (2)[1245].jpg
This ended up being heavier than the 4130 .75" tube sub-frame. And - it interfered with a new seat that I added to the collection, as well - didn't quite look right. And I also added a triumph tank to the mix...
WP_20171202_10_49_02_Prod30 Lifted Subframe.jpg

Starting to come together, but the seat was just way too high.
 
Time to bite the bullet and go crazy on the tank. It is almost a complete shell now... I've decided to stick with the Triumph tank. In the end - I will have more fuel capacity than possible with the XS650 tank. I really like it's round/organic shape. Note: When I started this project, Triumph had not released their latest round of bikes. But now - there are more parts to choose from on ebay.

This tank is going to be painful to reconstruct, but - it is probably the only way to get the lines that I need.
Heavily modified tank, new seat, back to the 4130 sub-frame...

WP_20171216_16_34_21_Proa back to the original Subframe.jpg


And with some photoshop - The word YAMAHA now replaces TRIUMPH.
WP_20171217_13_06_29_Pro[1203] BEST yamaha 50.jpg


I kind of like this paint scheme... Hmmm...

OK, that catches this thread up with where I'm at in real time. That said - this thread is going to slow down quite a bit. Hope you have enjoyed so far!

Next - Start Mounting electrics and start biasing the weight rearward...
 
Back
Top