Large Spine Frame XS650 / Egli / Rau / Cafe Racer

Had the day off today, tomorrow the family vacation starts - and it won't be near the garage.
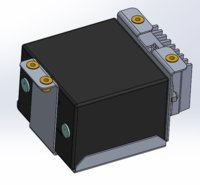
Today I mounted the Coil and got about 75% of the subframe "seat" mounting done.
I'm rubber isolating the seat similar to a production bike might.

Coil circled in red.
WP_20171222_15_35_22_Prob circled.jpg
WP_20171222_14_52_30_Prob.jpg

WP_20171222_15_34_55_Prob.jpg
 

Attachments

  • rivnut.png
    rivnut.png
    40.9 KB · Views: 311
You have done some serious planning and building in this project! This has to be in the Top 10 (or less) extensive builds. Most impressive!
 
Before I can move to the wiring harness, I will mount the brake light, turn signals, headlight, etc.
The sub-frame needs a brake light bracket.

Roughly locating the license plate and brake light...
WP_20180101_11_27_46_Pro.jpg WP_20180101_12_25_00_Pro.jpg
 
The brake light is one of these cheap LED units off ebay. Cheap, but a nice piece. The steel bracket is a bit heavy. So, I fabricated a new in aluminum piece, 62% lighter, a whooping 96grams, or 0.21lbs weight reduction.

WP_20180104_15_51_36_Pro (2).jpg WP_20180104_15_51_45_Pro (2).jpg
 
Got some time in the garage this weekend. My Neighbor peaked in, asked if I had a New Years' resolution yet... He said he had one for me: "Finish this bike."
Perfect, challenge accepted!

Working to the CAD model, got the basic bracket done. Made a mistake along the way and had to partially cut, bend and re-weld the main tube. Of course, had I made it exactly to the CAD model - I would not have had to do this... ahem. I haven't added the gussets - they may not be needed, but can add later easily enough.

I had some really nice Rizoma Graffio turn signals I was going to use... They are supposed to be M8 X 1.25 thread... Which should be around 7.8mm~8.0mm diameter, weird, but these are 7.3mm diam - I can't get a bolt to stay on - and as a result, they can't be mounted! So I had some back up turn signals, a bit larger than what I wanted... they can be changed later. These bullet shape units kind of fit the look though.

Anyone have any ideas how I can get the Rizoma's to work - or have had the same issue?

WP_20180107_12_05_40_Pro.jpg WP_20180107_15_23_48_Pro 888.jpg WP_20180107_15_23_54_Pro 888.jpg WP_20180107_15_27_20_Pro.jpg WP_20180107_15_28_33_Pro.jpg WP_20180107_15_33_56_Pro 888.jpg WP_20180107_15_34_23_Pro888.jpg WP_20180107_15_34_29_Pro.jpg Rizoma Graffio.JPG
 
... They are supposed to be M8 X 1.25 thread... Which should be around 7.8mm~8.0mm diameter, weird, but these are 7.3mm diam - I can't get a bolt to stay on - and as a result, they can't be mounted!

Anyone have any ideas how I can get the Rizoma's to work - or have had the same issue?

That IS a wierd diameter. Closest would be a #18 wood screw.

https://www.boltdepot.com/fastener-information/Wood-Screws/Wood-Screw-Diameter.aspx

Had a similar problem with an undersized male molded plastic threaded water drain fitting. Had to make a matching undersized female thread to screw onto it.

I'd have to have a close look at yours.
In lieu of that, show them to a machine shop...
 
headlight thoughts... Fork mount, triple clamp mount, steering head mount? Pros and cons for each...
Of course the Rizoma turn signals are out (for now)...
I like the slim/thin look, got the idea from an adventure bike thread... Pretty simple, unique, lightweight...

Hmmm...
Larger bucket fork mount iso smaller mnts.JPG Larger bucket fork mount iso wide.JPG Larger bucket Triple mnt iso.JPG round bucket triple mount full iso.JPG round bucket triple mount full side.JPG round bucket triple mount iso.JPG slim - head mount full iso.JPG slim - head mount iso.JPG slim - head mount side full.JPG slim - triple mount side full.JPG slim side.JPG slim iso.JPG slim exploded.JPG
 
I like the fork mount of the first picture. I would maybe make a single, thicker mount on each side. With the top and bottom mounts of the triple tree, it may be too "busy" with 4 clamps on each fork side.
 
Yeah, I've ordered a pair of fairly conventional fork leg brackets. Unfortunately - they look heavy and of steel, fortunately with Rubber mount and 52mm ID!
The R6 fork leg has a very gradual Taper from the top triple 50mm Diam to the bottom triples with 52mm diam. So the rubber will be good for Vibe and help absorb the taper. I'll give these a try.

Turn Signal Mount smc.404.48-55-3T.jpg
Turn Signal Bracket smc.404.48-55-2.jpg


I like the slim/thin headlight look and I found an aftermarket - nearly identical version to what I was thinking of fabricating.... So - that's been ordered.
Flashpoint-5.75-headlight-14.jpg

Flashpoint Yamaha-Scorpio-Cafe-Racer-14.jpg
 
The headlight above arrived - it's a "flashpoint LED headlight. Nice piece.
The fork mount headlight brackets arrived - but they are 56mm, not 52... So, no real progress this weekend. Just hope I can return those brackets and get the replacements without hassle and by next weekend...
 
Spoke to the supplier of the fork mount headlight brackets - they forgot to send me additional rubber to shim it with. Received it, and it's too thick... So - another week will pass for this...

In the meantime - Steering damper from an R6 will mount nicely to the top triple clamp, but I need a bracket attached to the frame...
A little more detail added to the CAD:
headlight and R6 Triple clamp 012018.JPG


And the new bracket might look something like this (blue):


headlight and R6 Triple clamp 012018b.JPG


This will be welded onto the top of the spine.
After I fabricated the round section and welded it to the from - I may not need the flat support under the bracket legs... TBD
Sorry no pics, but it is welded to the spine now (less the flat part). I can always weld that on later.

Damper Bracket BASE1.JPG Damper Bracket BASE1b.JPG
 
Last edited:
And working on the electronics... Not sure I will stick with this "open" design... But, here is the snapshot... Top/side/ISO:
ebaytop.JPG ebayleft.JPG ebayiso.JPG

To start this work, I focused on the battery bracket.
Battery Bracket assy.JPG Battery Bracket assy.JPG Battery Bracket.JPG

THe Blue assembly was Fabbed this weekend. Again - no pics... Too busy between family and project...

Weights so far:
Lbs Item
2.67 Antigravity Battery 12 Cell
0.31 Brkt
0.63 Rectifier (approx)
3.61 Total weight

Just the battery that came in the donor bike was:
9.43lbs, 12N14-3A.
 

Attachments

  • Battery Bracket assyb.JPG
    Battery Bracket assyb.JPG
    38.4 KB · Views: 224
That bikes gonna be straight outta' the Jetsons... ;)
 
Simple is never simple... The fork leg mounting brackets I purchased and was later told to use the spacer they sent me, was later embellished upon as just shove half of the 3mm thick spacer into the 2mm gap, biasing / offsetting the clamp... OFF concentric.... Not too thrilled with this... should I spend the ~$20 on the 2mm thick rubber sheet from McMaster? Hmmm... Going to think on this one for a bit....

In the mean time, the battery tray/electronics mounting bracket... From the CAD above - and not completed, but getting there...
WP_20180201_22_49_27_Pro[1906].jpg WP_20180201_22_49_37_Pro[1905].jpg WP_20180201_22_49_44_Pro[1904].jpg WP_20180201_22_52_47_Pro (2)[1903].jpg

Should have 0.5"+ clearance at full bump - between the swing arm and the bottom of the battery... Will work on this a little bit over the weekend.
 
Mechanical Engineer. Nothing special... Certainly, nothing as fun as what comes out of the garage. ;)
Aircraft Mechanic eh? You've got my sincerest respect!
 
Back
Top