This is my nomination for the Annual XS650.com Generosity Award.

R9QHCAltENxOhDgS_XghLjer9gkyIXQDnh0vzUFuIDNHkM32Ug.jpg

I agree, Ken has really been helpful to me and supplied me some good parts. He’s a great guy!

I would also like to add, that Gary very generously offered a couple of lines he had. He went out to his barn early this morning when it was 4 below zero to find them for me. But I turned them down because they seemed in worse shape than the one I already have. But the effort to do that for me is so appreciated.
 
I would also like to add, that Gary very generously offered a couple of lines he had. He went out to his barn early this morning when it was 4 below zero to find them for me. But I turned them down because they seemed in worse shape than the one I already have. But the effort to do that for me is so appreciated.

Well if interested in trying this one just say the word and it's on the way to AZ!
 
Thank you! You’re reading my mind, I was hoping for a diagram! It helps my little lizard brain understand. So is that safety relay in your diagram , the brown wire I was referring to?

Also, I was going to redo the wiring a little tomorrow anyways. I forgot, it’s not in the official diagram, but Pete recommends a 7.5 amp inline fuse , set up like this. ( doesn’t have to be under the seat)
View attachment 135328
The fuse is under the seat so you can jumper the ignition directly to the battery in the event of a blown main fuse or total short circuit. That'll get you home!
 
Re-posted the latest revised 72XS2/73TX 650 diagram in post #2124.......

2124 posts and still many more.......11 months in and 97.5% finished and the last 2.5% will take another 3 months:banghead:.....always the hardest ..... this has gotta be the longest thread in history............:laugh:
 
Last edited:
2124 posts and still many more.......11 months in and 97.5% finished and the last 2.5% will take another 3 months:banghead:.....always the hardest ..... this has gotta be the longest thread in history............:laugh:

No kidding huh? When I started this I thought it would take me 3 or 4 months to do a sympathetic restoration. I started writing this in real time , just to have a record of my progress and to ask for help along the way. I never dreamed that it would be a year of my life documented and that I would forge so many friendships along the way. I can’t believe you guys are still hanging in there! :)
 
Of course Bob, you've sold an old, and bought a new home, lost a good friend, had some health issue, plus countless other personal milestones along the way so, yes, this a long thread but certainly an interesting and inspiring tale - and wow - what a beautiful bike will emerge from it!

Pete
 
Last edited:
No kidding huh? I can’t believe you guys are still hanging in there! :)

When i reposed the diagram i made reference to the post no.......i was blown away by how many posts were in the thread........not something usually noted...........

I don't post much but have really enjoyed following you on this journey......and yes, it has bought a lot of people together and my dig about the time frame is just that the last 5% of a project nearly always takes the same amount of time as the first 90%.........

Can't wait for the ride tutorials and pics...........hurry up haven't go all day. :laugh:

Thanks Doug! I’m hurrying! And I’m glad you’ve been following along. This has been a lot of fun for me.
 
PAMCO WIRING COMPLETED

Well...at least I sure hope so. I think I have my mistake corrected. Here’s what I will be doing today, installing an inline 7.5 amp mini fuse under the seat, as per Pamco Pete’s recommendation, and soldering the multi plug ,that I cut off previously, back on. Then doing the final wiring up on my Pamco.

SO LETS GET STARTED!

These are going in,
C9DA55E2-27D8-404F-9884-CD6C6B9466BC.jpeg


Here I’ve soldered the plug back on and insulated with heat shrink tubing. This was cut off in error when I was trying to isolate the red/white wire to hook up to the coil. I didn’t realize at the time that this multi plug is where the the brown wire feeds power to my safety relay. Hopefully I’ve rectified that mistake now.
0F80472A-3FBA-4F3C-874F-B080F80EA22B.jpeg


Next up I’ve already soldered on wiring extensions to my mini fuse and I’m laying out the wiring. I plan to locate the fuse behind my tool tray.
E02AF5F2-95F8-45B6-B43B-96F52838972E.jpeg


I sleeved the wire with vinyl loom all the way front to back, using what I had available. Silver loom around the battery box , black loom with both wires inside from the battery box up to the coils.
D1E68A74-6C64-4D0A-B24B-09F7D31B458E.jpeg
183A1089-9A60-41D9-8BF1-B8E5C8146032.jpeg


All connections have been made and the wiring tucked away and secured. You can see the two 14 gauge red wires coming out of the loom for the connections. One end got a bullet connector so it can now just plug into the multi plug. The other red wire coming from the fuse was tied to the red wire from the Pamco and crimped in a blade terminal to go onto the coil.
00829B25-2630-4344-8DA1-D9BFF1B6242B.jpeg


So......hopefully, that’s all I will need to do for my ignition. Everything is in and wired, all that should be left to do is time it once I get the engine running.

COMING UP NEXT......
Here’s a sneak peak of my next scheduled job.
CBDEFCE0-26FC-46DB-A647-C3C44ED6F9F1.jpeg


Later!
Bob
 
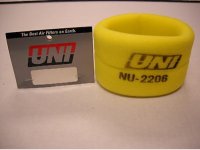
Hey guys, I didn’t include a photo yet, but I have a set of those unit filters just waiting to go in.
0405AB37-E63D-43A4-A285-10552BBD41CC.jpeg
I was also planning to de construct my old rotted paper filters and wrap the framework with uni foam , just as you guys suggested, for spare filters.
I haven’t even checked the fit of those yellow filters in my air boxes yet.
This is a good time to ask, Gary, didn’t you say you had some kind of special homemade filter oil?
 
Back
Top