Oh dear - now for the NOT fun part.....:notworthy:....paying for it.

You've done a heck of a lot and it all sure looks nice. Take heart Bob - you'll get there! :bike:

Pete
 
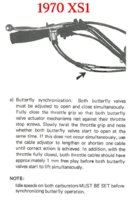
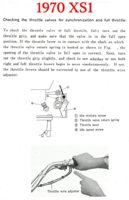
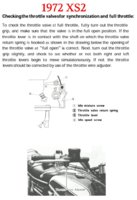
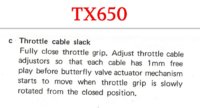
Here's some early "Dead Cylinder" excerpts:

XS1-DeadCylinder1.jpg ThrottleXS1a.jpg ThrottleXS1b .jpg ThrottleXS2 .jpg ThrottleTX650 .jpg
 
Hey thanks 2M! I’ve got some reading to do.
On my ‘77 before I made my manometer and got some vacuum barbs, I set it up using the dead cylinder method. I thought I had it pretty well set up until I actually put a manometer on it and realized how much more vacuum one side was pulling versus the other.
The adjustments are small but the effect is huge.
 
Forgot one.
You've got the mix screws, to get each cylinder to idle cleanly, on its own.

Then the idle stop screws, normally set equal (like a 1/2 turn from fully closed), but feel the exhaust pulses and set the stop screws to get equal pulses.

Then, the 2 throttle cables. Set them so that both throttles initiate movement equally. I do this setting on the bike, applying slight throttle, barely moving them, and glance at left/right sides, looking at the throttle arms (usually watching reflections on the chromed levers), watching for equal liftoff, and for equal letdown.

Lastly, I reach down to both throttle levers, left finger on left carb, right finger on right carb, and alternately lightly *blip* the throttles, left and right, to ensure that the carbs are transitioning off idle equally. If not, could indicate a pilot jet problem, or a weak cylinder.

Can't do this on linked carbs...
 
Well.....they can’t all be winners. :(

I was going to take a stab at rebuilding my front master cylinder today. I broke it down and cleaned everything up, and got ready to work on the rebuild.
84CD126B-5E40-4A81-BDCD-A93789A407CD.jpeg

49DF8F0E-866C-4B33-96BF-F185BA00AD10.jpeg
D0E6264C-E474-4850-992A-646935731942.jpeg

2516F1F9-6739-4885-8284-3535FE378E40.jpeg


I’m afraid I got a little bit ahead of myself on this one. I have already purchased the rebuild kit, before checking to make sure it was indeed rebuildable. It is not. Unfortunately there is deep pitting inside the bore, and also the diaphragm under the cap is falling apart and I have not seen a suitable replacement for it.
3C99E9E8-A882-4564-B1C2-C1C5E8159E6A.jpeg


So, a replacement master cylinder is in my future, and I have a cool new M/C paper weight! :rolleyes:
 
Well.....they can’t all be winners. :(

I was going to take a stab at rebuilding my front master cylinder today. I broke it down and cleaned everything up, and got ready to work on the rebuild.
View attachment 117339
View attachment 117340 View attachment 117343
View attachment 117341

I’m afraid I got a little bit ahead of myself on this one. I have already purchased the rebuild kit, before checking to make sure it was indeed rebuildable. It is not. Unfortunately there is deep pitting inside the bore, and also the diaphragm under the cap is falling apart and I have not seen a suitable replacement for it.
View attachment 117342

So, a replacement master cylinder is in my future, and I have a cool new M/C paper weight! :rolleyes:

It will be hard to find a replacement. There is a used on on e-bay but who knows what condition it is in. You can check this out.
https://www.applehydraulicsonline.com/collections/motorcycles
 
Just looked at Apple Hydraulics, looks like a good outfit. If I were going for concourse correct I would really consider that.
 
Yup - a sleeve and re-bore to the stock size could be just fine Bob.

Certainly, the one you've got is a mess.

Pete
 
I just wanted to say Thank You to Gary
For taking the time to scrounge up and send me a replacement vent hose holder, that was missing from my carburetor. There! That’s better!
37FA1B79-DFA8-4FFD-871B-F9E12C22D536.jpeg


Thanks Gary! You rock!
 
Last edited:
FRONT BRAKE CALIPER REBUILD

Ok, I got stalled out on my master cylinder rebuild, but not to be dissuaded, I have other parts for the front brake that needs rebuilding. So....on to the caliper. The unit on this XS2 is more complex than on my 77D, this unit is a two piston caliper that squeezes the disc from both sides versus the single piston caliper on my 77.

The first thing to do is remove all the bolts holding the two half’s together and separate the two sides.
6FDABCA5-B235-4EB9-95A6-D8BEFD41105A.jpeg
2AB9F2DA-B118-462A-B52A-18EDC1963E97.jpeg


Once you split the halves you can remove the seal from the brake fluid passageway, and pull the disc pads out.
CA48E61B-8E95-4783-A213-C74CDE62CAC8.jpeg
94B712DD-544B-4CAA-979A-A1EF0DD72E17.jpeg


Next up, remove the pistons from the calipers. These babies were STUCK! I worked for about an hour on removing them. I sprayed penetrating oil on the front and also inside the fluid passageways so it would get behind the pistons to help dissolve deposits on the inside also. Then I cycled back and forth, tapping on the pistons with the plastic handle of a screwdriver and blowing compressed air in the line openings. Be VERY careful if you use compressed air to remove these cylinders, they can go from being stuck to becoming projectiles in seconds flat!
When I blew air into the calipers, I placed them open side DOWN over some towels, so that when they come out they just hit the work bench.
A274ABEE-AD43-4D3D-9D38-592E7EC432BD.jpeg


With the pistons out, now the seals can be removed.
89152FA6-2B82-4497-85B5-D474A54B688A.jpeg


All the components laid out for inspection and cleaning.
D87D334B-B413-4B86-947B-BD3F100FBF2B.jpeg

Next up, clean up and rebuilding.
 
What? Those pistons don't come out that easy. You sure got lucky on that one. I used a grease gun, after pressing them in, pumping in grease, repeating this umpteen times and a mountain of grease...........they were out. Gotta say, your bike sure was in great shape to start.

Scott
 
EDIT: Never mind. Missed Bobs comment above.
 
“ When nothing goes right.......go left.”

So I actually started this job a couple days ago. I spent a lot of time cleaning the parts and then spent some quality time with my Dremel and wire wheels to remove the rust and corrosion. Finally wiping everything down and masking and painting them. That was a couple days ago and I had them hanging out in the hot Arizona sun to harden the paint.
81582CC5-AD24-48EF-9ECB-73AF04DEE308.jpeg

9FDFB2CC-988F-4E31-8F21-3907E7503F8E.jpeg


I have my rebuild kit on hand , as well as new brake pads. I thought everything was in good shape and I was just about ready to proceed, then I realized that what I thought was just some stuck on crud, was actually rust pitting ( AGAIN) on my pistons. I even tried wet sanding them with 1500 grit paper, but I fear they must be replaced before I can continue. I can feel them catch on my fingernail, they would wear the seals and allow air into the system.
6D266423-337F-4B41-91DB-645C0B80DE3E.jpeg
61926E86-E9B7-4271-8E29-50C7B7EDD59B.jpeg


So here I am, stalled out again. I’m kinda making progress....in a sideways sort of way. Sigh....
006A3B38-67F4-42F9-B705-2DA61D1988F2.png
 
Back
Top