EXCITING NEWS!
B0760847-D8F0-4689-B78A-A4305C8BBDAC.jpeg


That’s right, Jake and Elwood, the bike brothers are getting back together this weekend.
2437AE87-28BA-4CB1-B952-0C6D4136904A.jpeg


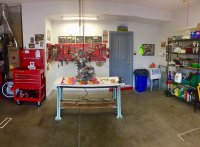
With a little luck, by Sunday afternoon my engine will be back in its frame where it belongs! I’ll get to try out my new chain hoist too! Stay tuned..........I’m so excited I gotta bust a move!
AEE1AA93-E60C-4E0E-9BC5-60C9DECE205A.gif
 
Even a couple wraps of duct tape would be better than nothing. Something else I do is add normal split ring lock washers to most of the motor mount bolts. Those factory lock nuts don't seem to lock on as well once they've been off and on a few times.
 
Even a couple wraps of duct tape would be better than nothing. Something else I do is add normal split ring lock washers to most of the motor mount bolts. Those factory lock nuts don't seem to lock on as well once they've been off and on a few times.

I could certainly add some lock washers, I don’t need much excuse to run to the hardware store!
 
Here you go Bob, I found that the large "pool noodles" were really too big and the couple of wraps of masking tape was adequate.
DSCN0124.JPG


Having the engine on the dolly and the frame on the block & tackle I could lower as slow and gentle and manoeuvre the engine as needed.
Hardest part was playing around with the slings to get the frame lifting horizontal.
All back together and ready to stand up.
DSCN0126.JPG
 
Today I ran to the hardware store to pick up some lock washers for the motor mount bolts, and a piece of rubber hose to cut up and slip over my motors exhaust mount studs.
97F80E63-A34E-4A76-B02B-5FAB433A360D.jpeg

Then I ran to Harbor Freight to buy some sale stuff.
Here’s a tip, if you tend to be an impulse shopper like me, take your bike and only buy stuff you can fit in your tail bag! No air compressor or tool box today!

I won’t have to swipe my wife’s hair dryer anymore when I wanna heat something up.
$8 .....they made me buy it!
11C16485-840F-4CD4-A90D-CD03B4DC5483.jpeg
78277665-21B3-4DF3-9808-750DA5B9428A.jpeg


When I got home I installed my kickstand and center stand. My first items going back on my bike!! Woohoo!
15477616-8BF4-4482-B3FE-109E72E15D9A.jpeg
51B5787E-E81F-4327-AC52-F788AC77CEFF.jpeg


I sure hated sanding my fresh powder coat off of the sidestand mounting tab to get it to fit back on, but oh well. Side stand and center stand generously greased at all rotation points.
Works like butter baby!
This is going to be fun!
 
Last edited:
I need some help understanding something. My compression release doesn’t seem to make contact with the exhaust valve to hold it open during the starting process. I’ve made a little video to show it.

I got worried that maybe I installed the wrong rocker arm on the left exhaust , so I removed all the covers and measured that little extension that the compression release holds down. It’s exactly the same length on all of the arms.

I don’t get it. Anyone? Beuller? :thumbsdown:
 
Bob, you sure the cam doesn't already have the valve partially open? Try rotating the crank and see if the valve comes up to contact the actuating arm.
 
Nothing is wrong. Not sure if these pics will show enough.First pic valve is open. Yes it can not touch.
63.PNG

This pic valve is closed. It can touch, when it does it pushes down on the rocker to open the valve. Keep in mind the head is upside down in these pics. If you roll your engine to where the exhaust valve is closed it should touch.
65.PNG
 
Ok guys thanks! That must’ve been it. I just couldn’t see it. I just tried bolting the compression release in place, with the gasket and everything. Making sure the valve was closed, I could not pull the lever with my finger. Then I tried rotating the motor while I held pressure on the compression release lever and as soon as the valve opened the lever moved also. So thanks again, I was having a little panic attack there! Sheesh!
 
COMING TO YOU LIVE FROM THE ARIZONA DESERT !!!

345 days a year of sunshine here , and today it’s this,
0F1A1E2E-0B9F-463A-B8B5-6C22565657B7.jpeg

Ah well....we are forging ahead. Today is engine setting day!
I’m all set up and awaiting my fellow forum buddy, Daniel Black to arrive.

The first thing I did was to hang my chain hoist and skooch the workbench with my engine on it foward until it is directly below the chain hoist. I had bought a 3 foot length of chain that I have bolted to the foward top motor mount boss and the top rear motor mount location , I’m trying to achieve a balance point roughly directly above the top rear motor mount .
BBB5ABDE-B641-4E4B-B5C7-3E00EF5BDD30.jpeg
9F406408-AEC3-4FB1-AEA7-05E69B7D6558.jpeg
33AA0ED1-1BD8-443A-A746-9412FA0FB185.jpeg
80D3161D-4388-4A86-B4AA-FF635ED1DA57.jpeg


As soon as the engine is lifted just off of the workbench, we will push the bench back to the wall and lay out some moving blankets to set the motor down on, on the floor.
More to come, stay tuned! :cool:
 

Attachments

  • F978DBDE-6C55-42BF-BE2D-42244CC55CF8.jpeg
    F978DBDE-6C55-42BF-BE2D-42244CC55CF8.jpeg
    185.9 KB · Views: 153
I like to stick the engine bolts in from the side that is shown on the frame parts drawing. Some insert from the left, some from the right. I'm not sure how much it really matters but I just like to do it that way. If you're going to lay the motor on it's right side and drop the frame down over it, the only bolt that may be an issue is the long bottom one. It is shown going in the right side, which won't be possible with the motor laying on the right side. You may have to stick it in from the left temporarily, then switch it around once the frame and motor are set back upright .....

https://www.partzilla.com/catalog/yamaha/motorcycle/1972/xs2/frame-engine-bracket
 
Back
Top