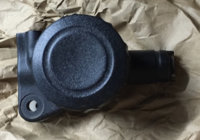
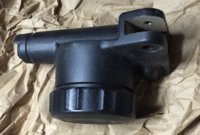
Master Cylinder Rebuilding

Trying to rebuild my 78 Special master cylinder today...
I have the MikeXS rebuild kit but I am not sure of the sequence and all I have is the crappy Haynes manual.

Here is how I think it goes back together.
092014180655_zpsf955d7f3.jpg


But what is that rubber seal for at the top? The parts diagram in the Haynes manual shows two additional pieces that were not included in my kit.

Here is the mess I started with:
071714081852_zps442e0f47.jpg
Good picture. I have three different books (including a factory shop manual) and still did not have a picture where I could really distinguish the parts. Thanks for a clear picture.
 
I have a MAC tool (1214) with very small tips that works perfect to go down in there and raise that slip ring straight up out of there. Remember in this case you want to squeeze NOT expand the ring.

there are two holes down inside the main tunnel under the plastic top that need to be cleaned. The top will spin CC off of the metal bottom. One hole is easy to clean and see. The smaller one looks like someone started to drill a hole then stopped. You will need a fine wire to test whether it is open or not. A small E string will work just fine. You can see the wire thru the tunnel.
 
Last edited:
You're good! What is the difference for the 72????

The easy way to pick it is that the 73 body has the raised circular area with the internal thread in the top.

Also the cap is different. Some of the internals are different.

It was almost impossible to buy an original 72 master cylinder assembly as they were quickly superseded by the 73 part.

(I managed to get one on ebay after several years and parting with $$$.$$)
 
Does any guru have a trick to installing the rubber slider that fits between the plunger and the spring. It does go in big end first, right? It just wants to wad up or flip over. The one that came out had the imprint of the plunger star on the small part so I am assuming that end goes in last. HELP !! This piece is driving me nuts.
 
In order to remove the piston you must first remove the internal snap-ring. This "ring" is a pain in the butt, seriously. I never reuse this ring nor should you. It will be corroded and, after trying to work it out, will be damaged.

Really great info. :thumbsup:

I'm about to reassembly everything

Would you therefore recommend to put som grease or something else on the new snap ring when reassembling it, in order to avoid it to rust? Or would it risk the grease to work its way into the bore and damage the piston function? I couldn't find a stainless snap ring.
 
The easy way to pick it is that the 73 body has the raised circular area with the internal thread in the top.

Also the cap is different. Some of the internals are different.

It was almost impossible to buy an original 72 master cylinder assembly as they were quickly superseded by the 73 part.

(I managed to get one on ebay after several years and parting with $$$.$$)

OK, so I have my '72 650 working master cylinder but I don't NEED it, but I want a similar ROUND type m/c for my chop. Is there a more 'parts replacement friendly' xs650 m/c that I can swap onto my bike?
 
Madjap I bought the replacement from Mike's. the cost was just a few dollars more than a rebuild kit and it works great.
 
Great write up!
Everything expected to be encountered is there.
I'll add that the rubber bushing that goes on to the metal plunger was a challenge. Common sense dictates that it should start onto the plunger from the smaller end that the brake lever engages when assembled, and that's how I started but hit the first obstacle. ......and I didn't want to start picking and pulling the bushing to get over that rise. Looking at the design of the bushing reminded me of an umbrella and then the old question of "What goes up a chimney down but never down a chimney up?"
Slide that bushing onto the plunger from the end that has the star embedded, the spring contact end. It's a bit of a stretch but no more than what you encounter coming in from the other end, as that last placement hurdle is the same diameter as the star end but you won't be fighting the bushing flair.
Again, by design, an existing bushing on the plunger is best removed going in the direction of the brake lever.......up a chimney down......
 
attachment.php


Bill or others
How do you put the gasket(?) on to the piston? I can't seem to put it on with just my finger, and I don't want to damage it with a pair of needle nose...any suggestions?
Thanks
There is a great video by Shane Conley that I watch last night... (to teach myself how to rebuild a MC). He shows a technique on how to get those gaskets around the piston that I thought was insightful. Here is a link if anyone is interested. Being a brand new XS Owner, I appreciated the attention to detail he shares. Very helpful to those of us who are just beginning.
 
After reading this thread, I'm feeling confident enough to tackle my first ever MC rebuild. Thank you for taking the time to document this process!!
I do have a question though... What kind of brush can I use for removing corrosion (caused by the brake fluid) without scratching or damaging the cylinder? Would a brass brush used for cleaning the bore of a pistol suffice? Thanks in advance for the feedback. Much appreciated!
 
Just so you Know... I got the snap ring out and back in with an awl and 2 small screw drivers and I didn't scratch the bore...not that it matters out past the snap ring it can be scratched and not hurt anything it's just the dust boot there .
I have snap ring pliers bit not long reach ones , so I took it all apart and cleaned it real good and re assembled the master cylinder using the OLD parts..... I didn't buy new ones ! and after assembly it would not pump up pressure... after 2 or 3 days fussing with it I discovered that the Older models , say 1978's or so something like that would leak break fluid if the line to the caliper was disconnected and left to dangle.
that was my first clue.... it needed to seep to fill the line by itself just setting there.....
I took the master cylinder apart again and the resivour and discovered that the 2nd hole was not drilled in my 1983 master cylinder
so it couldn't leak if it wanted to ... I took the smallest drill I had , 1/16" and drilled the hole through to the bore ,being careful not to go through and nick the other side of the bore.... I cleaned the newly drilled hole and tried to chamfer the hole the best I could...
I put it all back together and let it set over night with the brake line connected to the caliper , although I did notice before I quit for the night that it was pumping up pressure... but it was springy with air in the lines... so the next morning I bled the system and got all the air out of the line and top line connector ( that was a tricky one) but the end results was success....
I did this because the brake was on solid and would not release when I got the bike...I had to take the caliper off to get it to roll at all.
sit that was 2 years ago and it still works like a champ !
......
Bob...
 
After reading this thread, I'm feeling confident enough to tackle my first ever MC rebuild. Thank you for taking the time to document this process!!
I do have a question though... What kind of brush can I use for removing corrosion (caused by the brake fluid) without scratching or damaging the cylinder? Would a brass brush used for cleaning the bore of a pistol suffice? Thanks in advance for the feedback. Much appreciated!

I would imagine a pistol barrel brush would be ok, (don't have a gun so can't state categorically). If the bore of the MC is corroded then it is shot and will need to be replaced....................usually you will find it is just old fluid gunk ed up and a good flush with WD40 and then brake fluid it and it should be ok. Often the internal parts, piston and seal can be used again, again only if an inspection shows they look good.
 
I disagree there 650skull, the gun barrel brushes would scratch the shit out of the soft aluminum...they are very stiff brissels for a tough cleaning job on hard metal.....
if it were me I'ed wrap very fine steel wool around a dowel or pincle and stuff it in the bore and once in it
spin the dowel and steel wool with your hands to make sure you cover the entire surface...I would do that wet with WD-40 and not do it very much just in and out 3 or 4 times should be enough....just enough to get it good and shiny ! if it's good and shiny already keep the steel wool out'a there and leave it alone ! and as 650Skull said if the bore is rough pitted and corroded enough to warrant trying to clean it, it's probably shot anyway... the bore must be very smooth or it will leak internally and you'll have to pump the brake after it sets a while when using the brake again... that is not right.... you should be able to grab the brake lever and lock up that wheel at any time .... if it leaks pressure off replace the master cylinder, or rebuild it with new rubber parts , as they go bad with age.
....
my 2 coppers !
Bob.........
 
Back
Top