LEGEND_10
XS650 Enthusiast
Hey guys,
I've been coming to this forum for the past couple years looking for answers and inspiration for my build and have yet to post anything myself. I'm getting really close to getting her back on the road, and figured I should post some photos of the progress (better late than never). Let me know what you think!
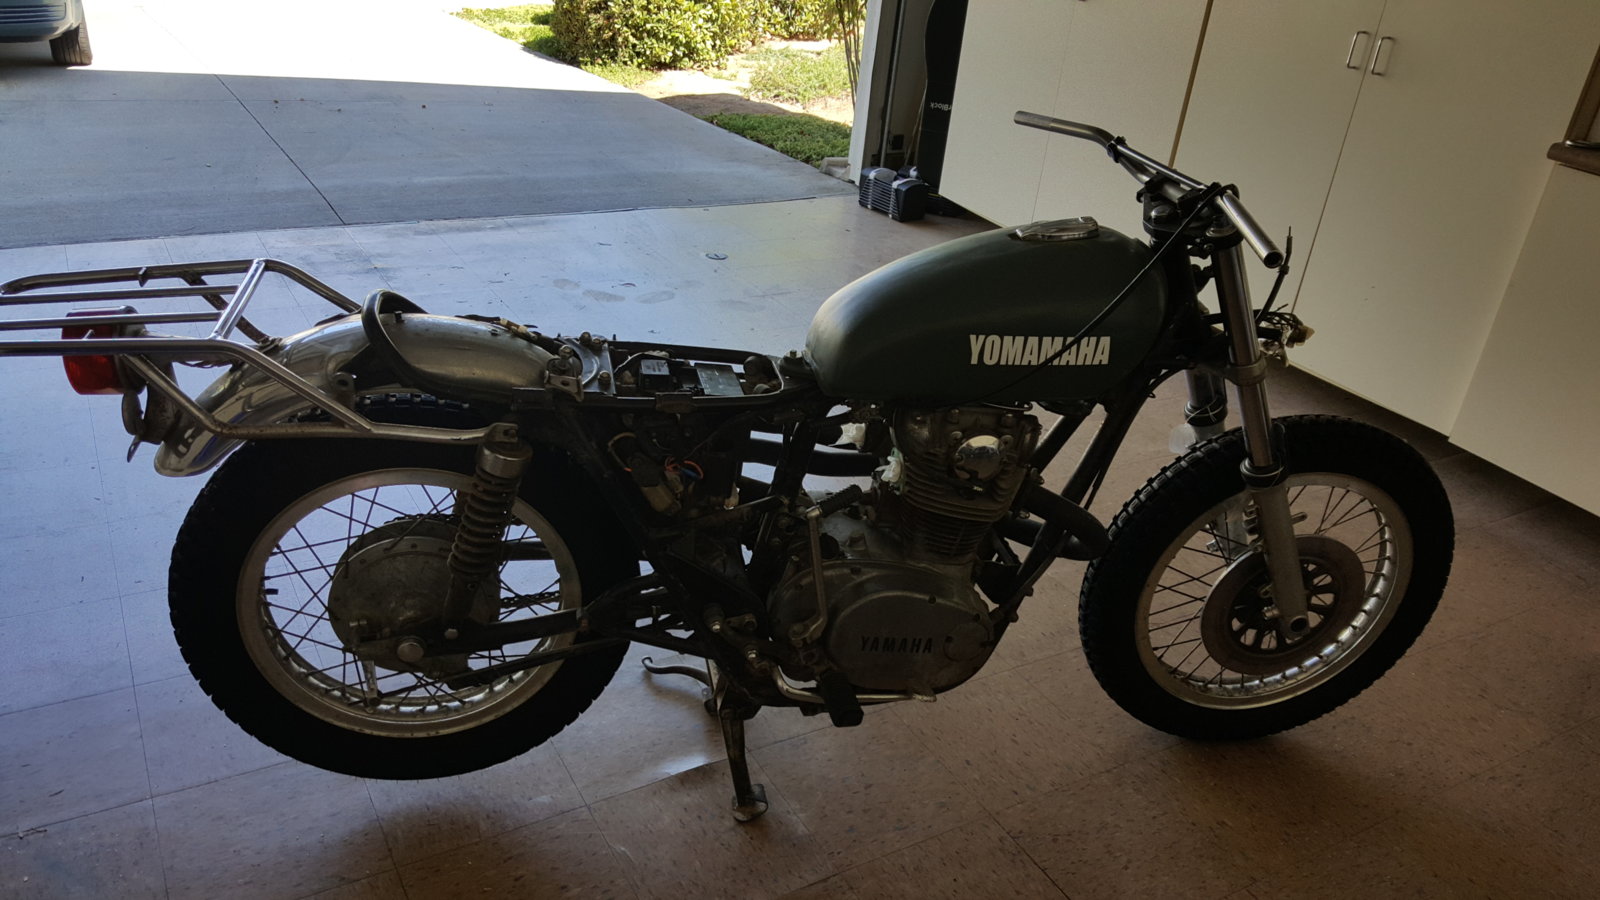
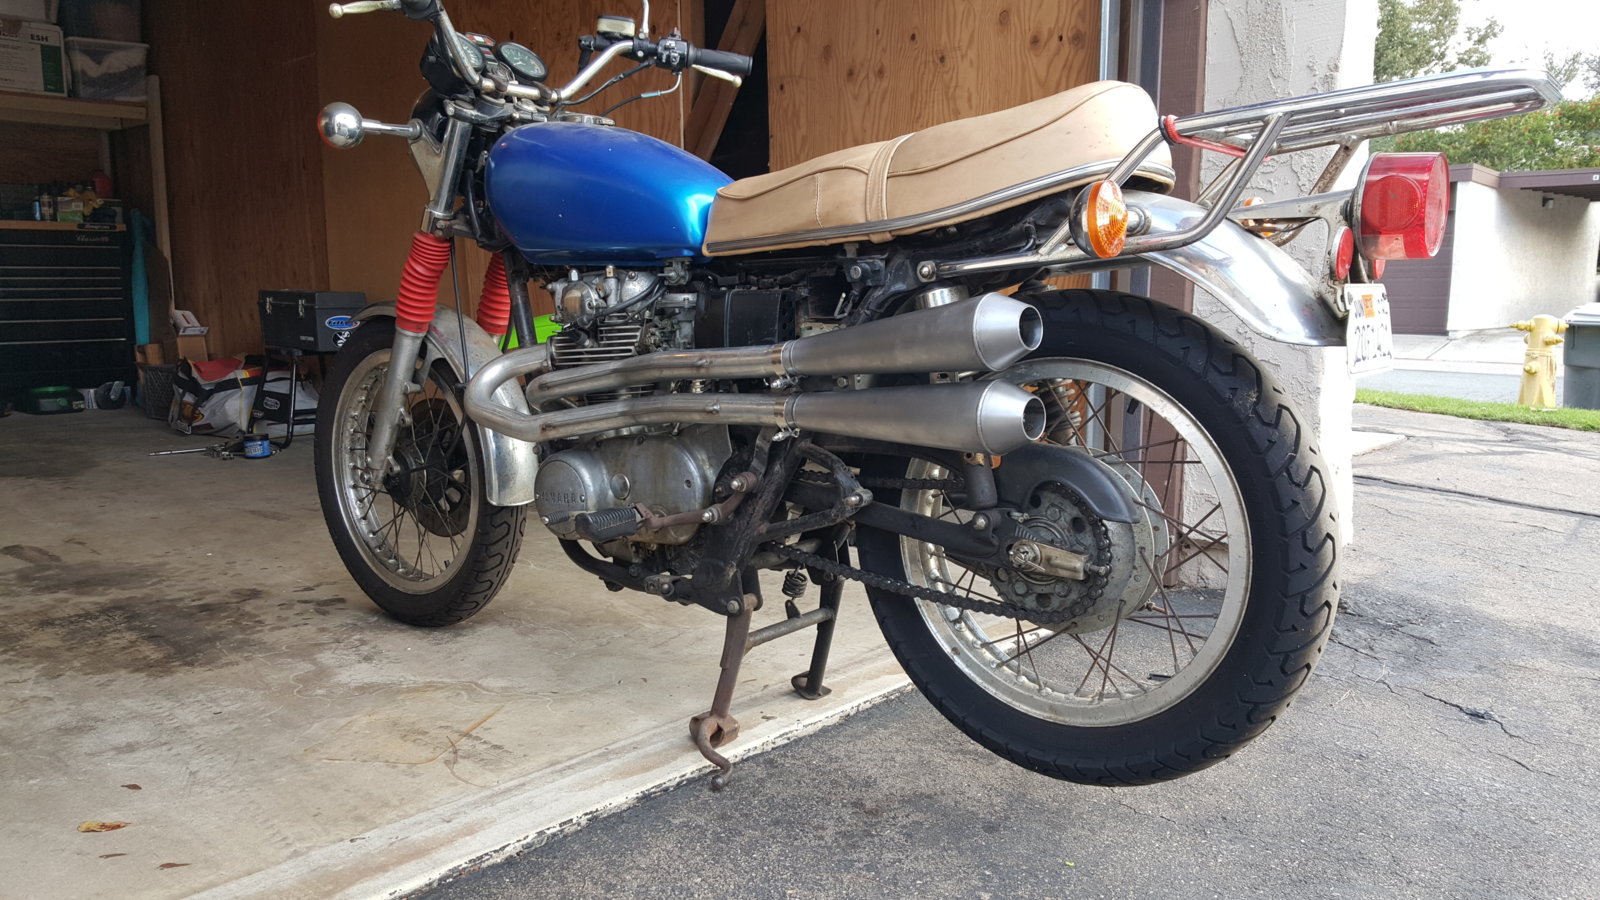
So the bike started out with a coworker of mine who picked it up for the Barstow to Vegas Offroad race (w/ 11k mi). He brought it to me to install the Omar's pipes, clean the carbs, and jet. I thought he was crazy and didn't think the bike would survive. Well she did, although pretty beaten up, I bought her and have been completely rebuilding since. Here it is before the beating.
After the trip across the desert, the suspension was blown out, bars were destroyed, and barely running. She was in need of some serious TLC.
I grew up riding motocross, and riding in the desert and wanted to give the bike a scrambler / tracker kind of feel.
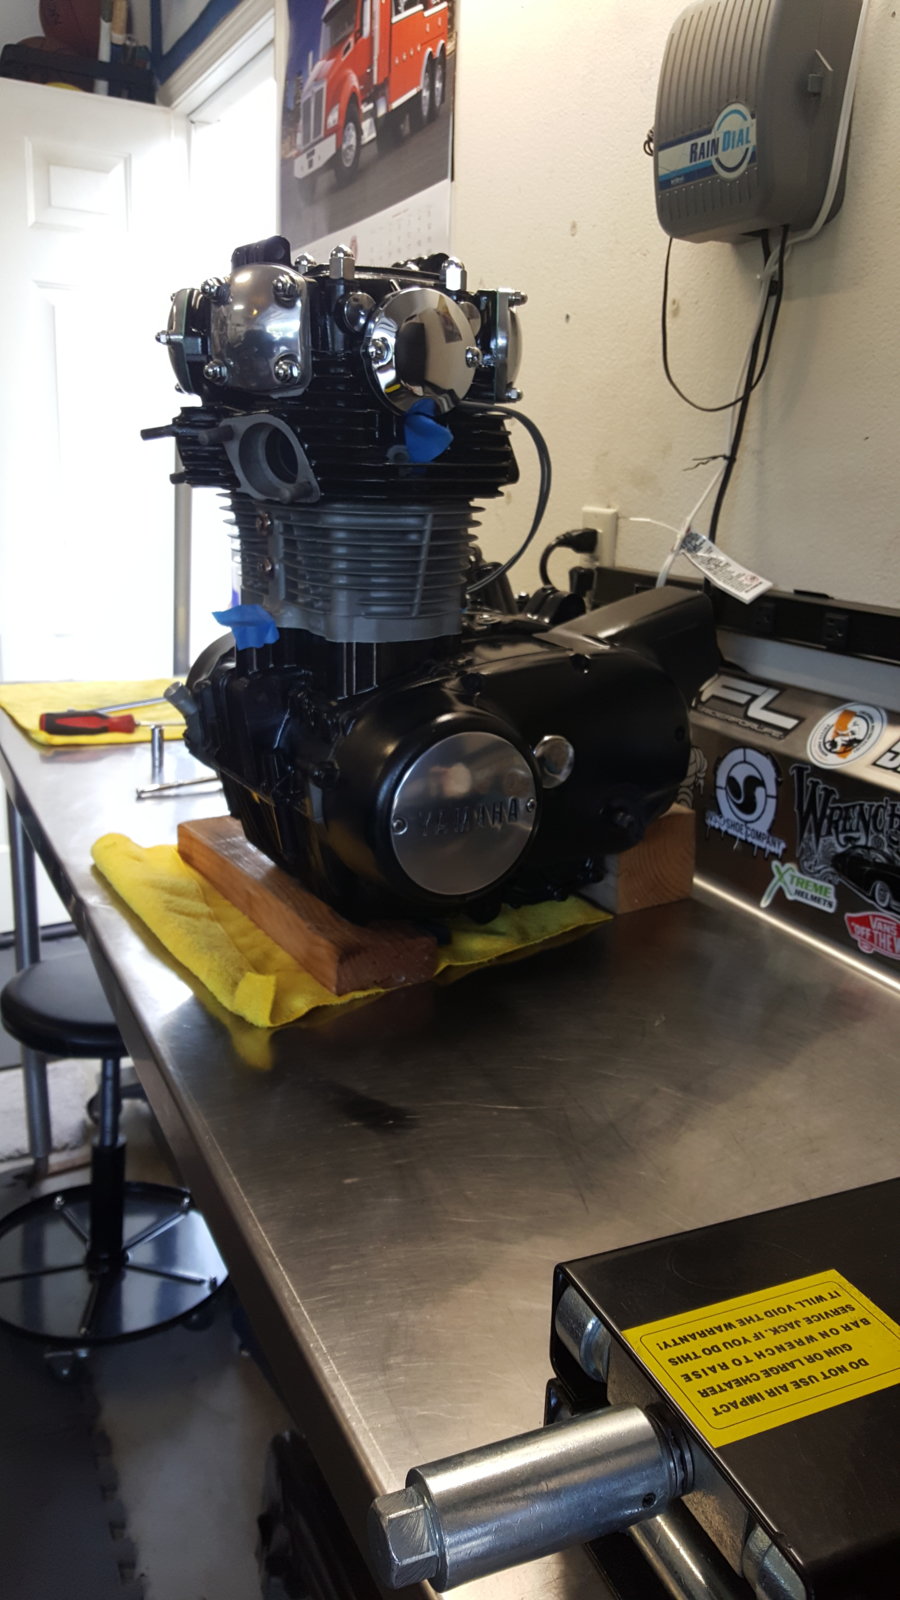
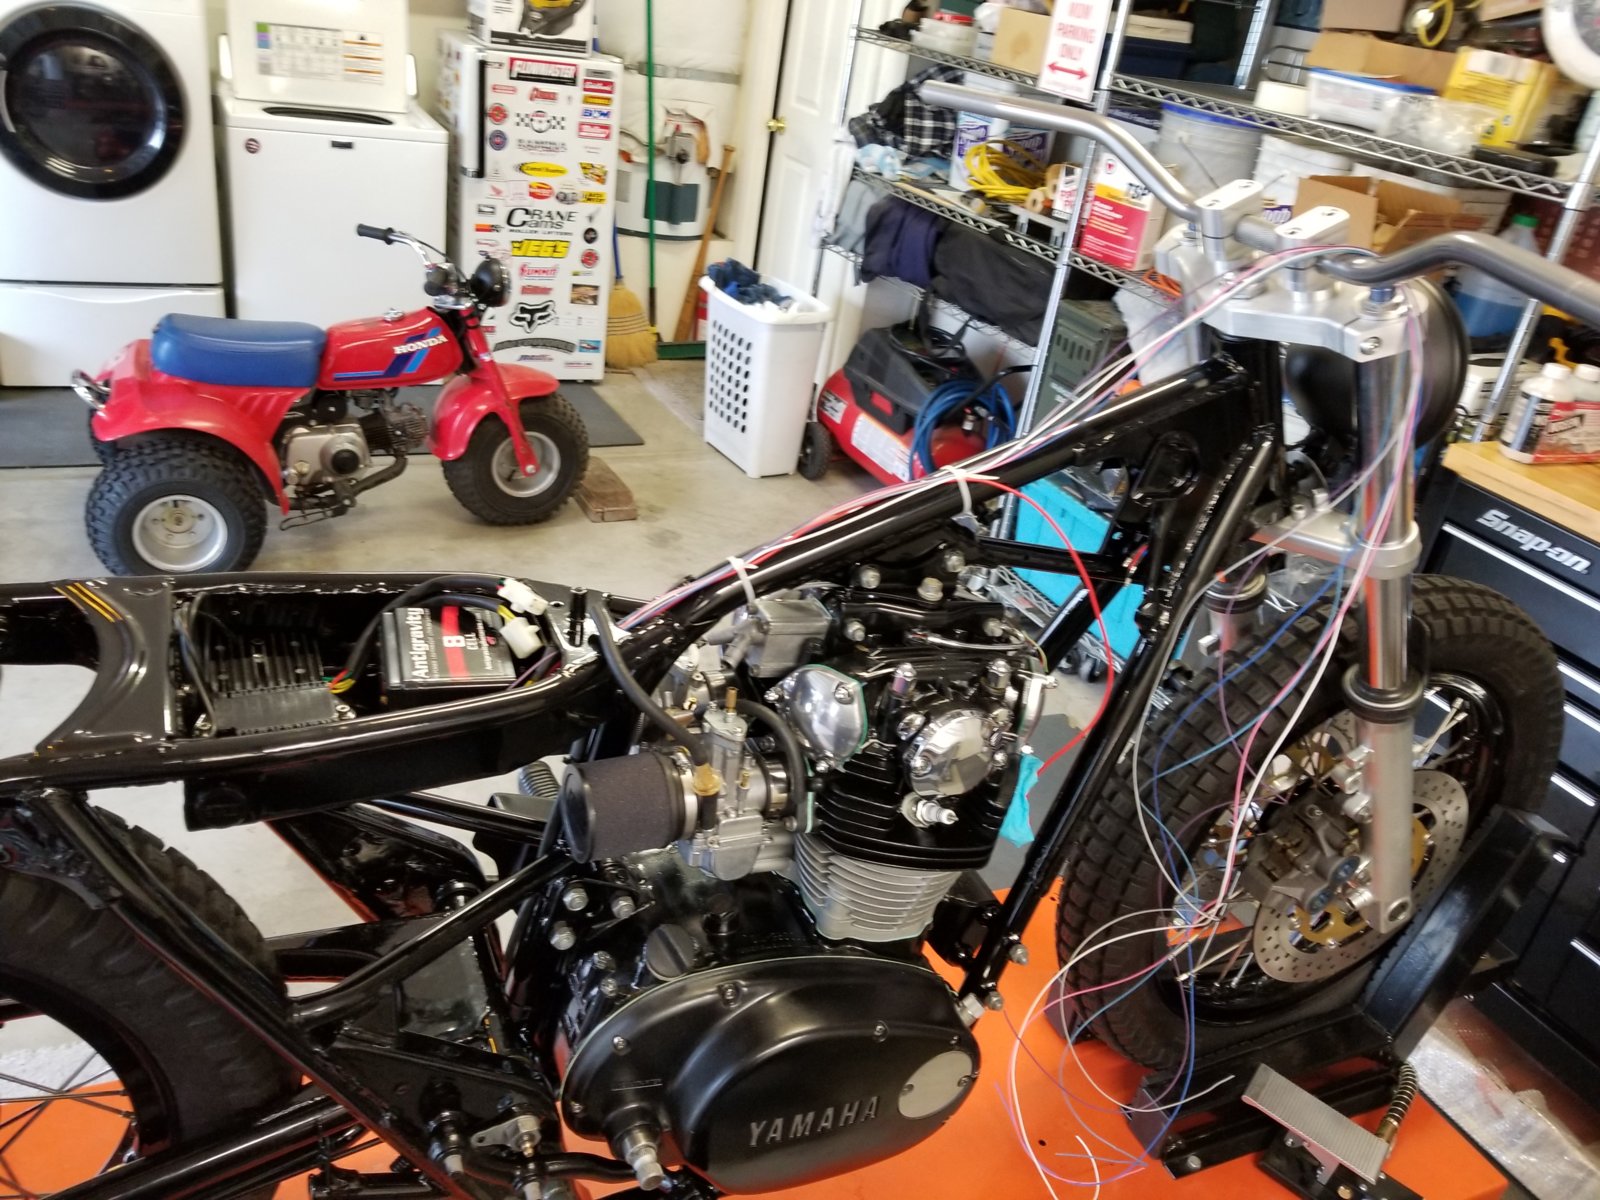
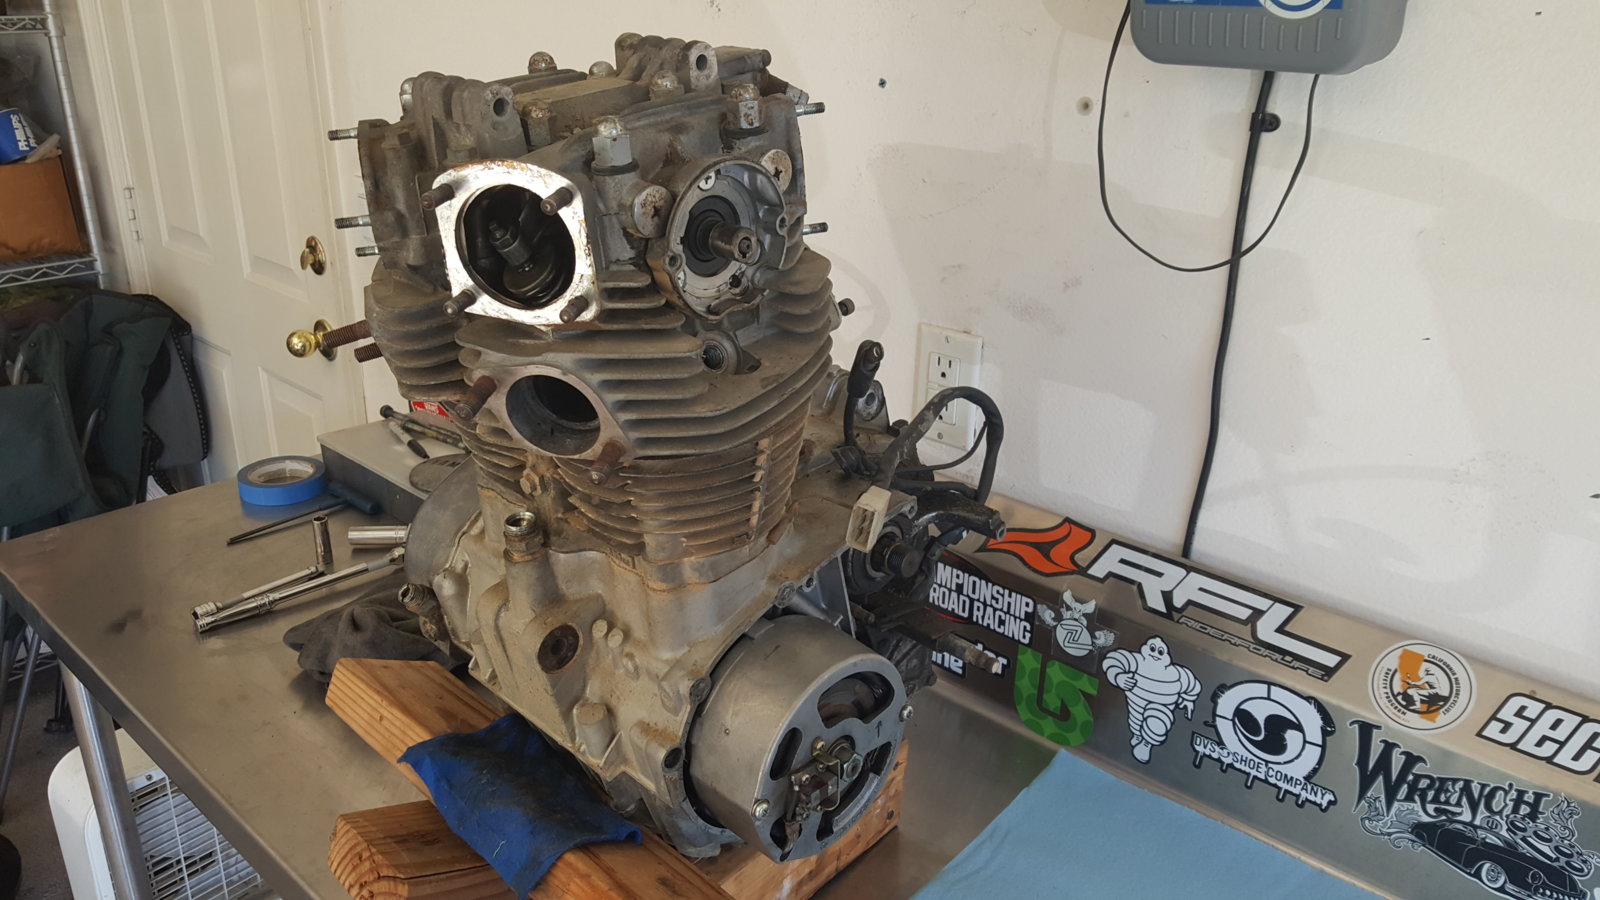
My first focus was to rebuild the motor. I sent the crank and cam to Hugh for the rephase, bored the cylinders to 700cc for the JE pistons, rebuilt the head, installed Hughs PMA, Pamco Ignition, removed all associated starter gearing and components,
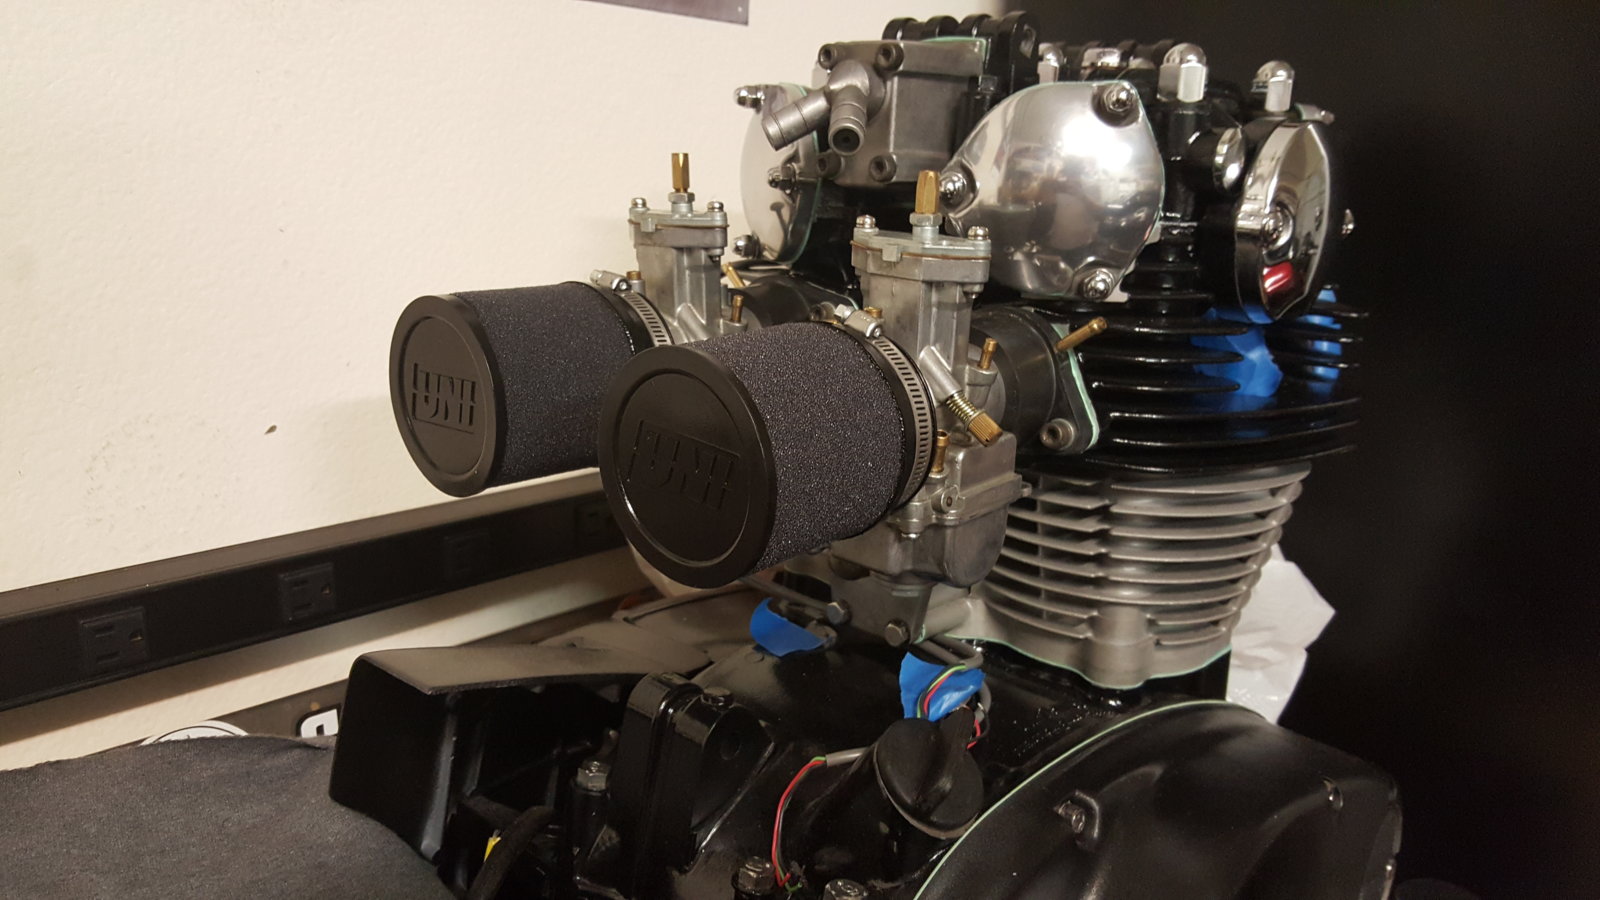
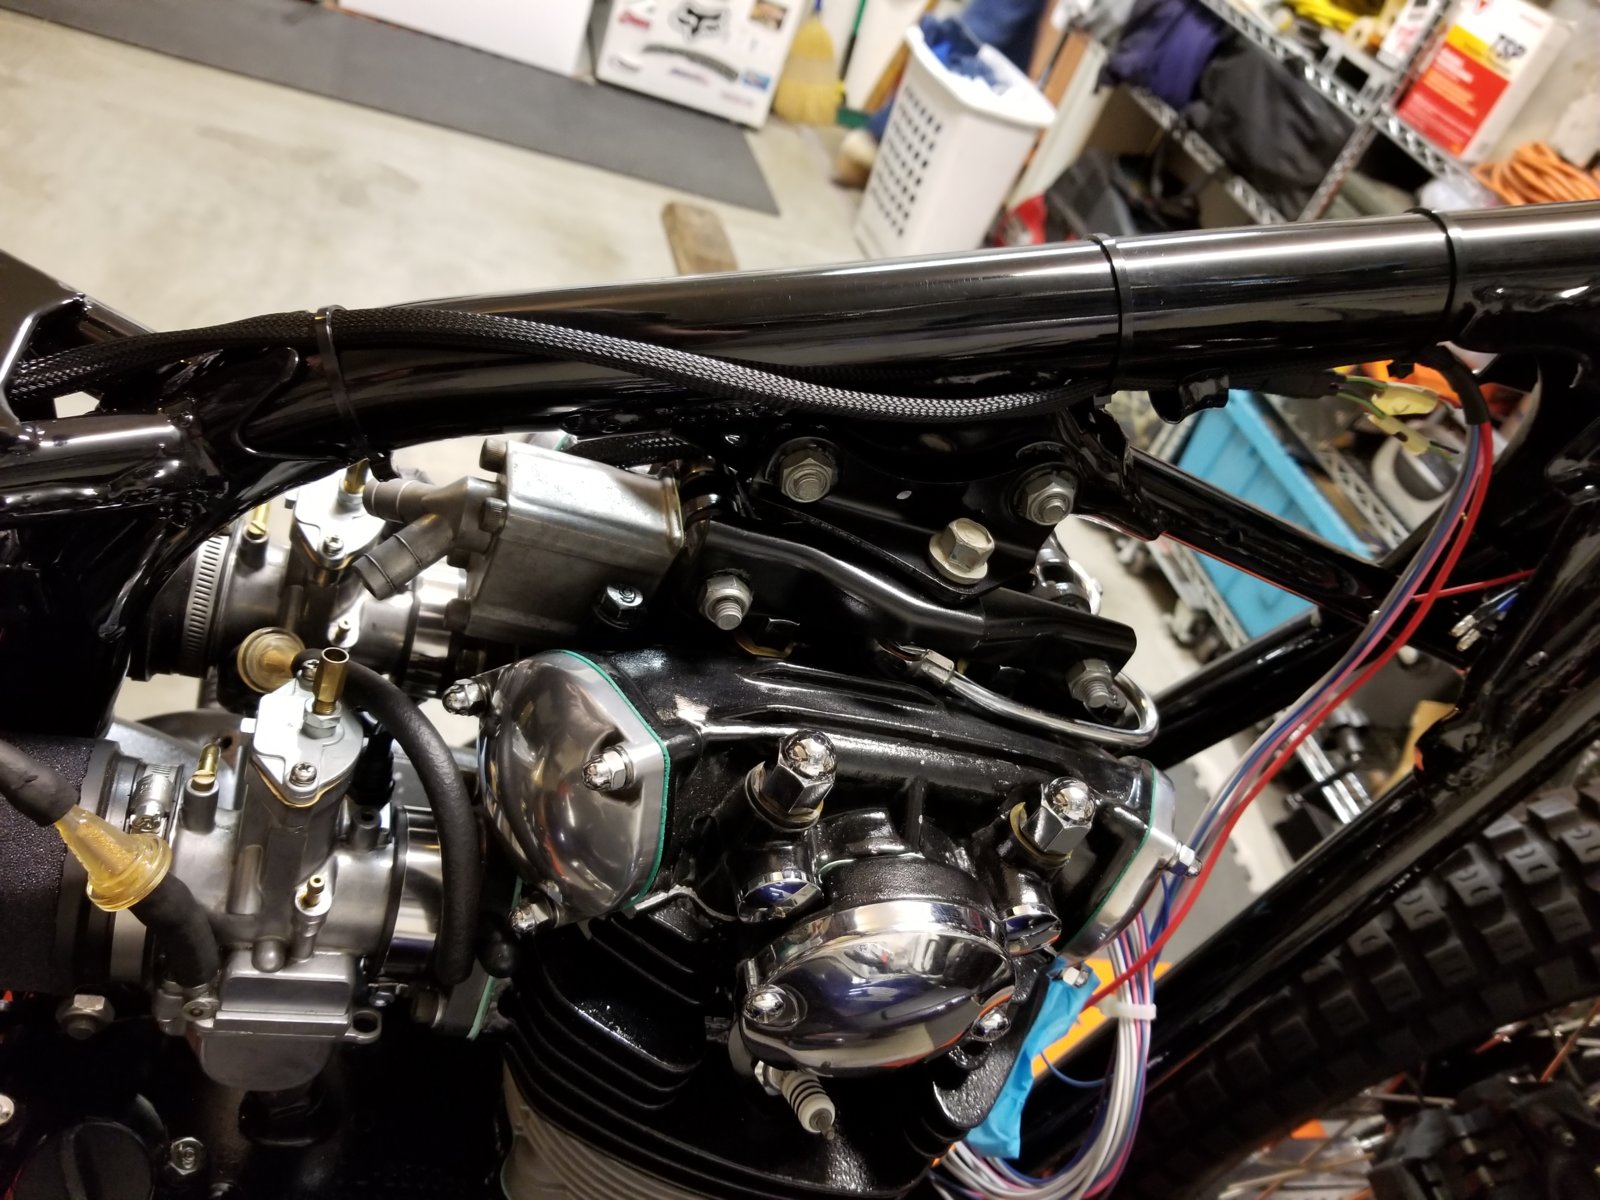
My buddy had these PWK's laying around so I decided to give them a go over the CV's. I put on some UNI pod filters to hopefully help me tune these things in. I haven't read too much good about tuning them, so any advice you guys have other than getting different carbs would be greatly appreciated.
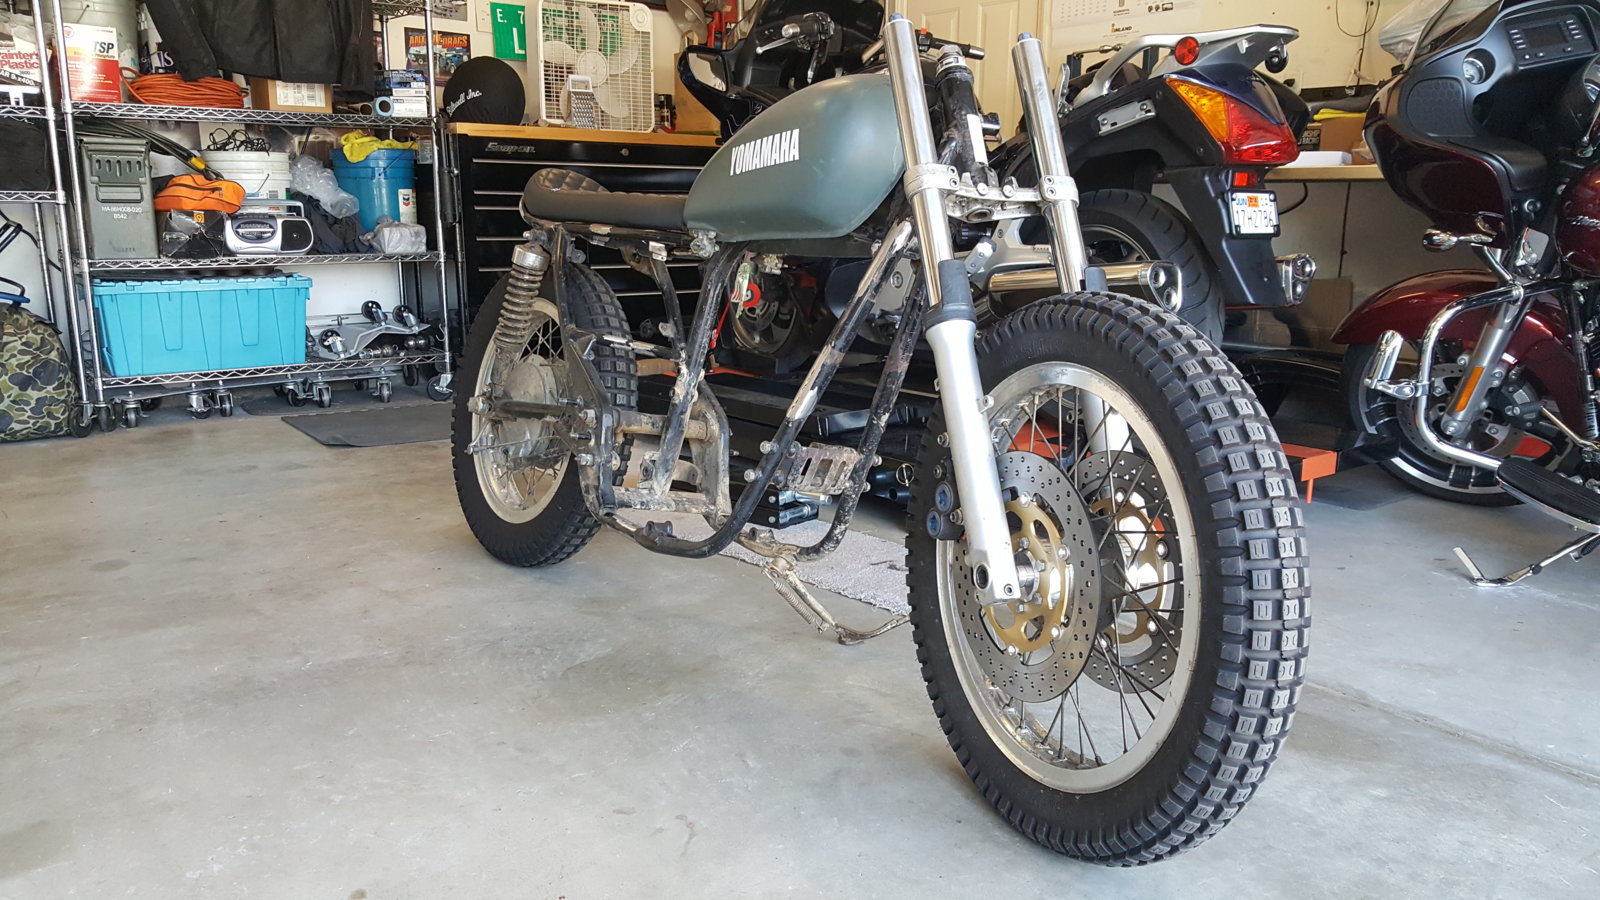
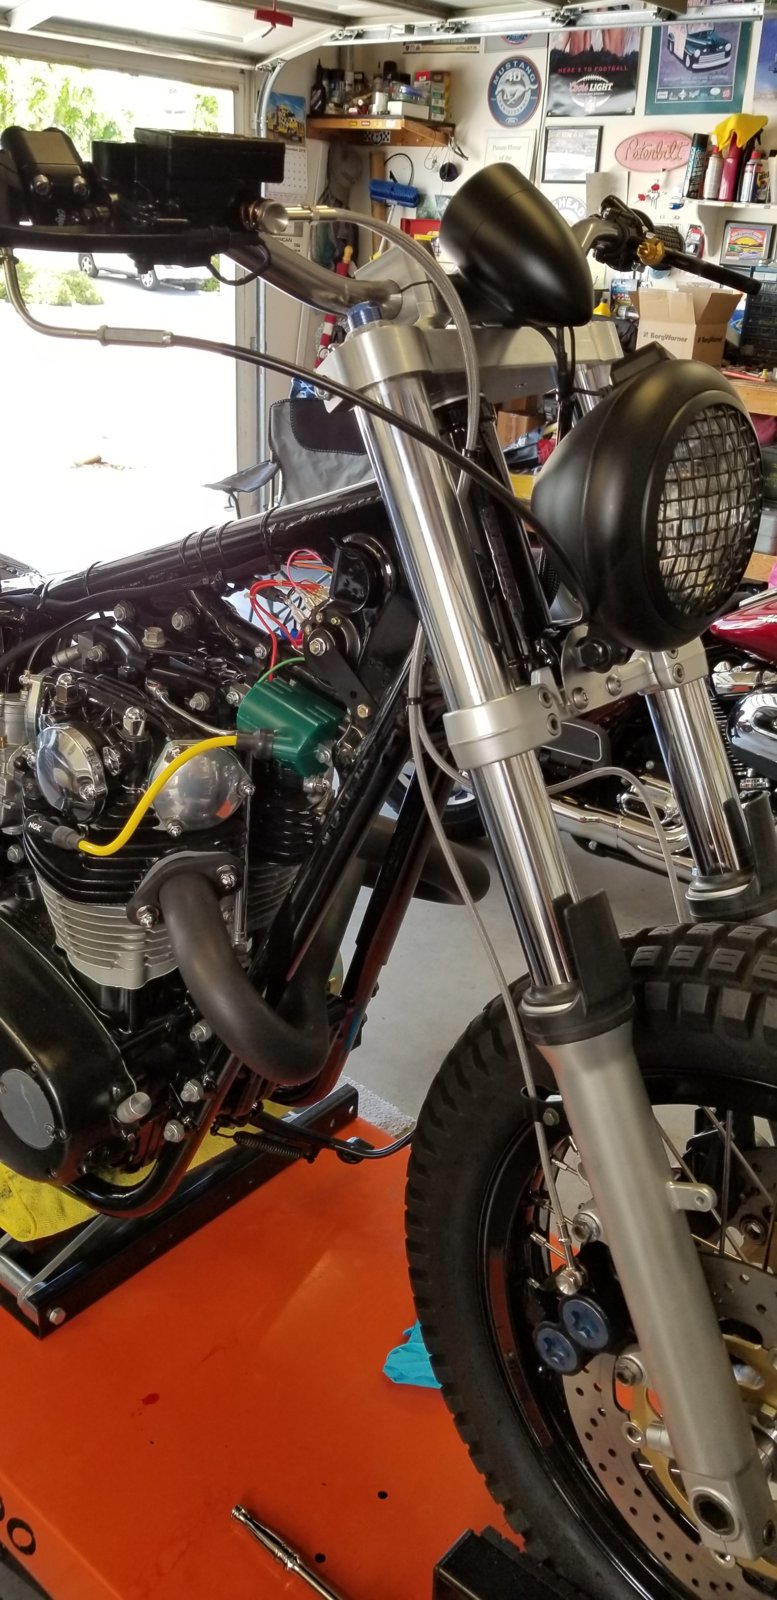
Since the forks needed to be rebuilt I decided to go with the '01 R6 (43mm) front end conversion . I used '01 R6 calipers, and 300mm rotors from mikesxs, so the bolt pattern matched the xs hub and the outer diameter matched the R6 calipers. Machined some spacers to off set the rotors, as well some wheel spacers.
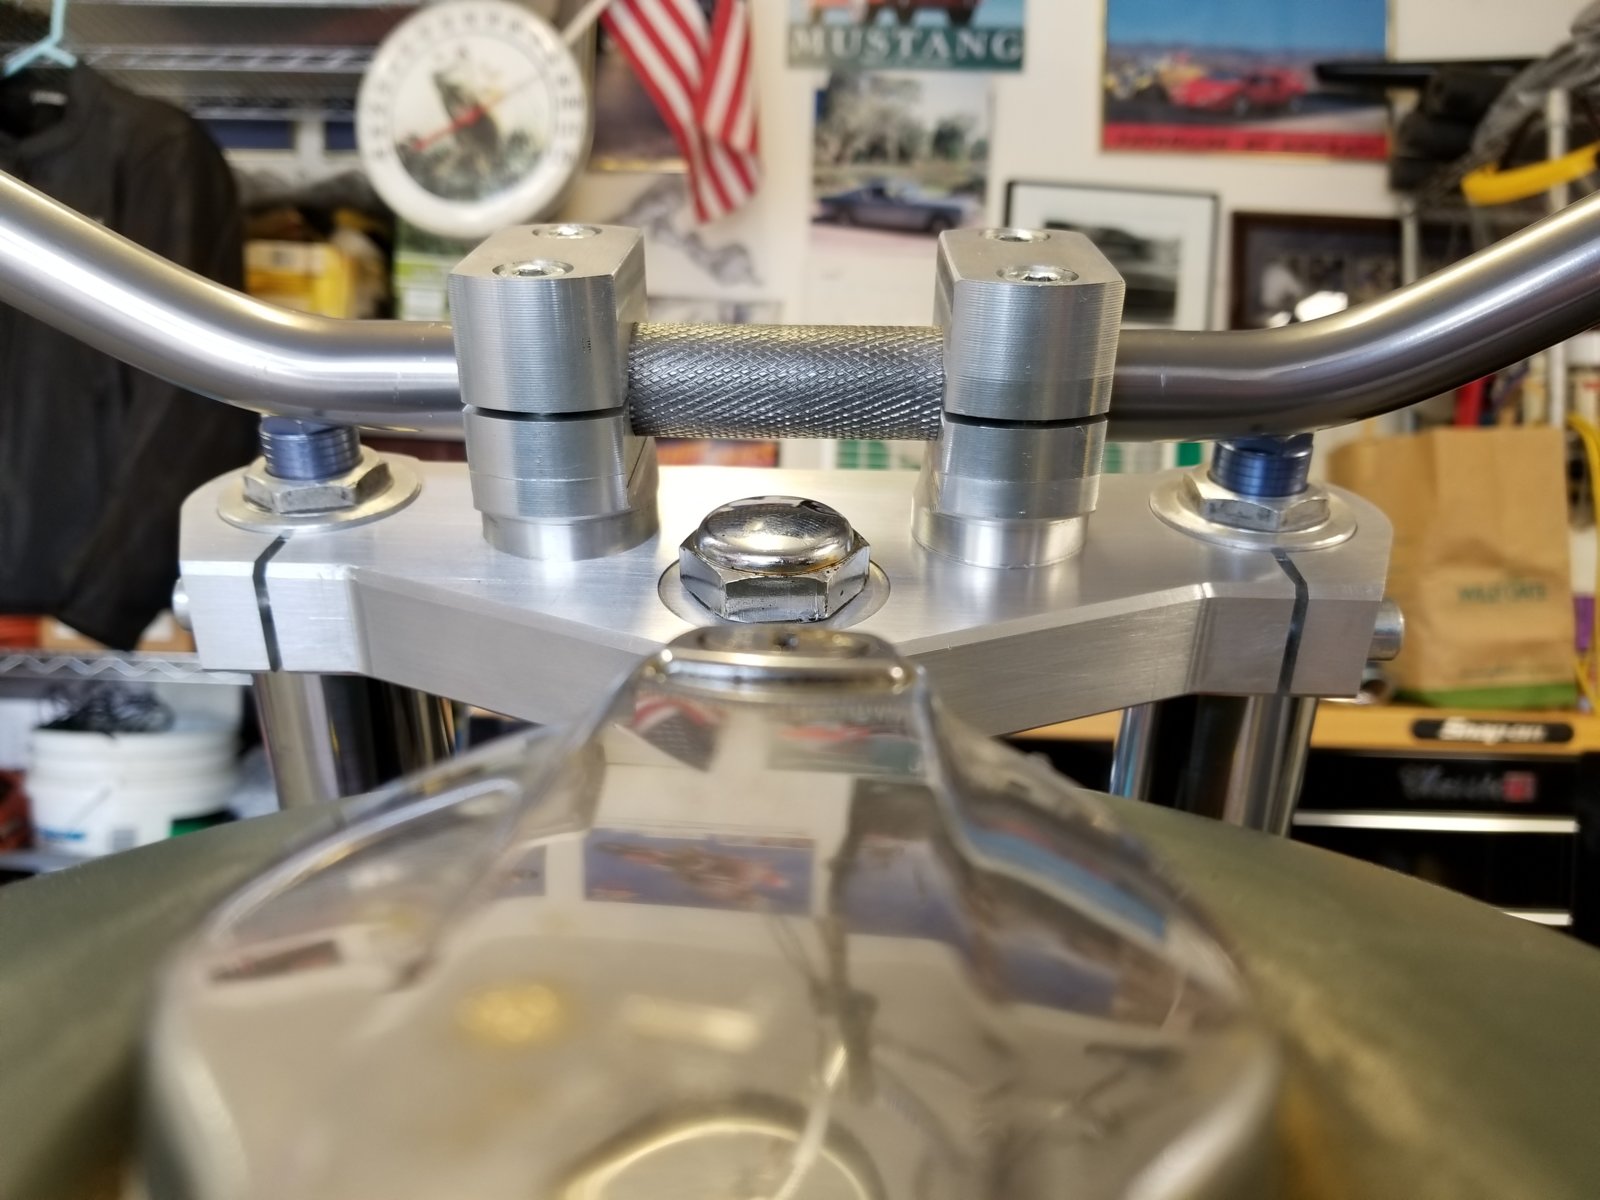
For the upper portion of the fork conversion, custom machined top triple clamp and handlebar risers.
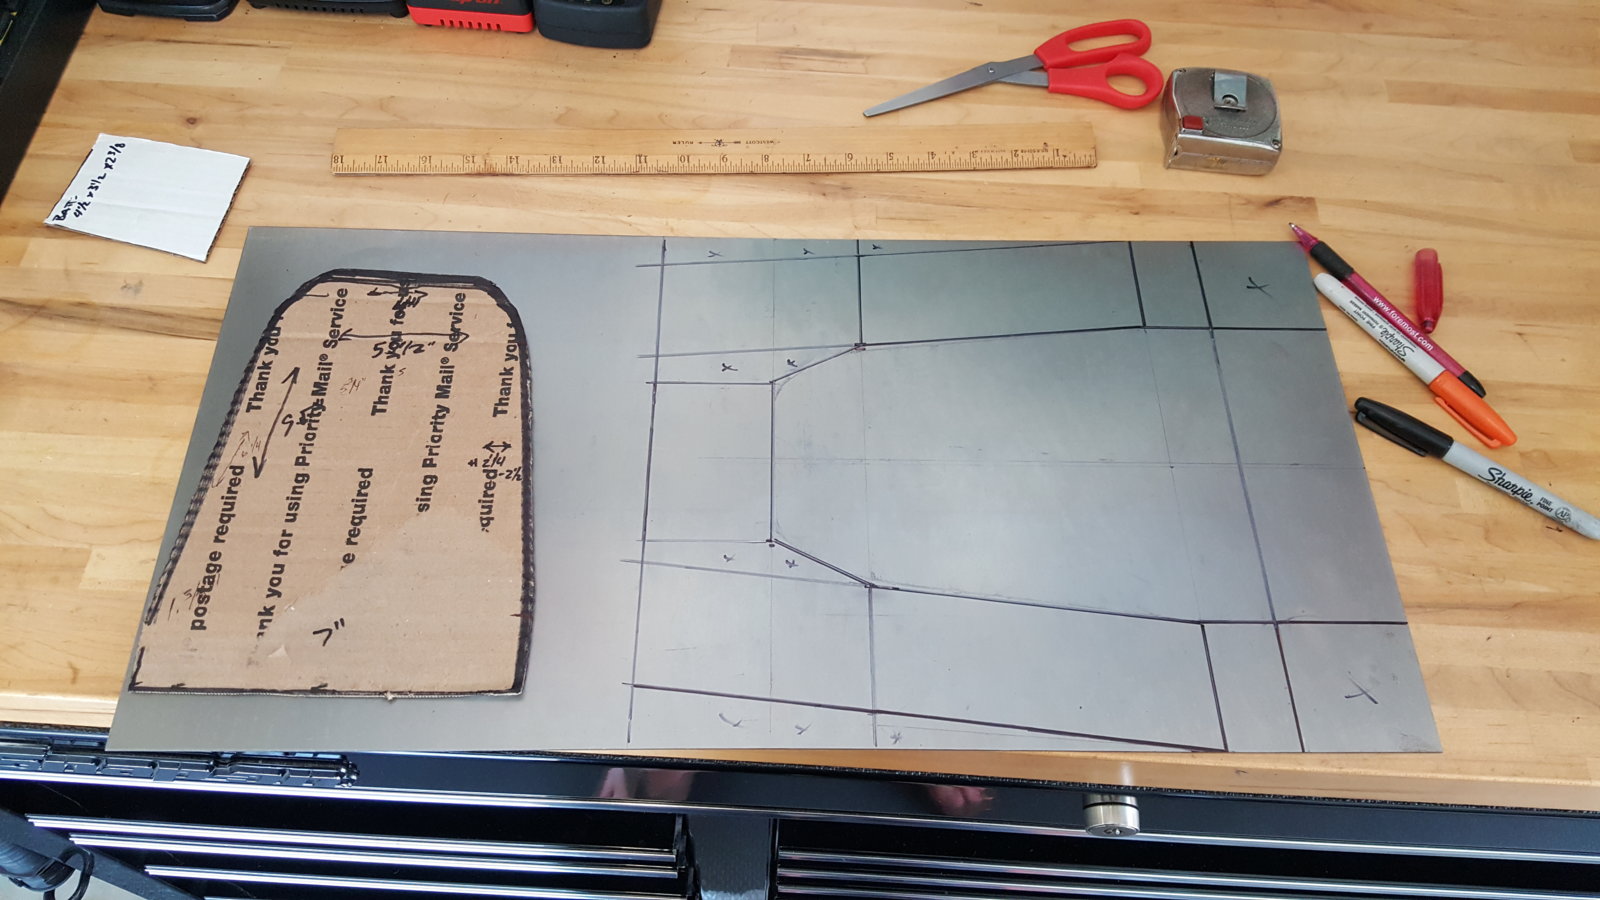
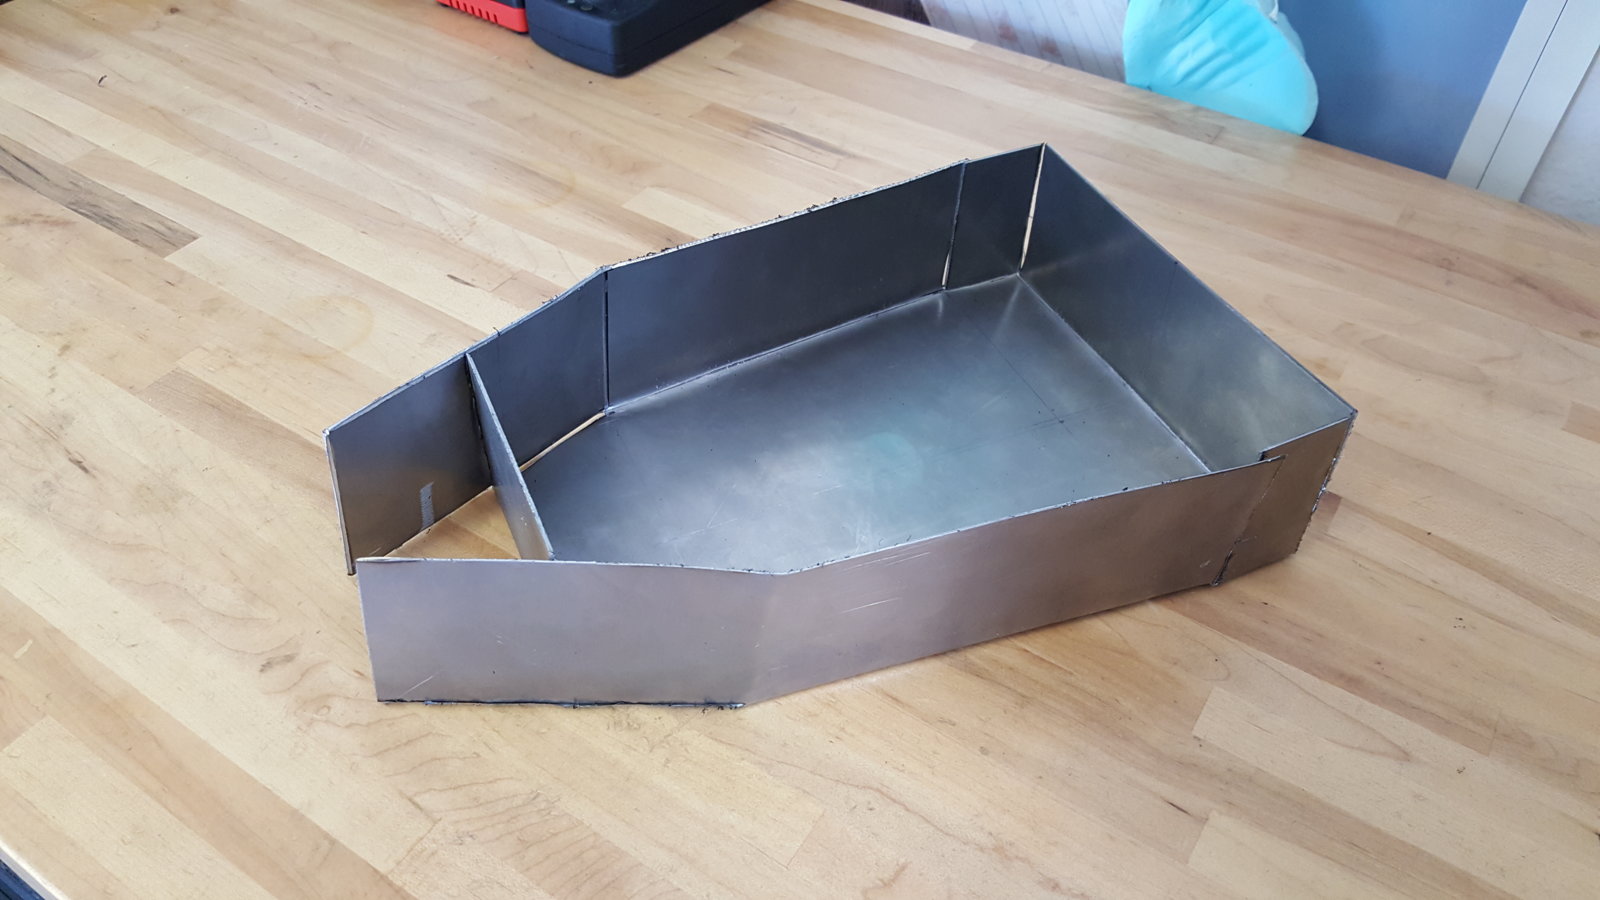
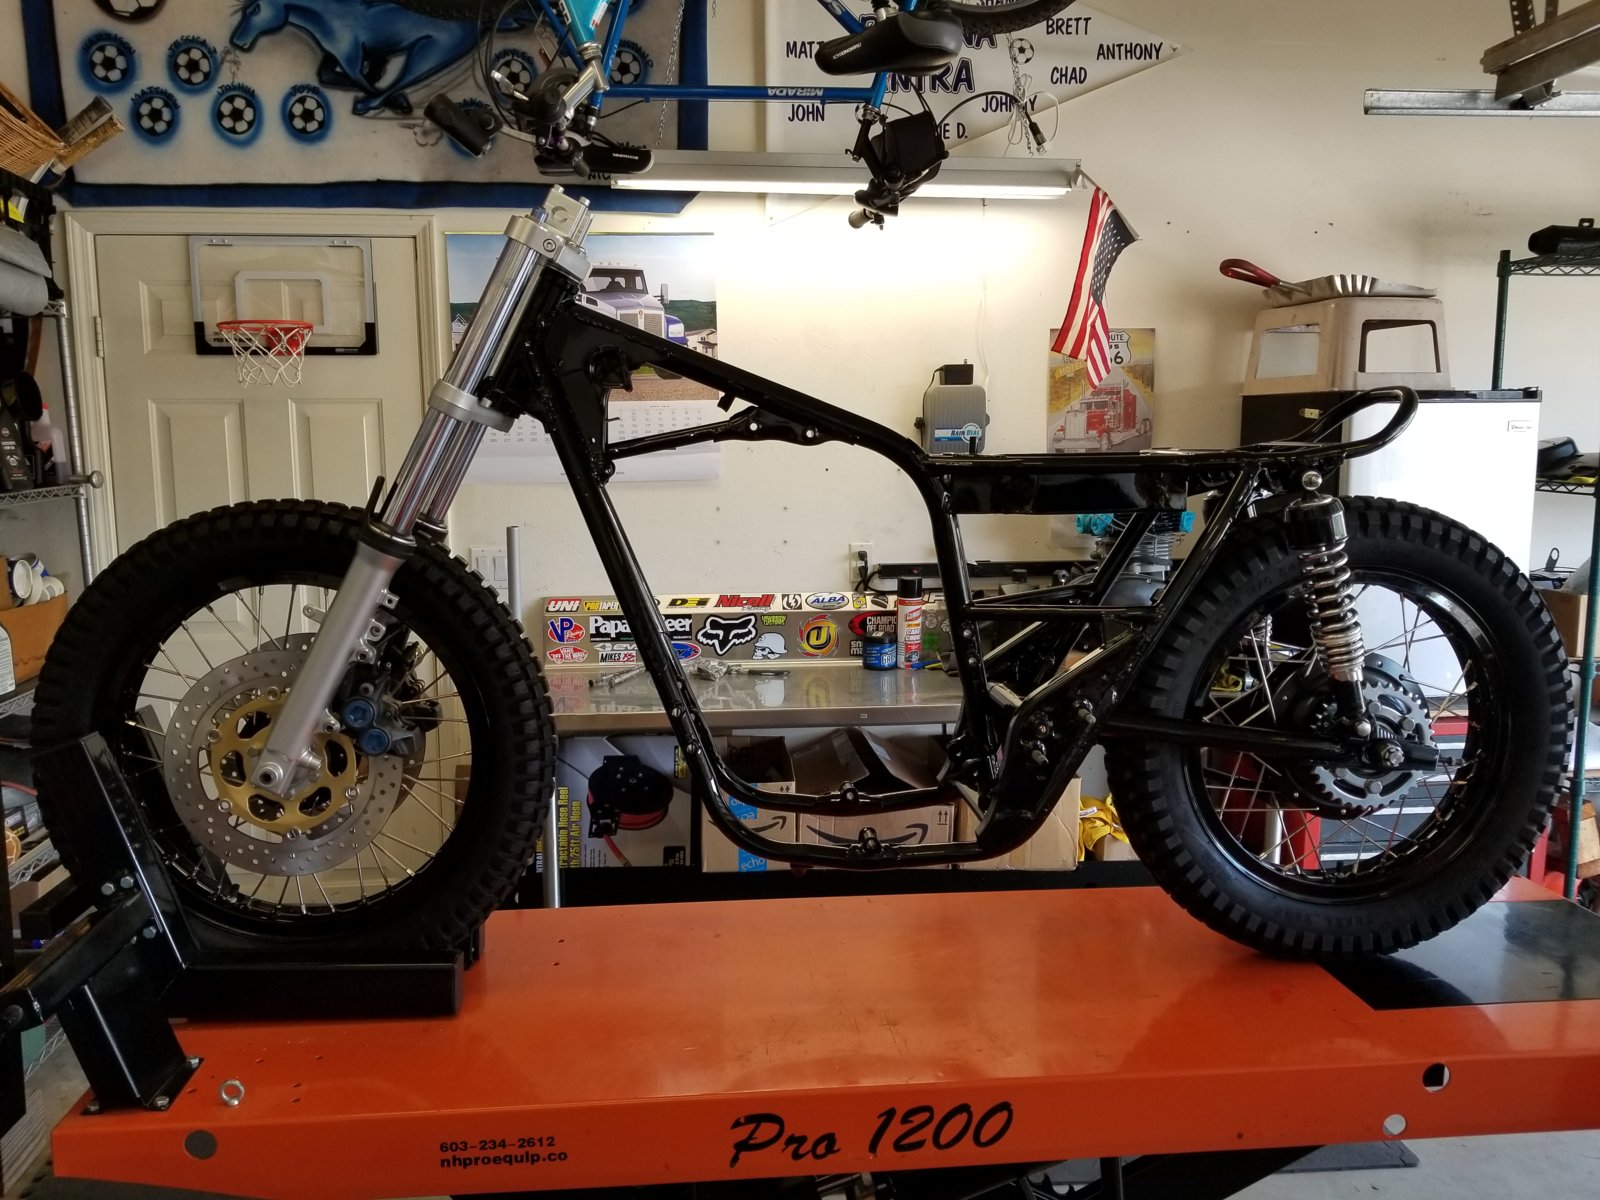
Here is after I removed the many extra tabs and brackets I was no longer going to need or have a use for, and welded in the battery tray and seat brackets.
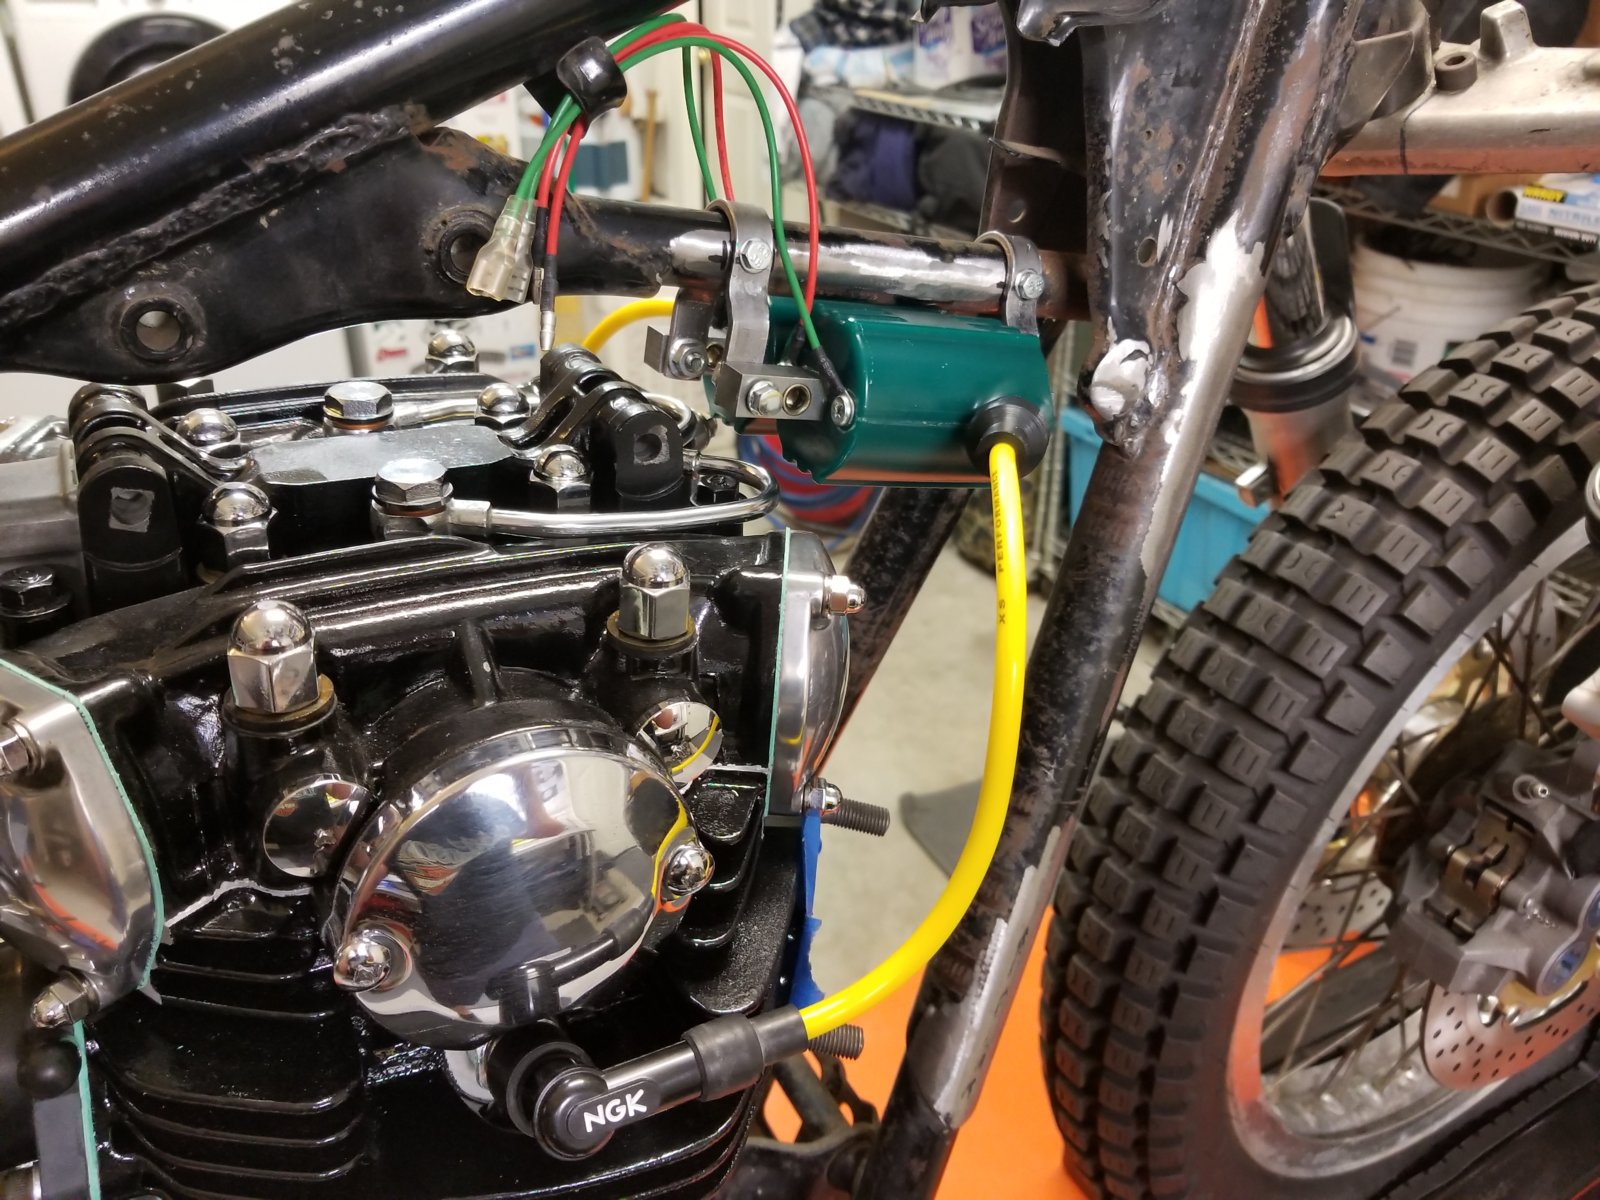
I did throw the motor in and get it running before I tore it back down for powder coat and paint. Had some fun trying to mount the two massive coils.
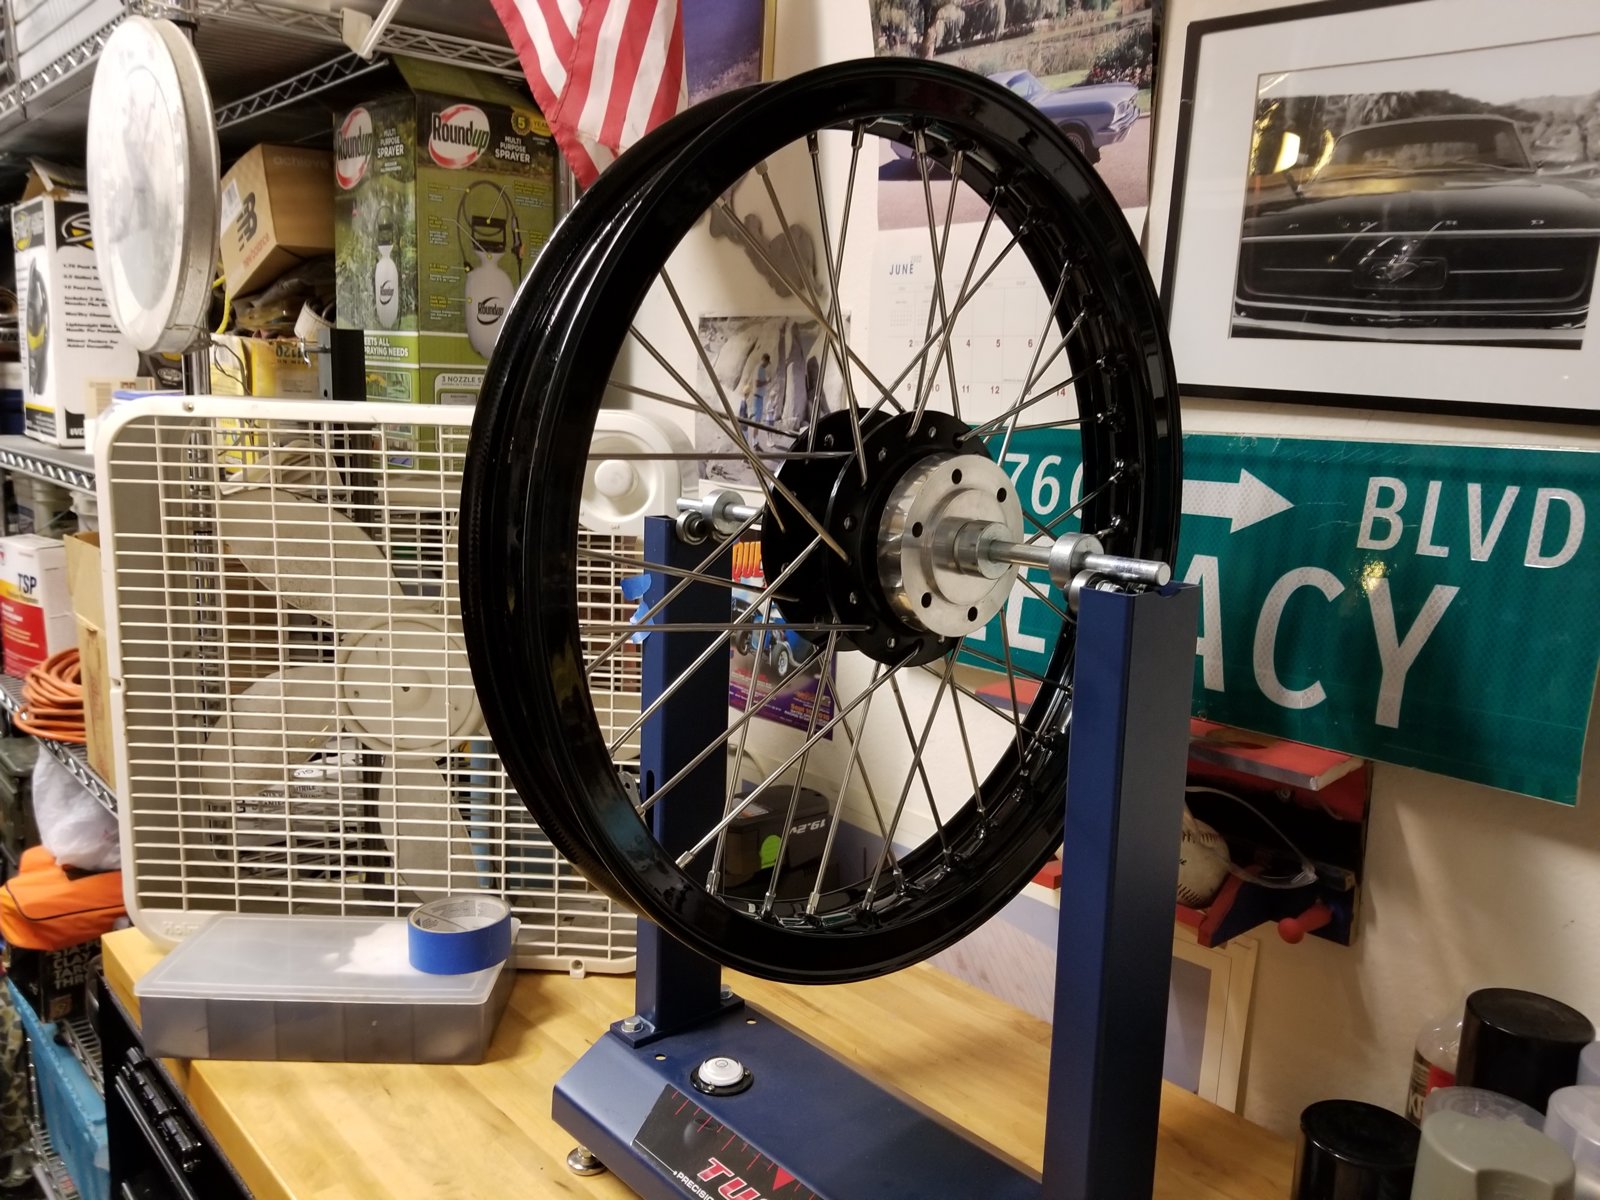
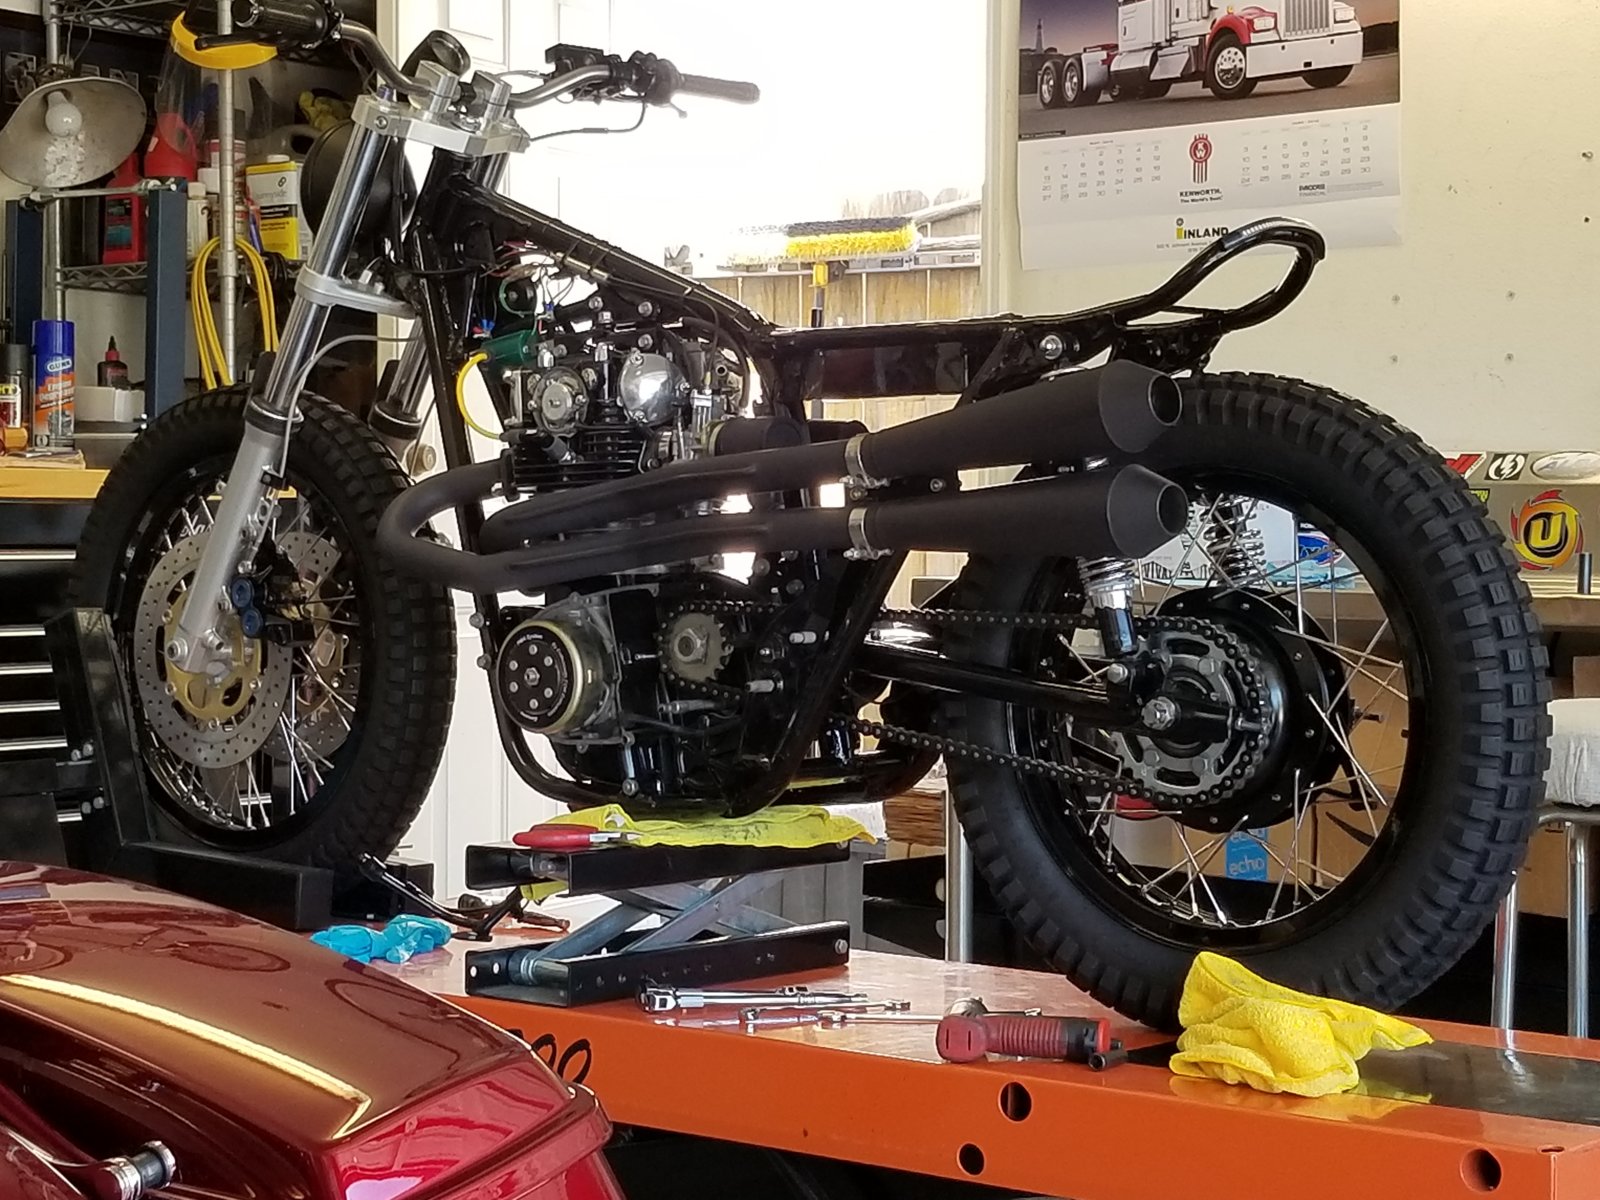
Here is the roller once the frame and rims came back from powder coat. I installed S.S. spokes and nipples,new sealed wheel bearings, and picked up some matching rear shocks.
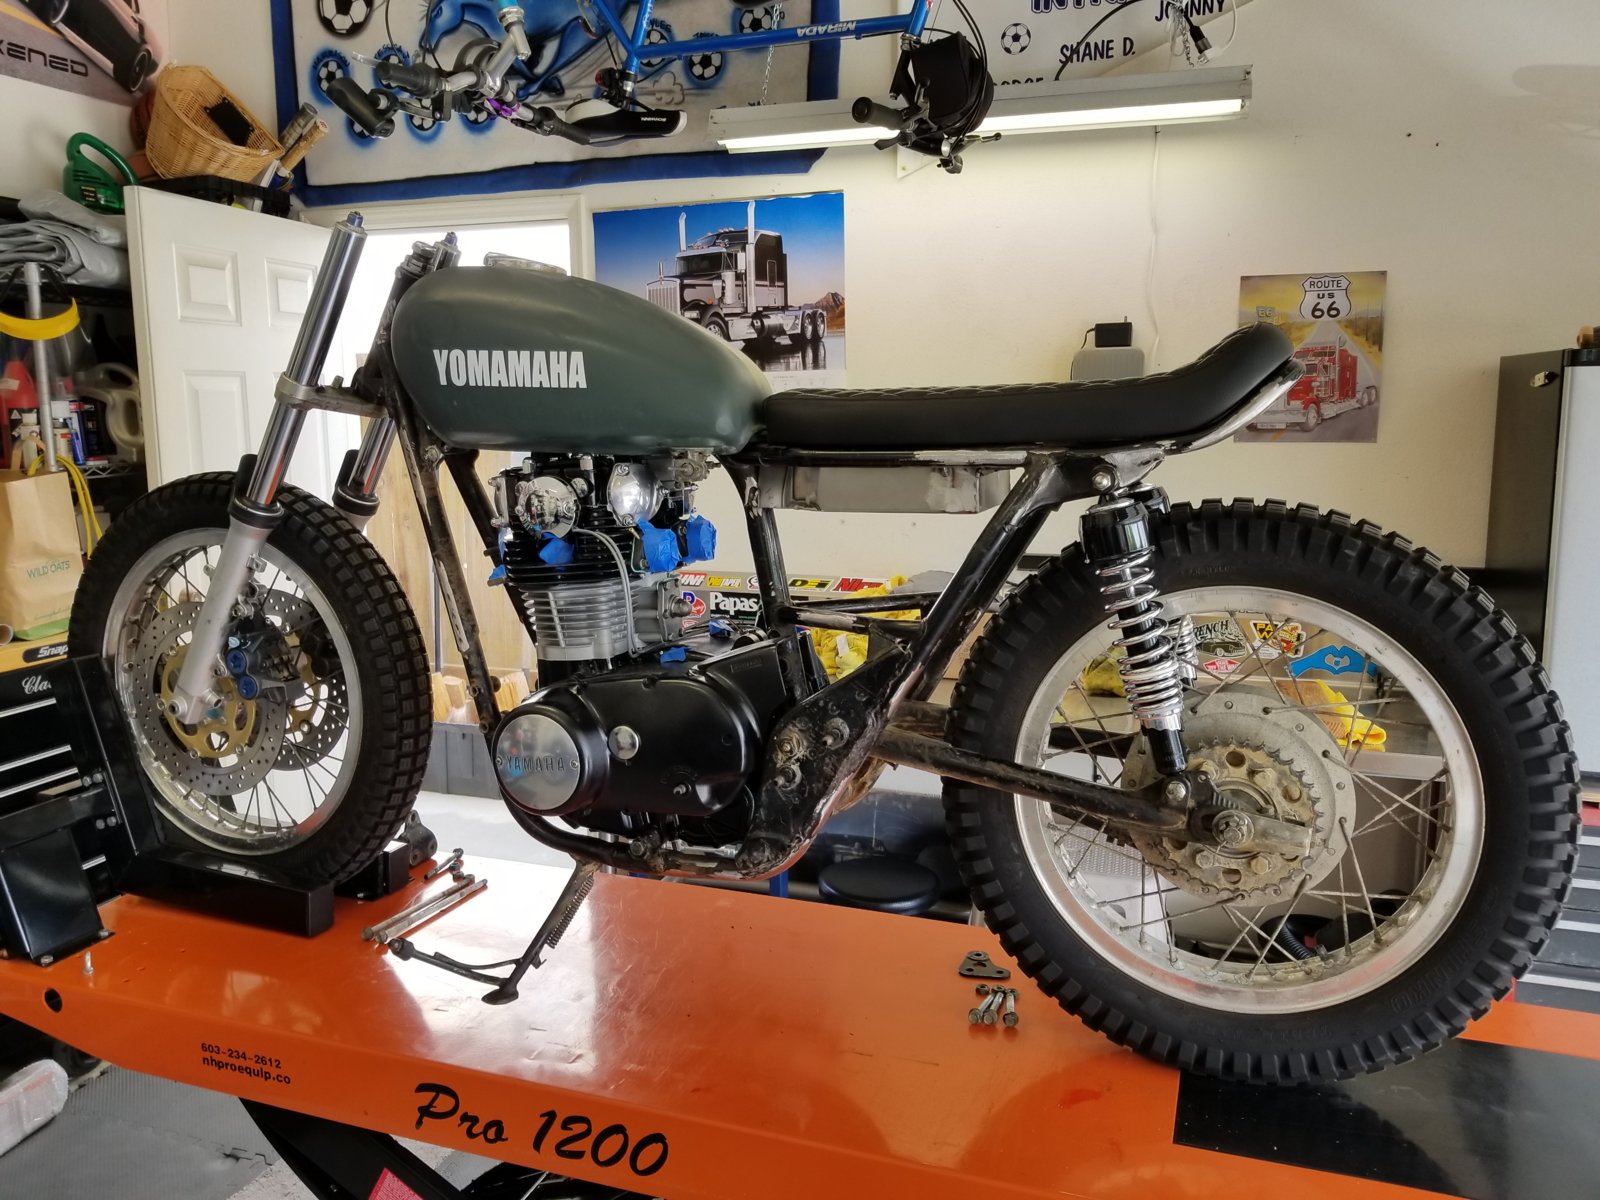
Got the motor back in and ready for wiring.
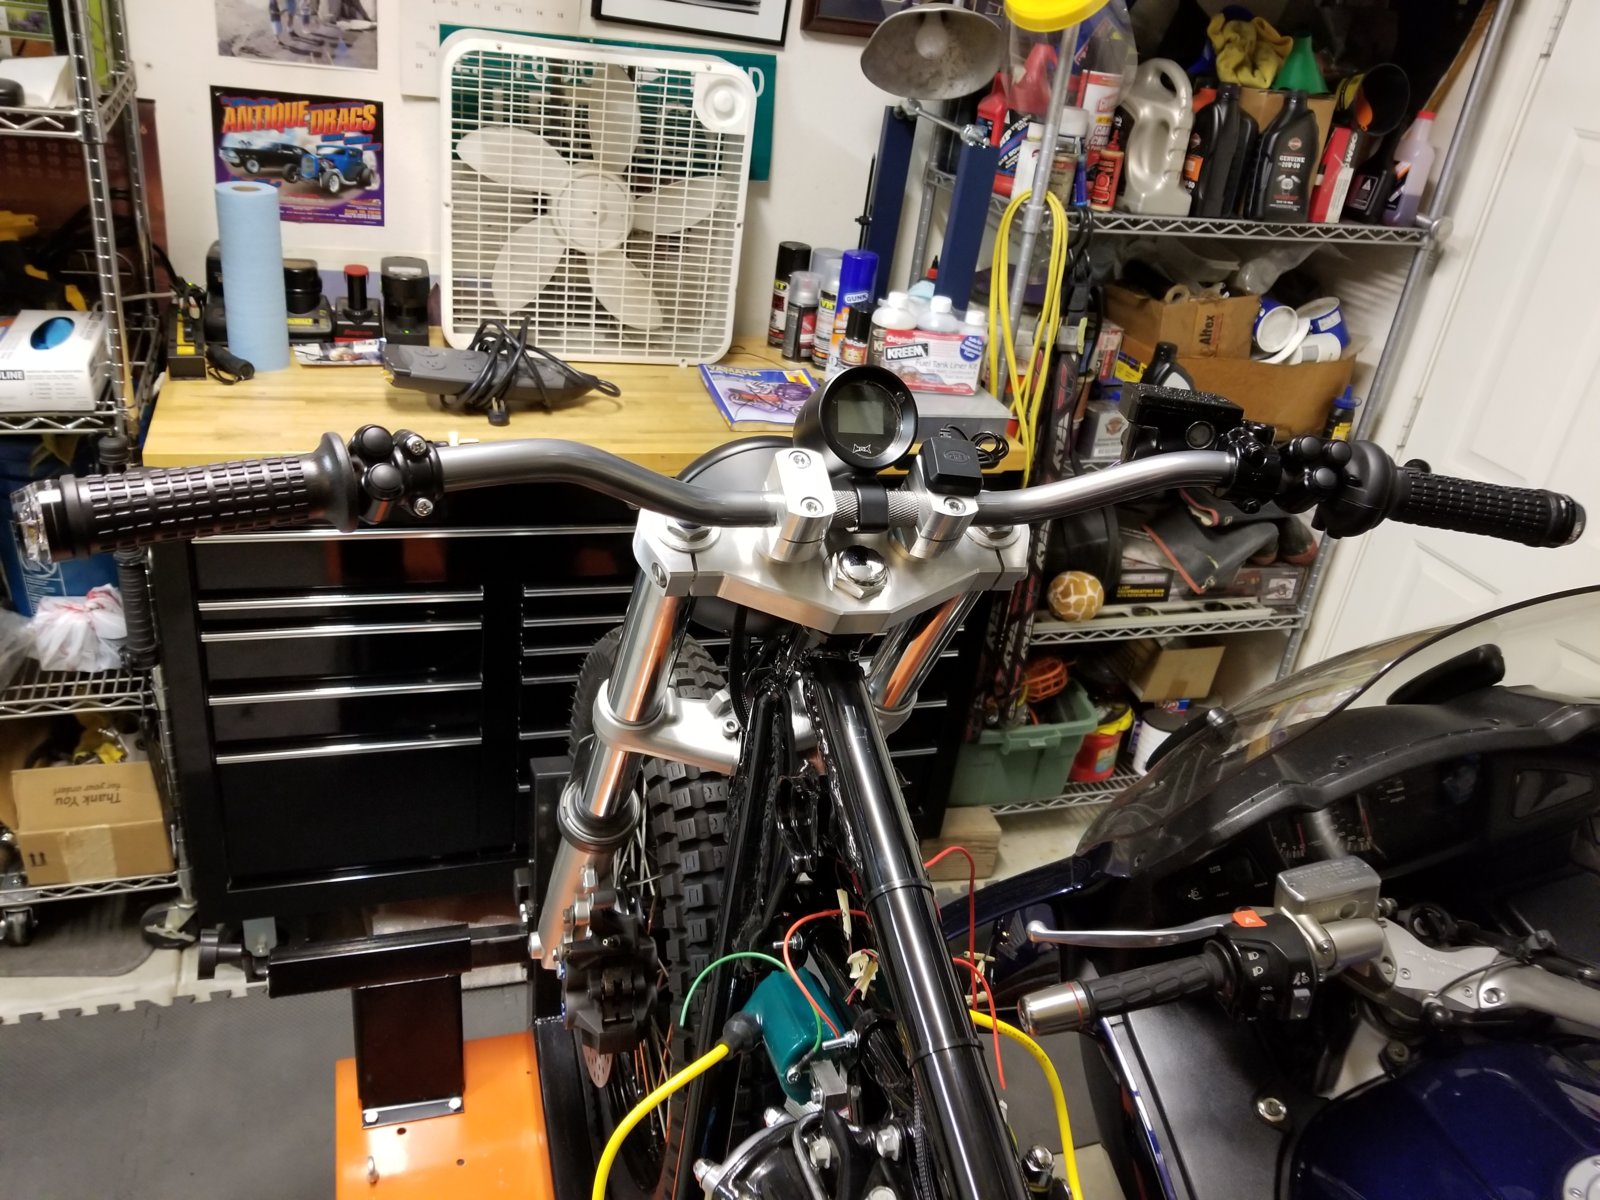
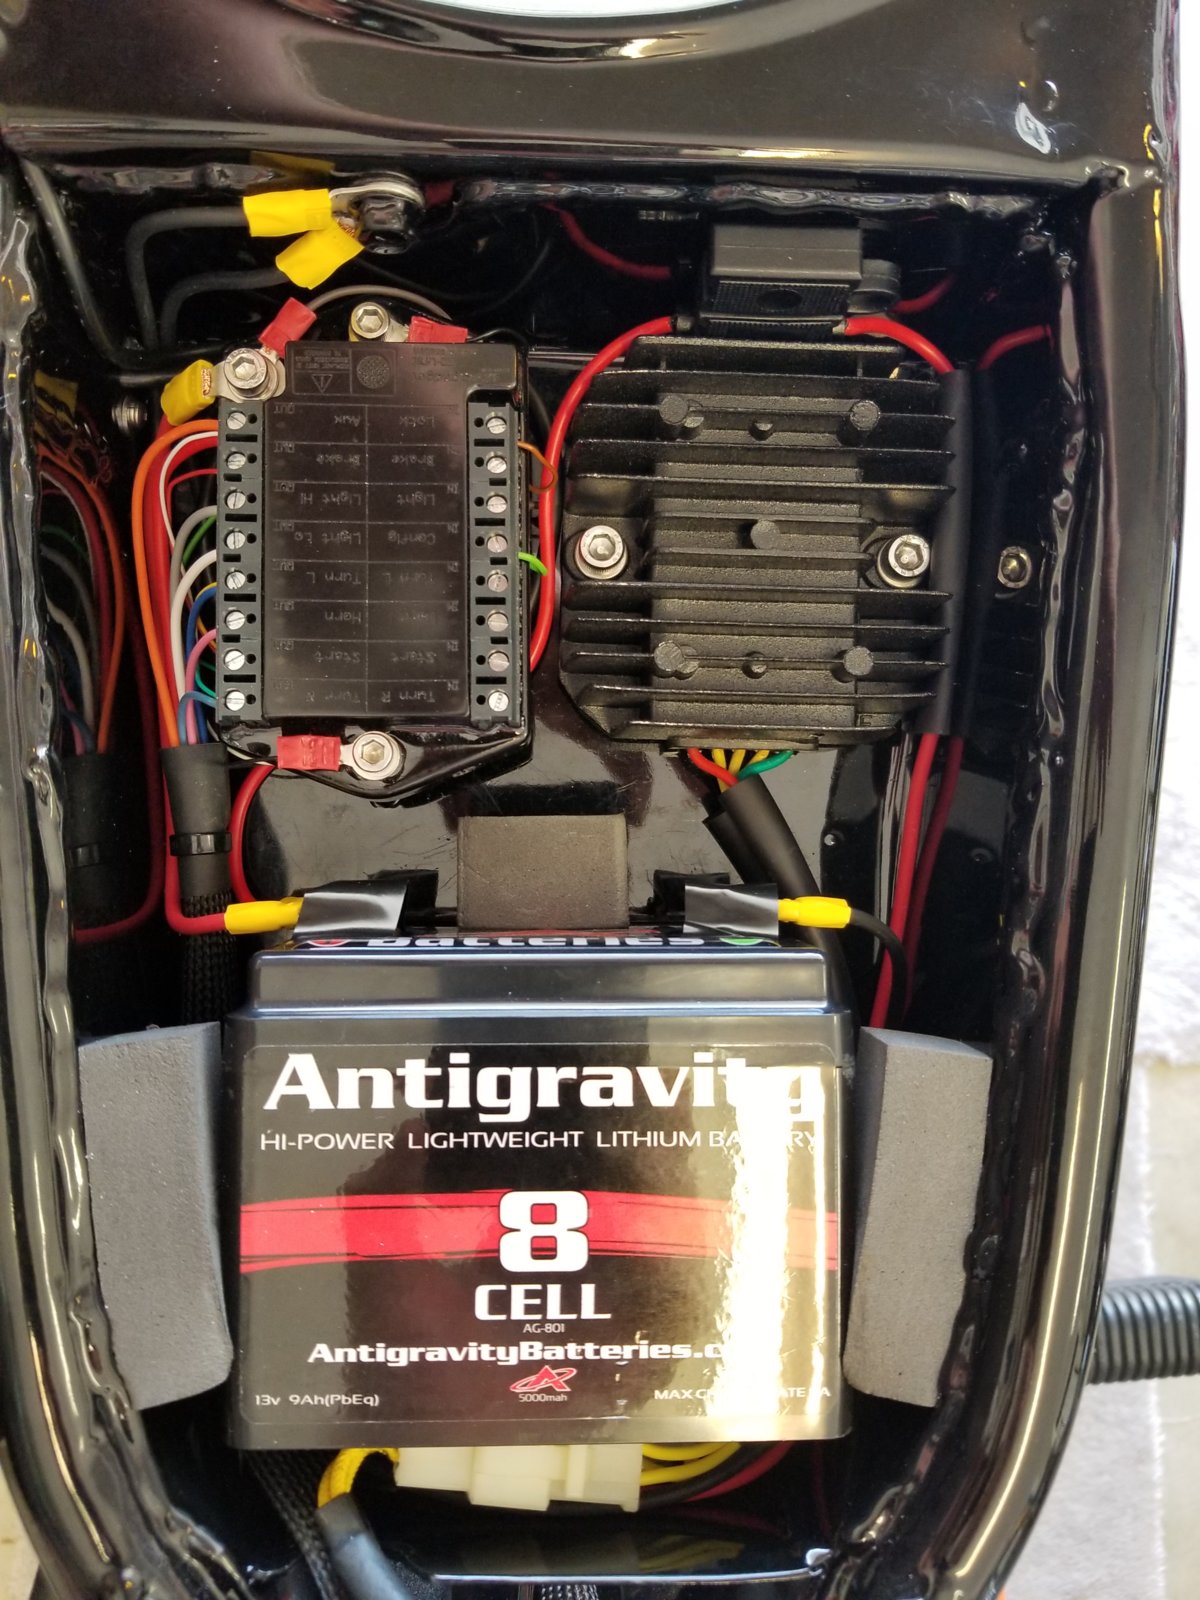
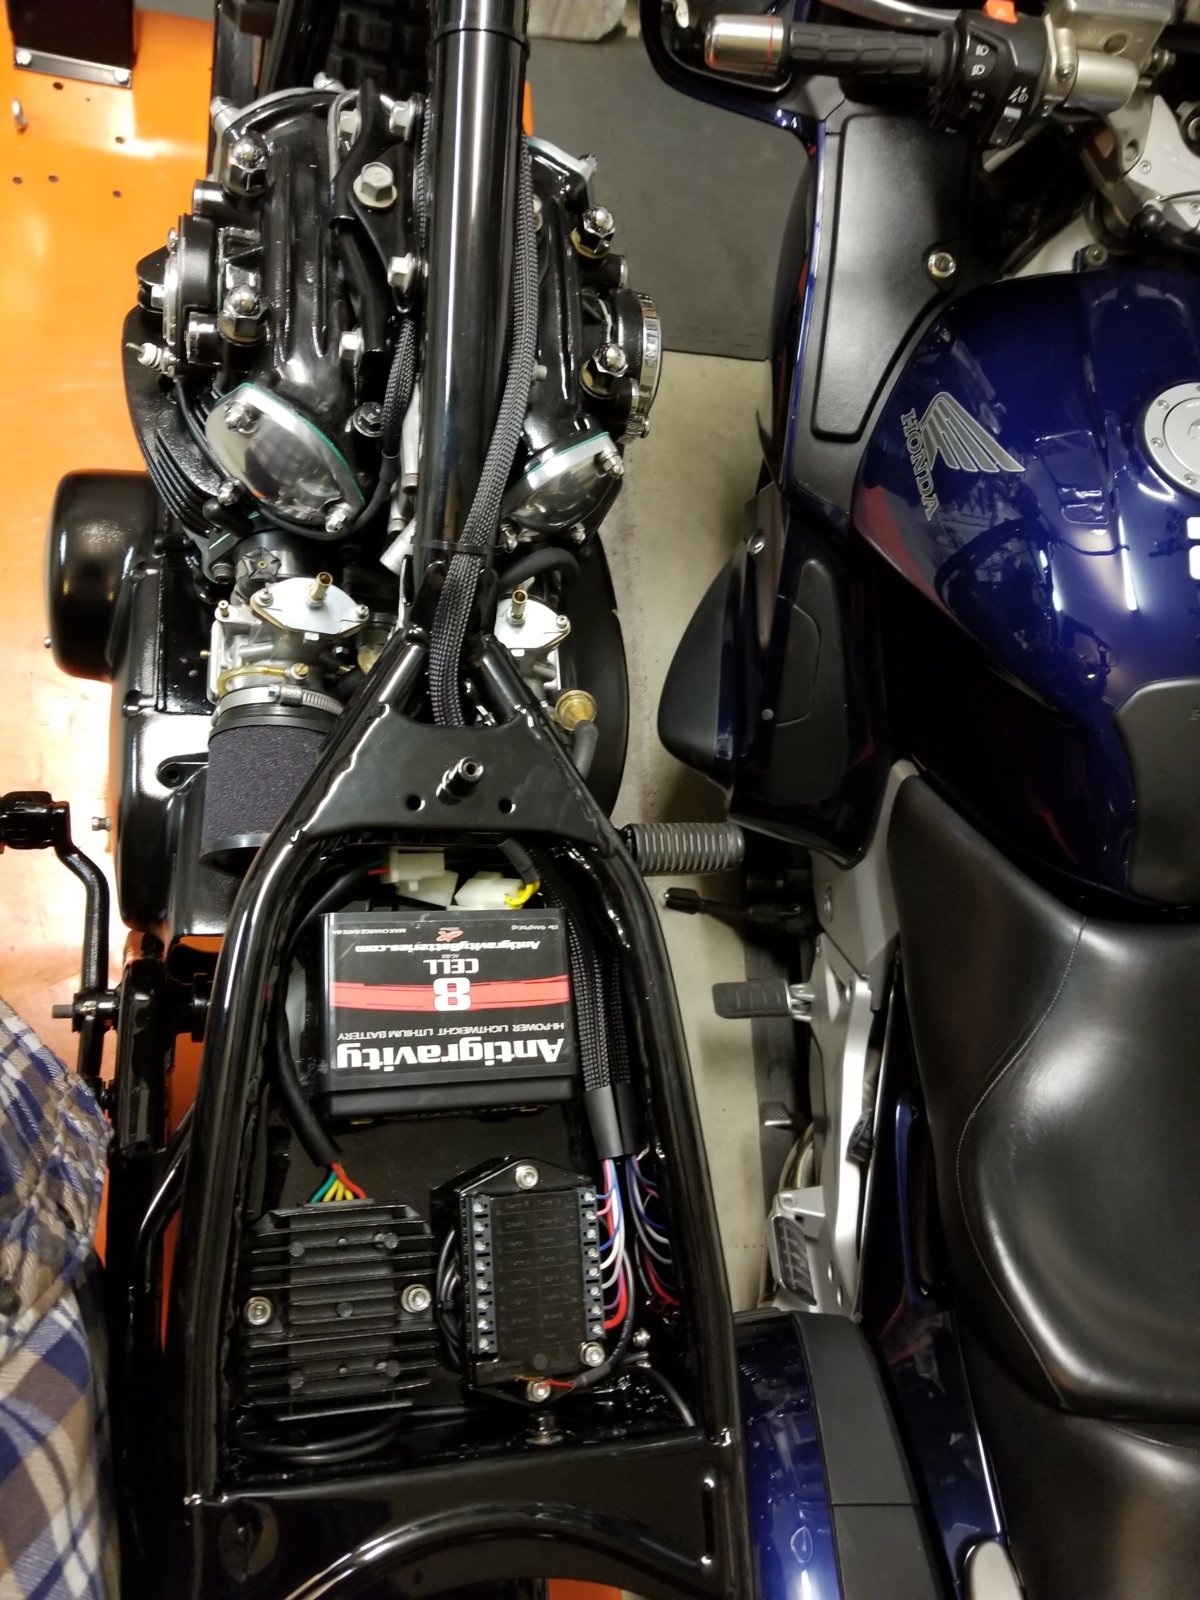
I wanted to modernize the electrical system so all the old wiring had to go! I decided to run the Motogadget M-Unit with M-button & M-Lock, Motogadget bar end signals, Motone push button switches, and MAX GPS speedo.
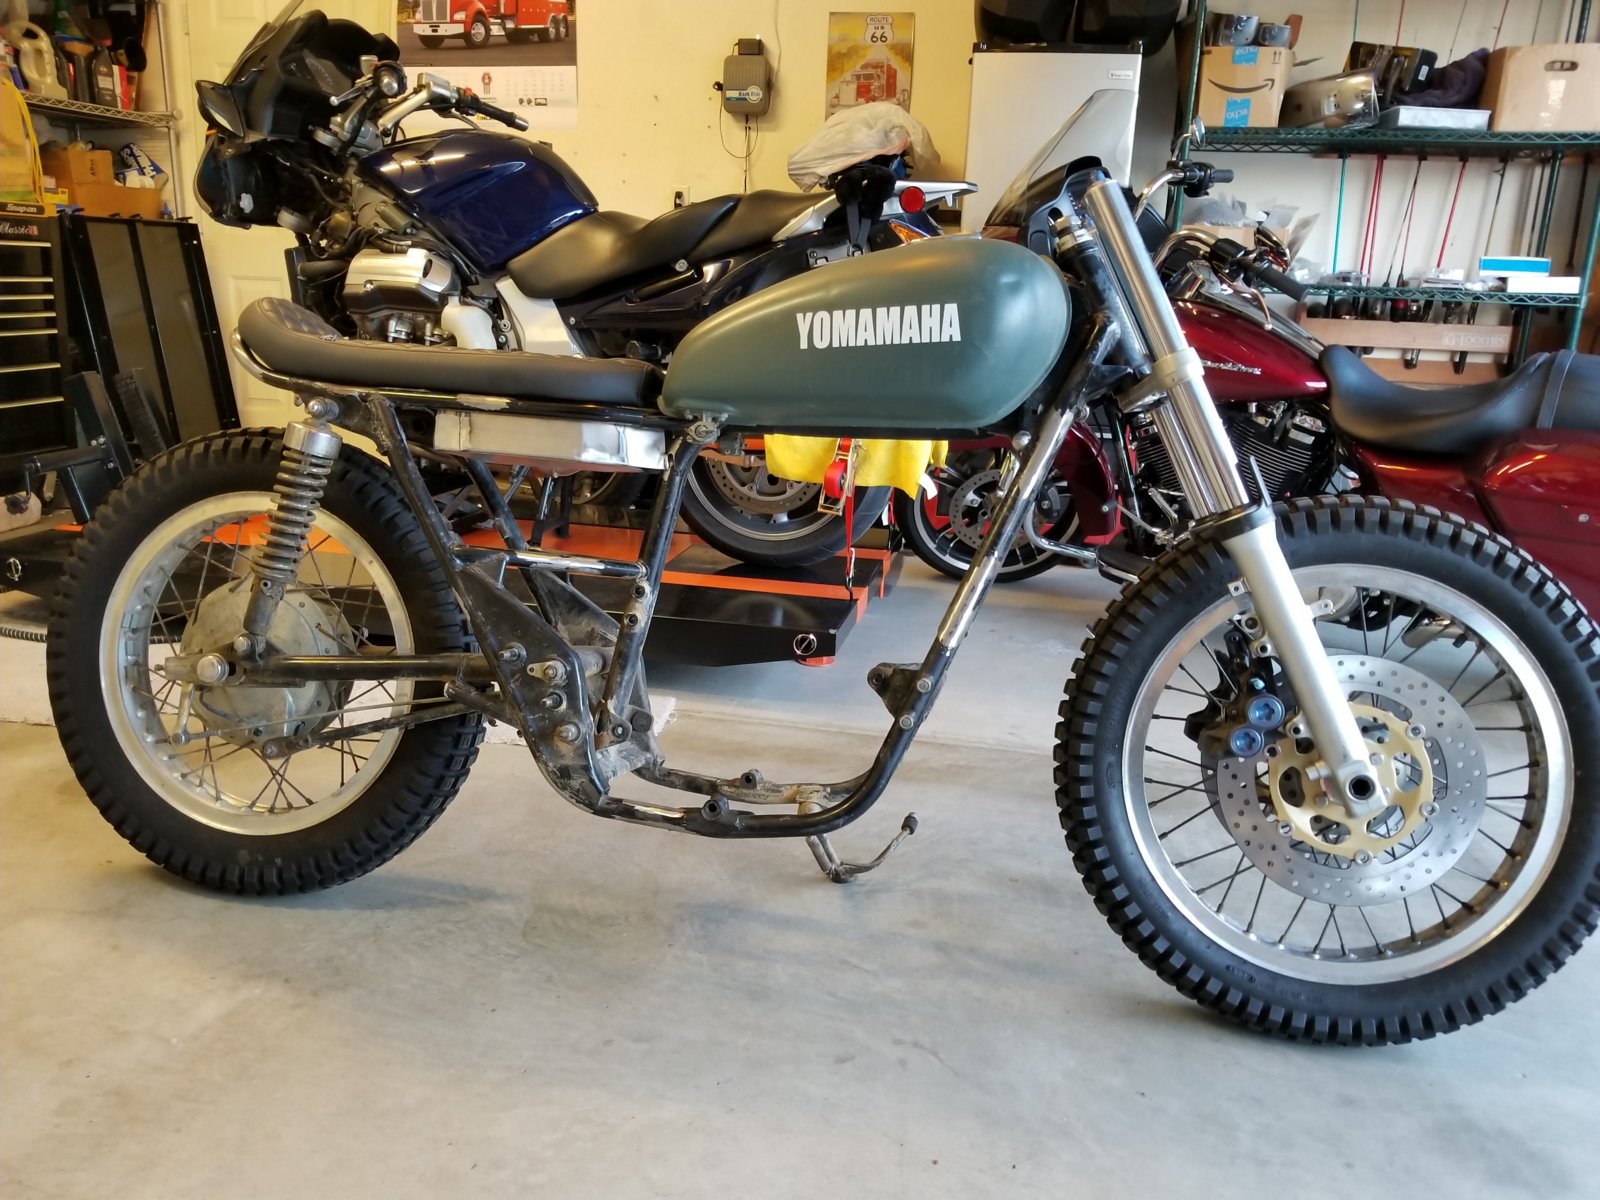
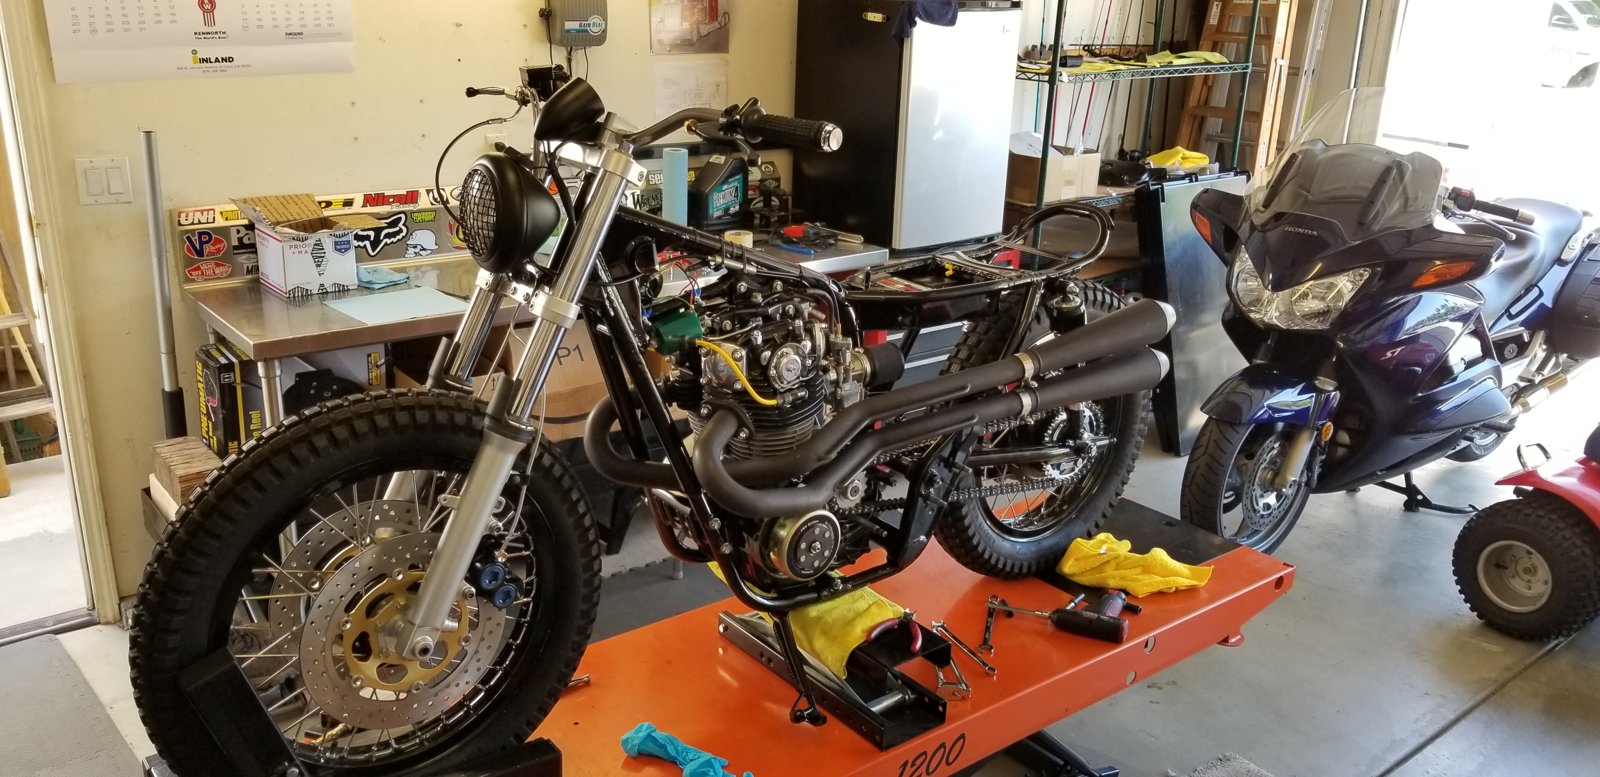
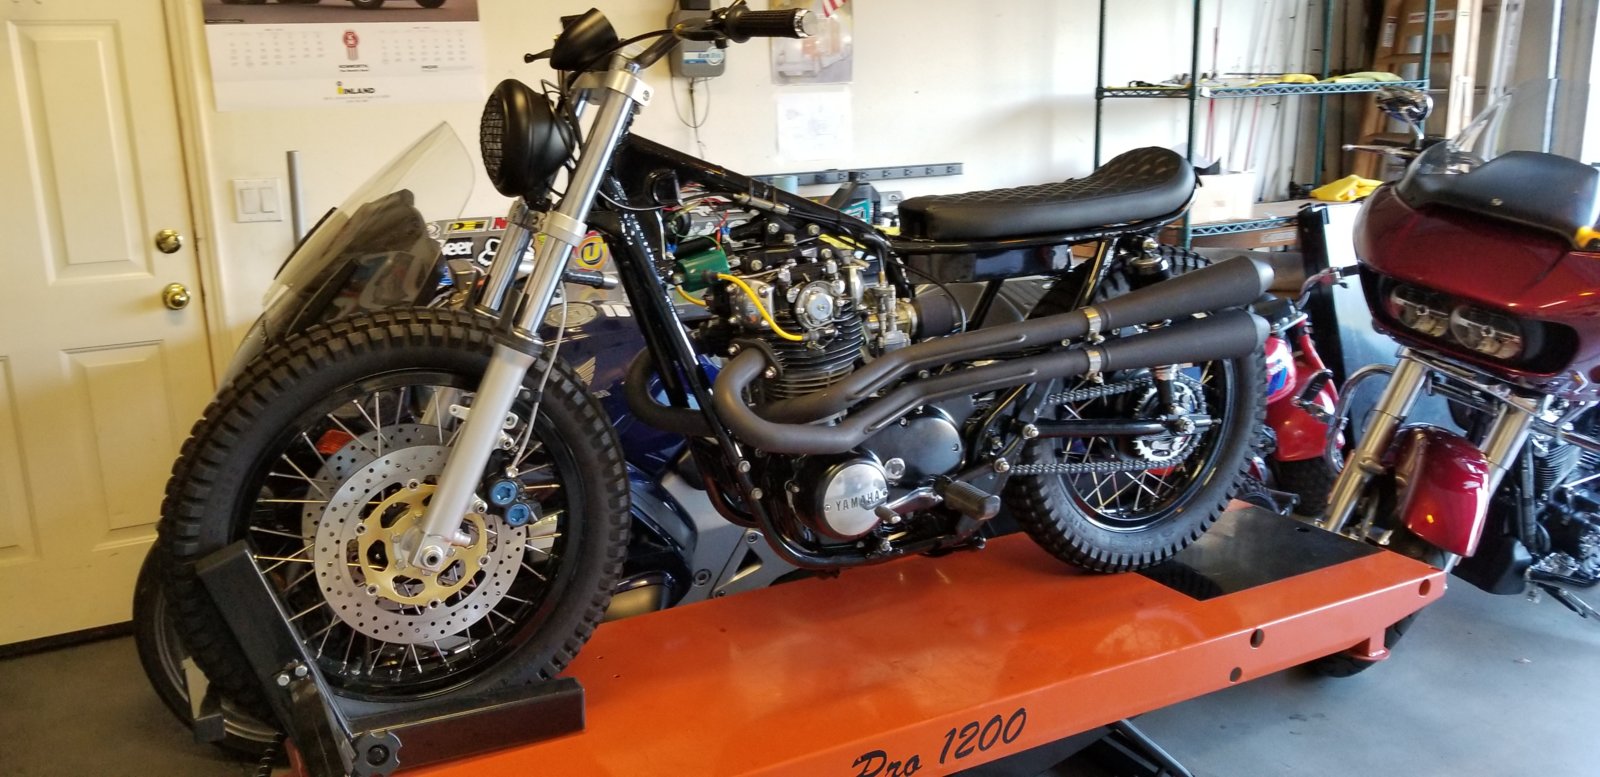
Sorry for the long post. Almost done. Here is the current state. Just waiting for the tank to get painted.
Thanks,
Matt
I've been coming to this forum for the past couple years looking for answers and inspiration for my build and have yet to post anything myself. I'm getting really close to getting her back on the road, and figured I should post some photos of the progress (better late than never). Let me know what you think!
So the bike started out with a coworker of mine who picked it up for the Barstow to Vegas Offroad race (w/ 11k mi). He brought it to me to install the Omar's pipes, clean the carbs, and jet. I thought he was crazy and didn't think the bike would survive. Well she did, although pretty beaten up, I bought her and have been completely rebuilding since. Here it is before the beating.
After the trip across the desert, the suspension was blown out, bars were destroyed, and barely running. She was in need of some serious TLC.
I grew up riding motocross, and riding in the desert and wanted to give the bike a scrambler / tracker kind of feel.
My first focus was to rebuild the motor. I sent the crank and cam to Hugh for the rephase, bored the cylinders to 700cc for the JE pistons, rebuilt the head, installed Hughs PMA, Pamco Ignition, removed all associated starter gearing and components,
20170709_171028_001
1st thing was to rebuild the motor. Bored to 700cc with 277 rephase by Hugh's, Hugh's pma, Pamco...
My buddy had these PWK's laying around so I decided to give them a go over the CV's. I put on some UNI pod filters to hopefully help me tune these things in. I haven't read too much good about tuning them, so any advice you guys have other than getting different carbs would be greatly appreciated.
Since the forks needed to be rebuilt I decided to go with the '01 R6 (43mm) front end conversion . I used '01 R6 calipers, and 300mm rotors from mikesxs, so the bolt pattern matched the xs hub and the outer diameter matched the R6 calipers. Machined some spacers to off set the rotors, as well some wheel spacers.
For the upper portion of the fork conversion, custom machined top triple clamp and handlebar risers.
Here is after I removed the many extra tabs and brackets I was no longer going to need or have a use for, and welded in the battery tray and seat brackets.
I did throw the motor in and get it running before I tore it back down for powder coat and paint. Had some fun trying to mount the two massive coils.
Here is the roller once the frame and rims came back from powder coat. I installed S.S. spokes and nipples,new sealed wheel bearings, and picked up some matching rear shocks.
Got the motor back in and ready for wiring.

I wanted to modernize the electrical system so all the old wiring had to go! I decided to run the Motogadget M-Unit with M-button & M-Lock, Motogadget bar end signals, Motone push button switches, and MAX GPS speedo.
Sorry for the long post. Almost done. Here is the current state. Just waiting for the tank to get painted.
Thanks,
Matt