sseres
XS650 Junkie
after a lot of  with clutch that either grabs too much at idle, slips at RPMs, can't find neutral, and is harder to pull than something that's really hard to pull, I decided to do the HHB hydraulic upgrade: http://www.xs650.com/forum/showthread.php?t=18236
Thing is, it works fine, but I really didn't like the look of the lever it comes with. Actually, I tried a bunch of things to make that better. But I'm no machinist and the outcome was nothing I wanted to show off.
Then, I rebuilt and traded out my engine and moved the hydraulic clutch over and still really didn't like the lever. So I started reading about the cable and lever they have at 650central.com. As many of you know, they are beyond helpful (not that Hugh isn't) but we talked about a couple of upgrades that might help, including a 1 piece pushrod.
That brings us up to date. I know it's not THAT cold here, but it's kind of hard to do work in the unheated garage when it's 30F, and this was the only day I'm going to have for awhile to get things going.
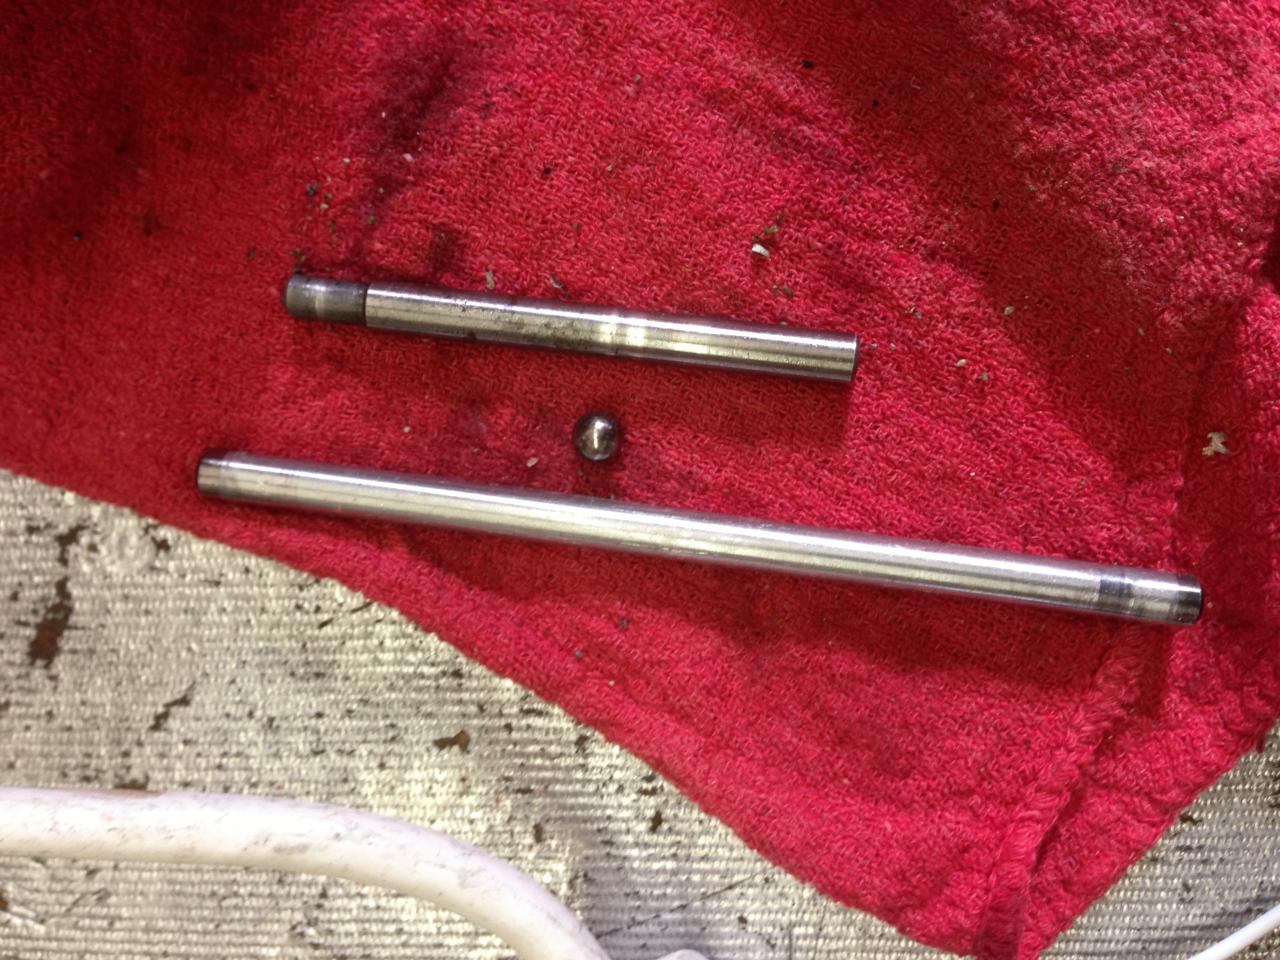
Here are the pieces from the original push set up. I'm happy to sell it to anyone who needs this stuff. I'm reasonable so just PM me.
 Looked ok.
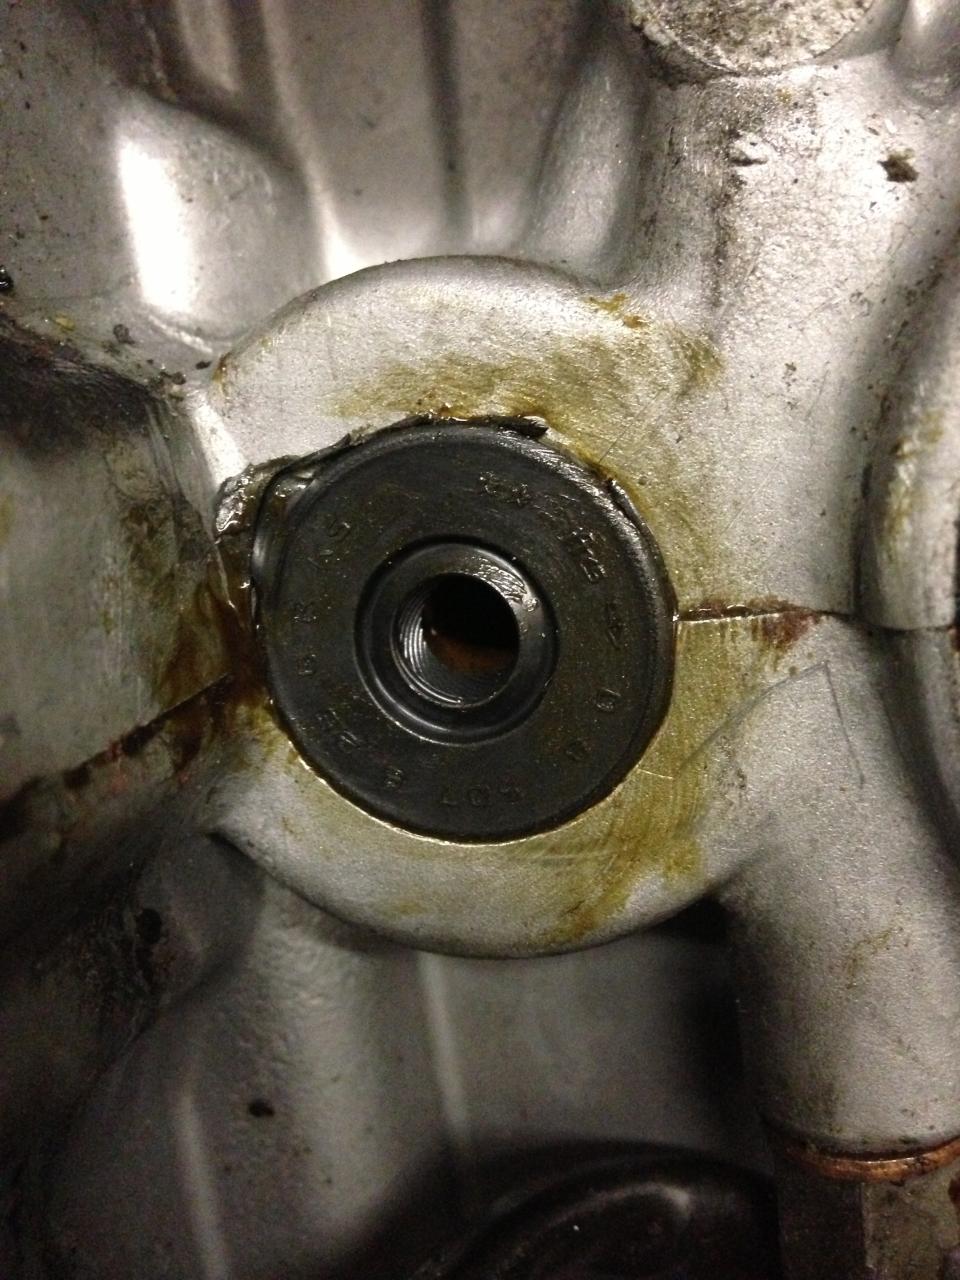
The real problem is that I messed up the dang push rod seal, even though I put a nice shiny new one when I had the engine apart.
However, after trading out the parts, which involved draining the oil, getting the left side cover off, and taking out the clutch springs and plates, (and listening to my dang Seahawks lose at the last 30 seconds after a HUGE 4th quarter), I had to call it quits and will go back to replace that little guy next week. I have a gasket puller that should make the job easier. Not sure if I have to drain the crank AGAIN to take that booger out and change it.
I also learned something cool about why they went to the multi-rod solution and it has to do with this:
http://www.youtube.com/watch?feature=player_detailpage&v=BVoejOo3n2M
. You can imagine that if there were more separate pieces in there, the end through the clutch seal wouldn't spin. It was shocking how much the multi piece rod set up wiggled in there, compared to the single rod "upgrade" I put in today.
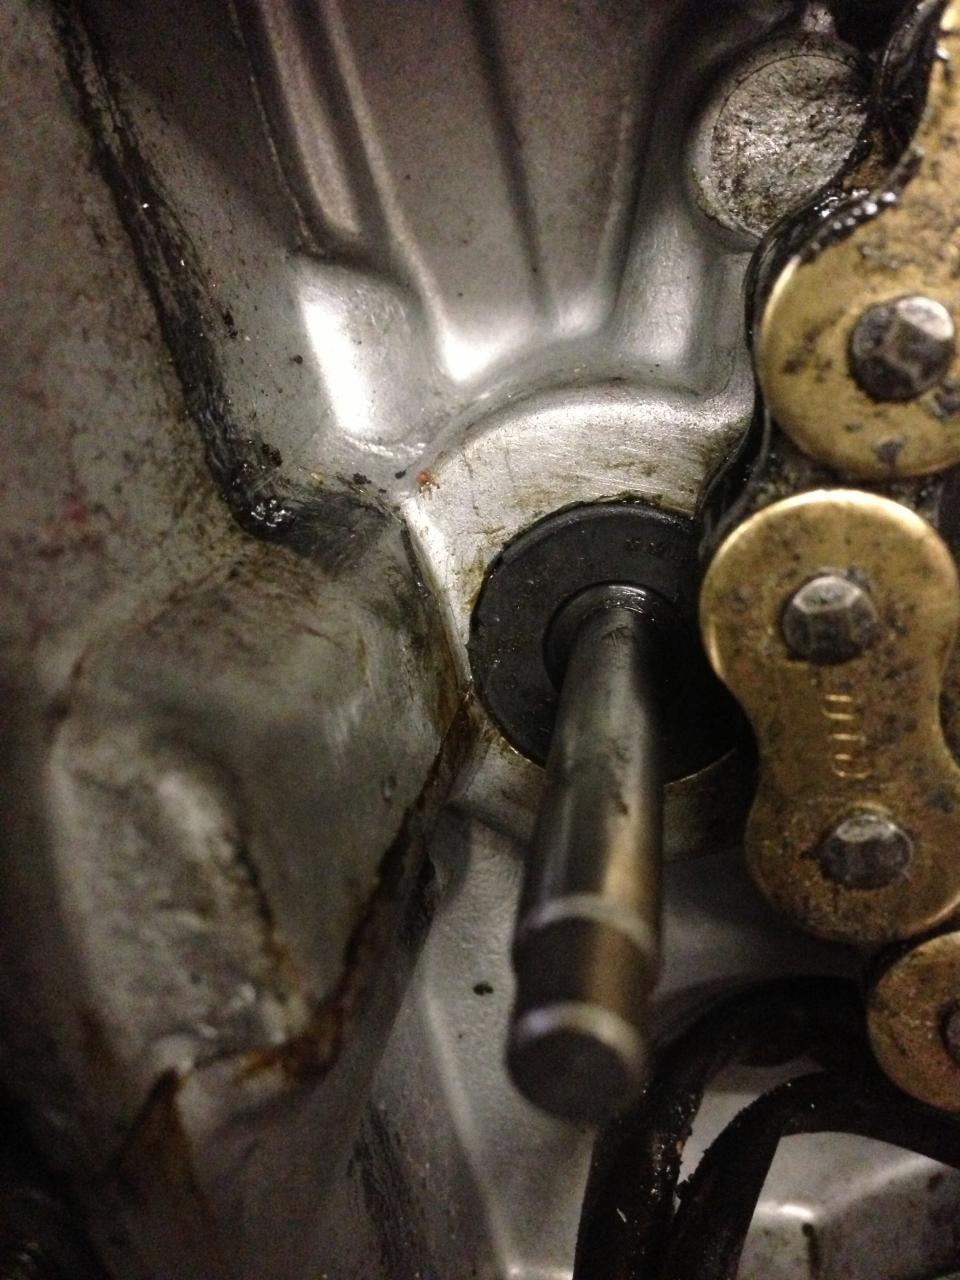
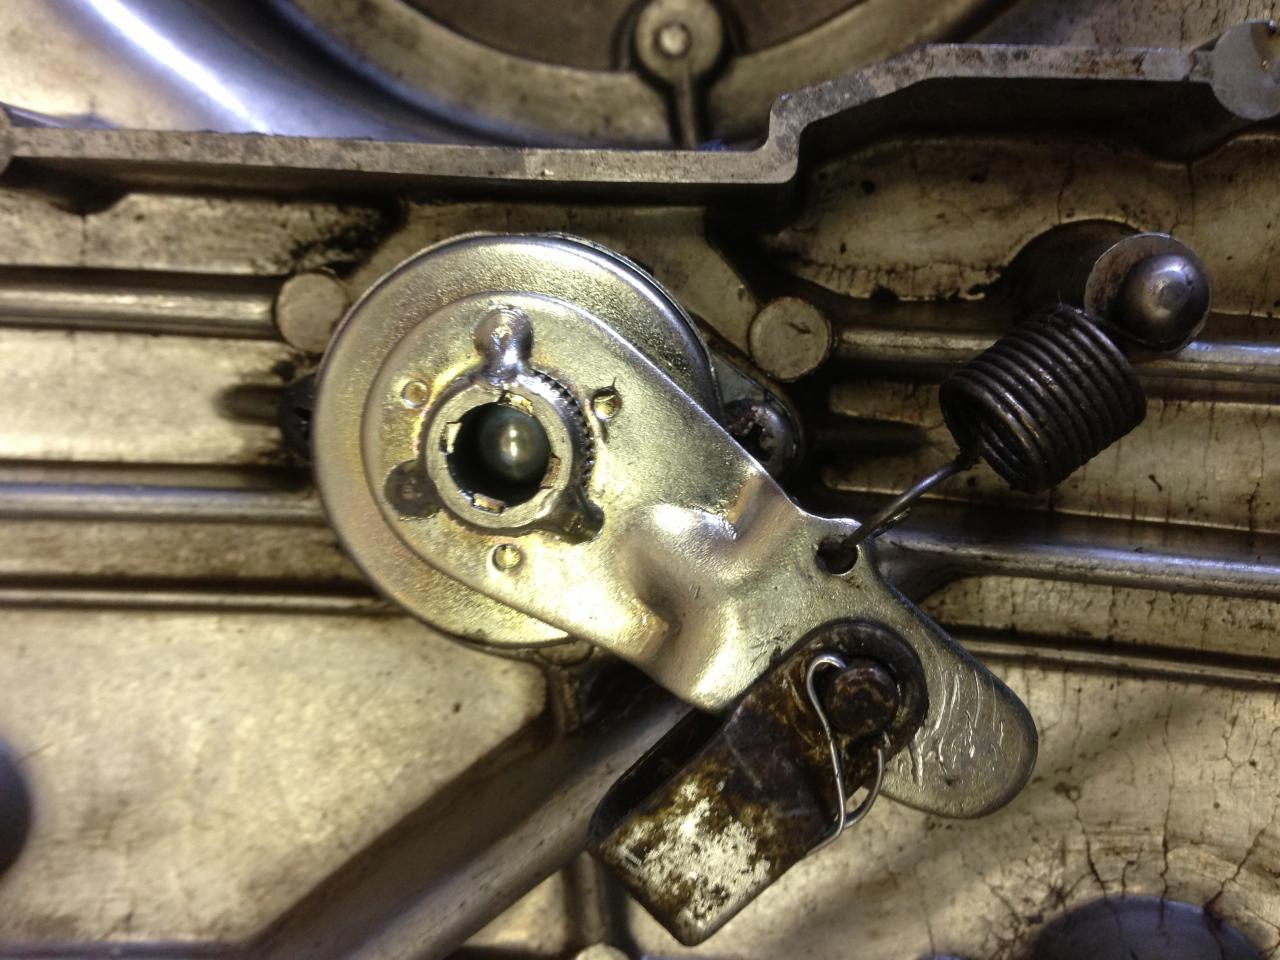
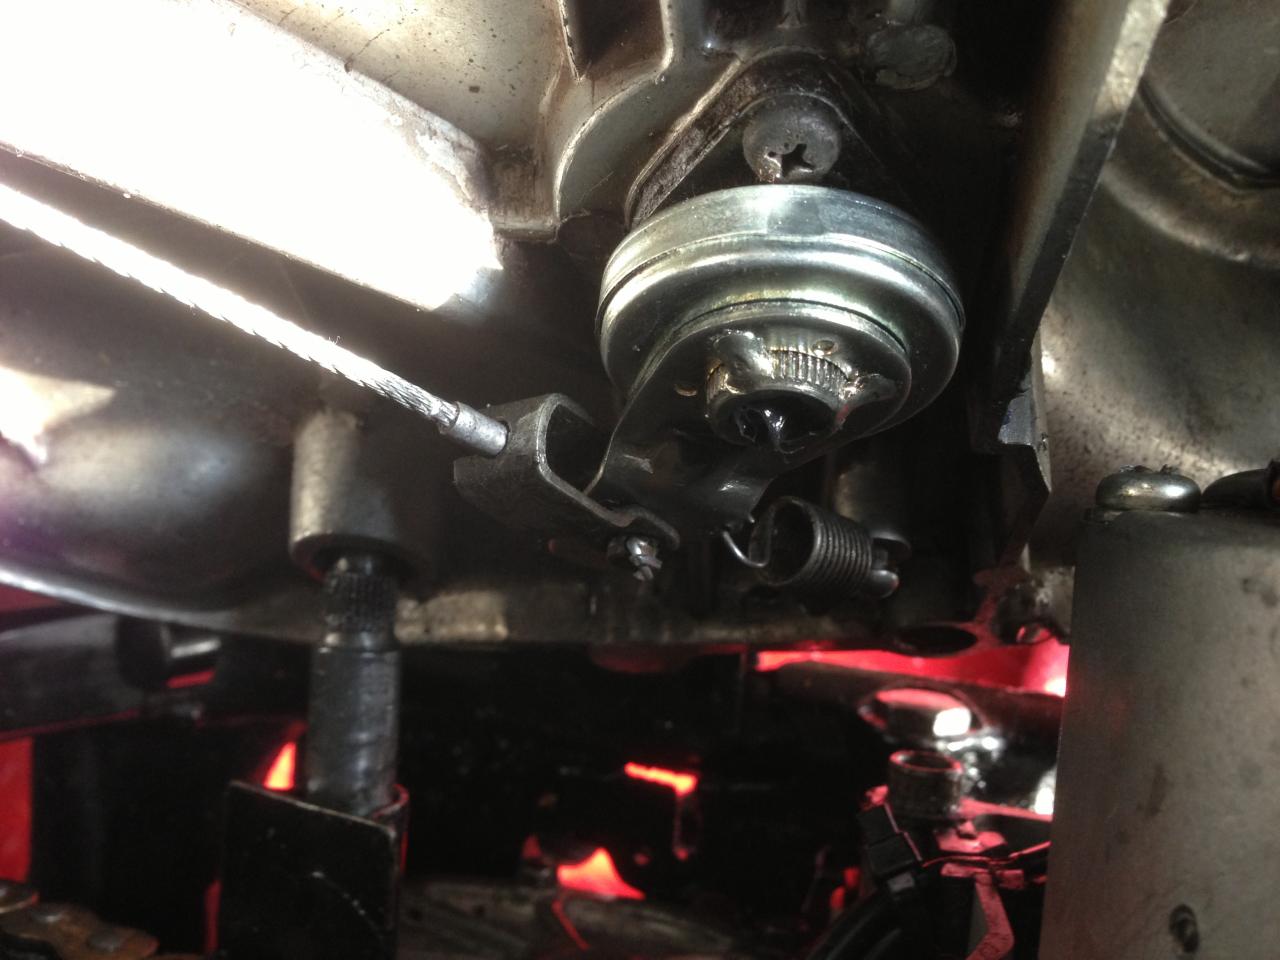
So, the benefit of the 650central.com system relies on a slightly longer clutch cable. This is what the worm looks like with the stock set up (minus grease on the ball bearing):
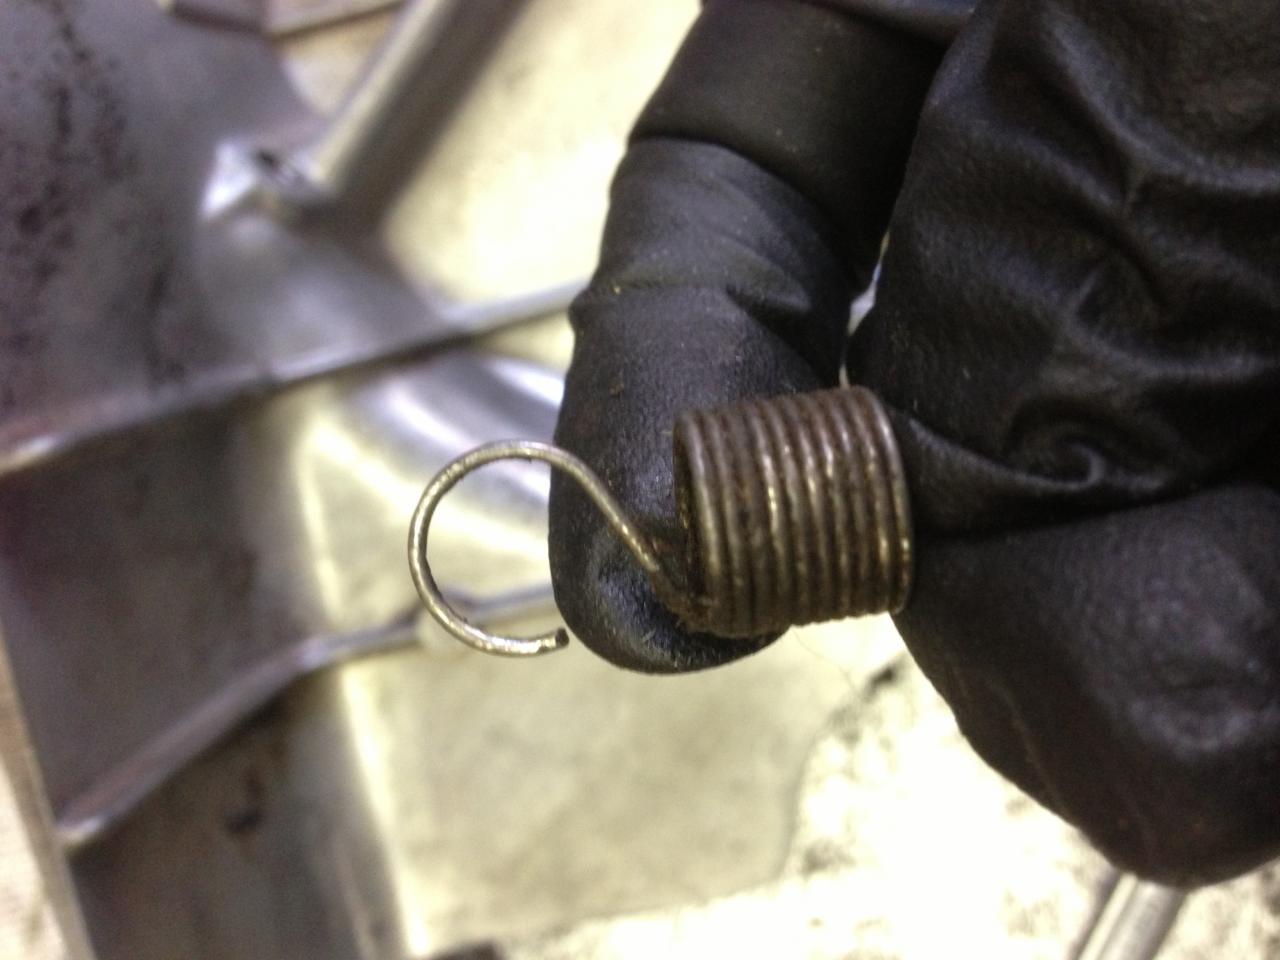
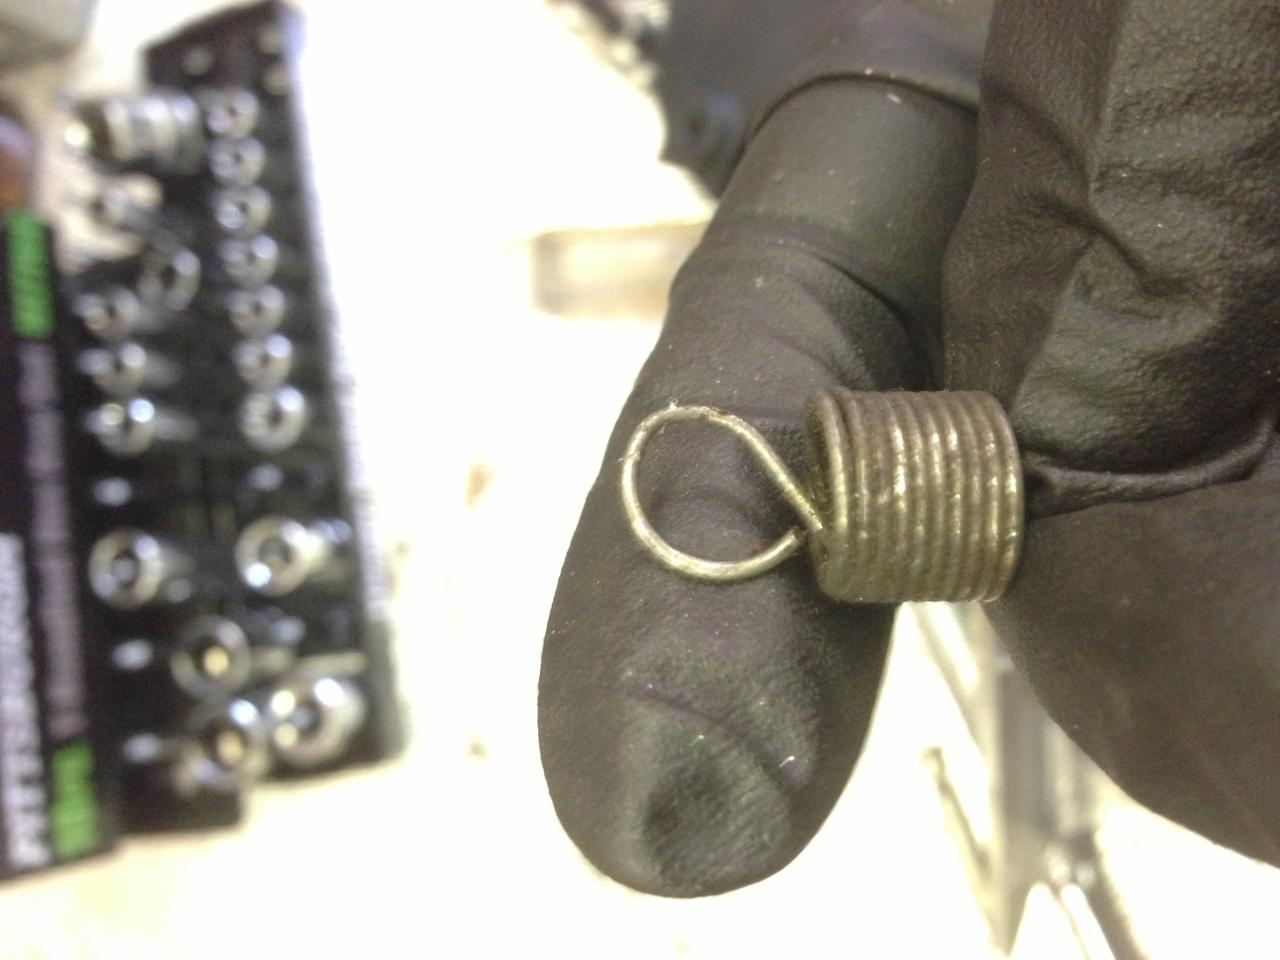
They told me, as many have mentioned in our forum, that you have to add some strength to the spring (even though my understanding was that this spring does diddly, since the pressure of the clutch springs themselves force the push rod, thus the worm, as far back as it will go). I did this to shorten it:
Stock:
Shortened:
Shortened and installed:
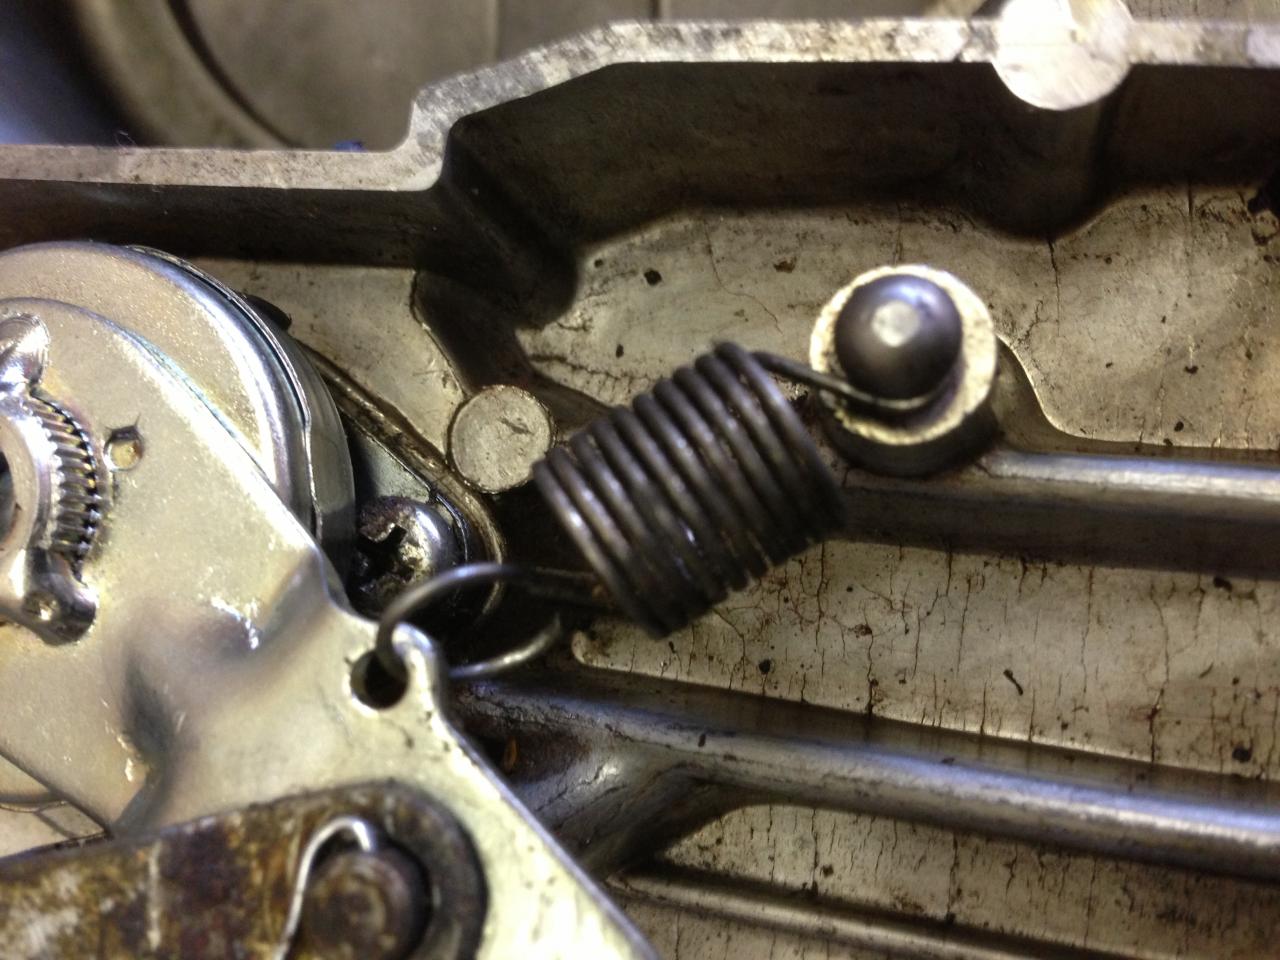
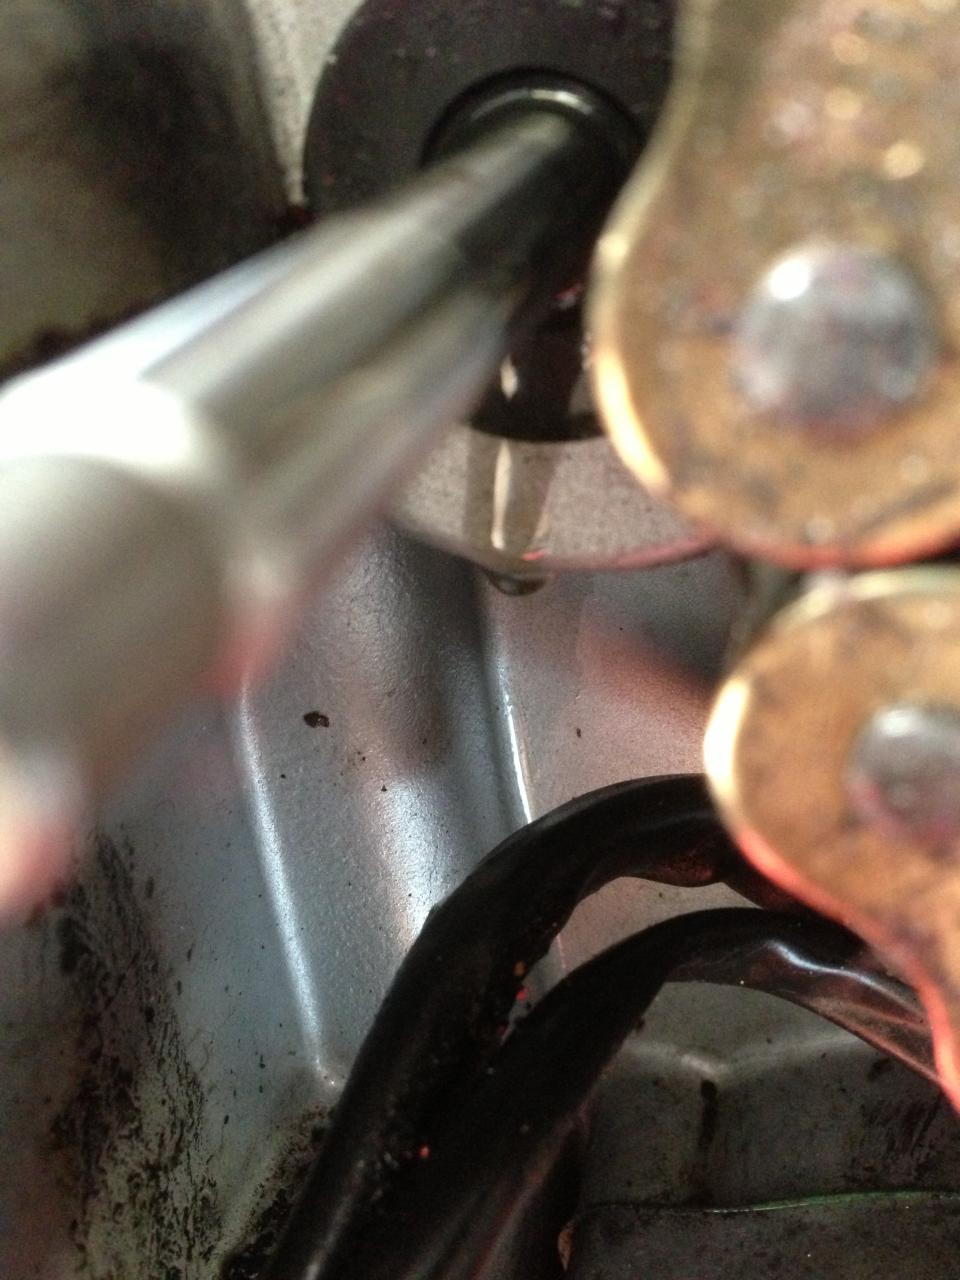
Here it is installed:
Now I'll wait for my hands to warm up and tackle replacement of the gasket another day. Lots in the forum about doing it. I have my round file ready, but I still need some gasket sealer. I wish wish wish there was something easier that could be done to stop this leak.
with clutch that either grabs too much at idle, slips at RPMs, can't find neutral, and is harder to pull than something that's really hard to pull, I decided to do the HHB hydraulic upgrade: http://www.xs650.com/forum/showthread.php?t=18236Thing is, it works fine, but I really didn't like the look of the lever it comes with. Actually, I tried a bunch of things to make that better. But I'm no machinist and the outcome was nothing I wanted to show off.
Then, I rebuilt and traded out my engine and moved the hydraulic clutch over and still really didn't like the lever. So I started reading about the cable and lever they have at 650central.com. As many of you know, they are beyond helpful (not that Hugh isn't) but we talked about a couple of upgrades that might help, including a 1 piece pushrod.
That brings us up to date. I know it's not THAT cold here, but it's kind of hard to do work in the unheated garage when it's 30F, and this was the only day I'm going to have for awhile to get things going.
Here are the pieces from the original push set up. I'm happy to sell it to anyone who needs this stuff. I'm reasonable so just PM me.
The real problem is that I messed up the dang push rod seal, even though I put a nice shiny new one when I had the engine apart.
However, after trading out the parts, which involved draining the oil, getting the left side cover off, and taking out the clutch springs and plates, (and listening to my dang Seahawks lose at the last 30 seconds after a HUGE 4th quarter), I had to call it quits and will go back to replace that little guy next week. I have a gasket puller that should make the job easier. Not sure if I have to drain the crank AGAIN to take that booger out and change it.
I also learned something cool about why they went to the multi-rod solution and it has to do with this:
http://www.youtube.com/watch?feature=player_detailpage&v=BVoejOo3n2M
. You can imagine that if there were more separate pieces in there, the end through the clutch seal wouldn't spin. It was shocking how much the multi piece rod set up wiggled in there, compared to the single rod "upgrade" I put in today.
So, the benefit of the 650central.com system relies on a slightly longer clutch cable. This is what the worm looks like with the stock set up (minus grease on the ball bearing):
They told me, as many have mentioned in our forum, that you have to add some strength to the spring (even though my understanding was that this spring does diddly, since the pressure of the clutch springs themselves force the push rod, thus the worm, as far back as it will go). I did this to shorten it:
Stock:
Shortened:
Shortened and installed:
Here it is installed:
Now I'll wait for my hands to warm up and tackle replacement of the gasket another day. Lots in the forum about doing it. I have my round file ready, but I still need some gasket sealer. I wish wish wish there was something easier that could be done to stop this leak.