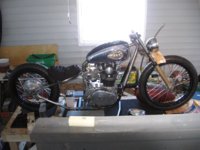
My mistress "the dirty screamer" build log

- thats exactly what im talking about - 7 different coloured wires at 1.0mm thick each, bound together as 1 cable sheathed in black insulation - used here to wire trailers

- i use 1.5mm cable on the production side as 1.5mm complies with VDE DIN 0298 and handles 20A


we some times use semi trailer wire it has 7 color coded wire all in one casing ,makes for a clean look.

Thats sounds like the best way to do it, clean and probley cheaper than buying a bunch of seperate wires. Thanks Guys
 
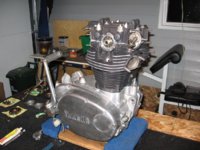
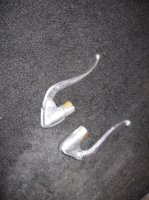
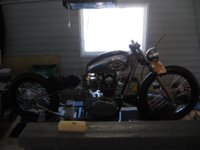
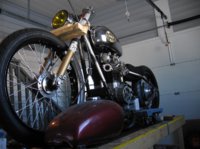
Heres a quick update and some more pictures. Freshly rebuilt engine and New inverted levers.
 

Attachments

  • 001.jpg
    001.jpg
    139 KB · Views: 392
  • 005.jpg
    005.jpg
    147.2 KB · Views: 355
  • 010.jpg
    010.jpg
    140.6 KB · Views: 385
Has anyone ever seen a valve cover (the 4 bolt one) that has some sort of built in pivot assembly? I was going through a box of engine parts I picked up the other day and found it. Is it a decompression valve? never seen one on a xs before.
 
- from the early XS2...these had the first electric start and motor compressions were a little higher...this is for the decompression as you figured
- the XS1 had a 3 bolt cover here - no electric start
 
- from the early XS2...these had the first electric start and motor compressions were a little higher...this is for the decompression as you figured
- the XS1 had a 3 bolt cover here - no electric start

Very intersting, being that I strive to be different and ive never seen it before i should try to use it. I guess it would have to just run a cable to the bars? hmmm
 
I wouldn't bother with it if you want to stick with the "Minimalistic bare bones approach" you mentioned earlier. Plus, if you have a later motor and don't need it, what's the point? (other than to be different) :twocents:

I'm pretty sure some 73's had the decomp too.
 
You mean with the compression release on there, could it cause problems with the valve not fully seating? If that's what you're asking, I don't know. I supposed it would if it's not adjusted properly.

Anyway, you can see how it looks all hooked up on Robert's bike http://www.xs650.com/forum/showthread.php?t=28 Check out the 5th picture
 
Thanks travis, Im thinkin I will just stay away from it for now. build goin real slow. Got the engine in last night. soon to start on wiring.
 
Some updates,

-Got the engine and carbs in.

-Talked to the chris at redtail leather today about getting a seat from him. Looks like he does nice work.

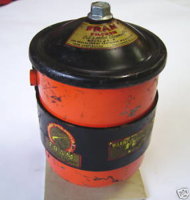
-also trying to buy an old oil canister of ebay for my wires, my coffee canister idea is to wide and will interfer with the chain.

-things are coming together real slow because ive been out of town lots lately.
 

Attachments

  • 006.jpg
    006.jpg
    138.4 KB · Views: 393
  • !BhITPn!BWk~$(KGrHqYOKj!ErzS2Sgr5BLH)fC)83g~~_35.jpg
    !BhITPn!BWk~$(KGrHqYOKj!ErzS2Sgr5BLH)fC)83g~~_35.jpg
    11.4 KB · Views: 274
Looking good! Do you plan on removing some travel from the forks to lower them? I have mine raised up in the tripe trees about an inch for mock up, but that's about the most you can go without hitting the lower triple tree under full compression. I think upon final assembly, I'm going to take about 3/4" out of the travel and raise them about 1/2" in the triple trees for a 1 1/4" total drop in front.
 
Ya I will have to lower the forks too. I also need to rebuild the fork seals but i figured i would get everything mocked up first.
 
Yep same here. I need to do fork seals too. No point in pulling the forks apart more than once. I’m also considering turning down the fork lowers to remove the mounts I won't need. Am a little concerned because they aren't near round and turning them will remove a lot of material. I wonder if they are intentionally oval with thicker walls at the front and back or if that's just the way they are cast. I haven't had a set of forks apart in a while to measure the wall thicknesses of the lower tube.
 
I was going to spin them on the lathe but i think i can do a pretty nice job with a grinder and some paper and remove as little material as possible. But it will be a while before I get to that part of the project.
 
I was thinking the exact same thing. Grind, block sand, hand sand, and then polish or powder coat. I think I'll decide what to do when I have them apart.
 
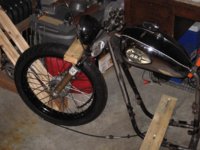
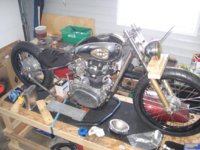
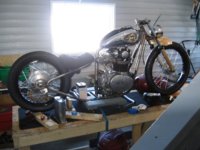
Ok so pretty much no new progress (waitin on parts and some time) but heres some new pictures.
 

Attachments

  • 028.jpg
    028.jpg
    125.8 KB · Views: 356
  • 035.jpg
    035.jpg
    134.4 KB · Views: 366
  • 030.jpg
    030.jpg
    131.1 KB · Views: 432
  • 026.jpg
    026.jpg
    136.1 KB · Views: 508
Back
Top