New Plug Wires for Coil

mikeh36

XS650 Enthusiast
Messages
61
Reaction score
13
Points
8
Location
Edmonton, AB, Canada
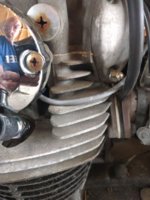
I'm in the process of installing the PAMCO ignition system on my '80 and have a potentially stupid question about the coil. When putting the new plug wires in do I have to strip the wires at all or just stuff them in until they make contact? The bike had the TCI ignition and the original coil is sealed and I can't open it up to make a comparison. The coil is this one
 
Arrrgghh I feel like an idiot. As far as I can tell not all the parts needed are included in the PAMCO kit from Mikes. Looks like I've got to go shopping for some wire ends for the plug wires that came in the kit. They supplied the boots for the wires but no way to actually connect the wire to the coil or boots.
 
You don't need ends for your plug wires. If you take those threaded caps off the coil where the wires go in and look in there, and look in the wire ends of the plug caps, you will see what looks like a spike or the threaded portion of a wood screw. The plug wires push on that if it's the spike type, thread into the end of the wire if it's the screw type.

Included with the coil and probably fitted under those screw-on wire caps, you should find what look like a couple little rubber doughnuts. You slide the threaded cap up on the plug wire, then the rubber doughnut, then insert the wire into the coil. Slide the doughnut up the wire against the coil and screw the cap on. The cap compresses the rubber doughnut on the wire and that helps hold it in the coil.

I prepare the ends of my plug wires before attaching them to the coil or plug cap by stripping about 1/8" of the insulation off then fanning the wire strands out in a radial pattern like so .....

PlugWireEnd.jpg
 
Thank you muchly 5twins. I'll give that a shot tomorrow. Everything I was finding on the internet was showing how to put terminal ends onto the wires. I'm being overly cautious with this because I really want to get the bike back on the road and the Mrs is a little upset with what I've spent in the last couple of weeks in the hopes it gets there.
 
I prepare the ends of my plug wires before attaching them to the coil or plug cap by stripping about 1/8" of the insulation off then fanning the wire strands out in a radial pattern like so .....

Hi 5twins,
that looks neat, mine never looked that tidy.
Not saying it was necessary but back in the day we used to splay the wires out atop a small copper washer then fix 'em with a dab of solder "to make assurance doubly sure"
 
I splay out the strands like 5twins did and poke an awl into the center of the cable, to give a starting point for the cable to shove or thread onto the spike. Not a big hole, sort of like drilling a smaller starter hole when drilling a larger hole.

Scott
 
Thanks for that idea Scott. I used both suggestions and got the plug wires hooked up. Looks like I need to shorten them a bit but for now it's working. Still need to do the timing on but it ran pretty smooth where as is. A little popping and banging out the exhaust but it needs replaced as well (next, next job) so I'll do the timing after that. Not sure if I missed wired something because the headlight has stopped working but I haven't investigated that yet.

I do have a question about the wiring that comes out of the rotor plate. Does anyone know how heat resistant that wire is? I tried to run it so that it stayed off the motor as much as possible but I can't keep it off right outside the rotor plate (see attached image). Or do I need to go figure out some sort of heat shielding for it?
 

Attachments

  • pamcowire.jpg
    pamcowire.jpg
    144.9 KB · Views: 200
That wire is heat resistant enough. All I did was add a little protection sleeve a bit farther up the wire, where it exits from under the lip of the gas tank. The original points wire had a protection sleeve there so I figured I'd follow suit .....

PamcoPick-upPlate.jpg
 
Back
Top