Thanks Jim. Ya do what ya can with what ya got, or in my case what ya don't got........lol.
-
Enjoy XS650.com? Consider making a donation to help support the site.
XS650.com receives a small share of sales from some links on this page, but direct donations have a much greater impact on keeping this site going.
You are using an out of date browser. It may not display this or other websites correctly.
You should upgrade or use an alternative browser.
You should upgrade or use an alternative browser.
On the road again at 40.............the bike that is
When I check the valves for leaks, I use kerosene in the combustion chamber but combine that with compressed air blown in the ports. I use an extension on the blow gun so I can get right in there up under the valve ......


No waiting this way, leaks show right up as streams of bubbles .....


You need to play around a little with the positioning of the blow gun. Get it too close to the valve and you'll actually blow it open. It will appear to be leaking like crazy even though it may not be bad.
No waiting this way, leaks show right up as streams of bubbles .....
You need to play around a little with the positioning of the blow gun. Get it too close to the valve and you'll actually blow it open. It will appear to be leaking like crazy even though it may not be bad.
Tis the season Robin. Ask Santa for some "shop toys."or in my case what ya don't got.......
Ah, that's a great idea 5twins. I will give that a go now as well to get a feel for it, then will know how to test this after lapping. Might have a long enough extension.
Thanks for the tip.
Thanks for the tip.
Tis the season Robin. Ask Santa for some "shop toys."
Oh boy, that's a really long list Jim!
A long list indeed!
Just remember the Shop Toys Rule of Life:
“He who dies with the most toys - wins”
Just remember the Shop Toys Rule of Life:
“He who dies with the most toys - wins”
Last edited:
Really nice clean up there Robin, they all look like they’ve been vapor blasted. You’re doing some nice work!
Thanks Bob. It really is rewarding seeing all that gunk and grime come off and getting them back to their former state of glory.
Close the port opening off around the blow gun with your hand. Again, this will take some experimenting as to how much. Close it off too much and you'll develop too much pressure in the port, blowing the valve open.
Ok, will do. Thanks 5twins. I'll play around with it.
OK, got the rocker cover cleaned up. No surprises that I could see.

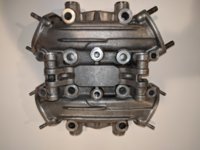
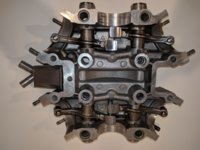
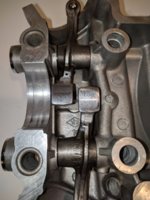
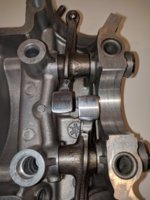
I didn't bother to pull the rocker arms. Some axial play obviously but could not feel any radial play when still lubed. Is this something that should be done to investigate things further, or am I probably OK?
Also, I think the rocker arm pads look OK?
I did blow out any kerosene from the rocker arm oil weep holes with a small air gun extension.
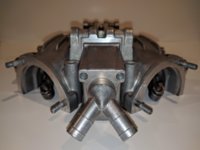
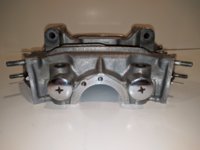
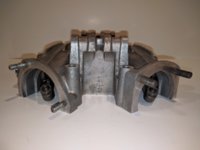
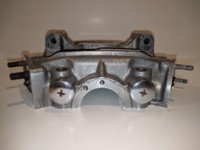
I thought the valve adjuster tips were in amazing shape, however the left exhaust was a little more dimpled. Interesting as this was the exhaust valve that was the harder one to clean. All this is a moot point as I plan to use these adjusters for 1981 to 2014 Viragos and V Stars. Picked this tip up from a post by aldo5468. He claims they are plenty long to engage the lock nut and the allen key head will be nice. Hard to see in the pic.

So, all the big cleaning is done. Whew! Will move on to cleaning up the smaller parts, do 5twins porting and polishing, then lap the valves while waiting for my pistons and bits.


I didn't bother to pull the rocker arms. Some axial play obviously but could not feel any radial play when still lubed. Is this something that should be done to investigate things further, or am I probably OK?
Also, I think the rocker arm pads look OK?
I did blow out any kerosene from the rocker arm oil weep holes with a small air gun extension.


I thought the valve adjuster tips were in amazing shape, however the left exhaust was a little more dimpled. Interesting as this was the exhaust valve that was the harder one to clean. All this is a moot point as I plan to use these adjusters for 1981 to 2014 Viragos and V Stars. Picked this tip up from a post by aldo5468. He claims they are plenty long to engage the lock nut and the allen key head will be nice. Hard to see in the pic.
So, all the big cleaning is done. Whew! Will move on to cleaning up the smaller parts, do 5twins porting and polishing, then lap the valves while waiting for my pistons and bits.
Last edited:
You need to let us know what your cleaning techniques are. I really can’t believe just how nice and new you’ve made everything look.
Thank you Bob. That's very kind of you. Nothing special, just time, kerosene, elbow grease, and lot's of different sizes and shapes of brass brushes, brass tube brushes, parts cleaning brushes, chip brushes and pieces of scotch brite hot glue gunned to popsicle sticks....lol.
As Maxpete would say, here are some of my tools of mass production....lol.

As Maxpete would say, here are some of my tools of mass production....lol.
I agree. Wire brush?You need to let us know what your cleaning techniques are.
Looks like we hit post reply at the same time Jim.....lol.
Robin ,
I think you wore those brushes out man!
Not to mention you must have arms like Popeye after all that scrubbing!
I think you wore those brushes out man!
Not to mention you must have arms like Popeye after all that scrubbing!
Haha....I yam what I yam.....
Yam....get it??
Tee hee!!!
Tee hee!!!
Reminds me that I'm going to see the dentist for a cleaning tomorrow.

Would it be copyright infringement if we made these for our workshops?..

Similar threads
- Replies
- 15
- Views
- 2K
