Painting Tins. No really...

What color should these tins be?

  • Candy green and white a la XS1

    Votes: 15 29.4%
  • Candy gold and white a la XS1

    Votes: 20 39.2%
  • Candy red and white a la XS2

    Votes: 16 31.4%

  • Total voters
    51
Tough news to hear Jim. I have very little body work experience and following this thread has taught me a lot so far. Looking at this as a learning thread and taking a positive view; if you do have to use Mike's badges and dig out the bondo it would add another element of body work to this thread.

Hi Jake,
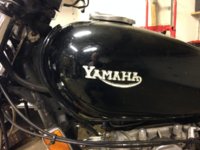
the '77 Standard tank has no badge pockets. they have to be epoxied on.
IMG_0024.JPG
 
Anyway, tank is on hold for now. The guy making the badges is having issues, so I might have to dig out the bondo and go with the Mikes screw on badges. We're in the wait and see mode. :whistle:

Jim, I hope you will be able to wait a little bit longer - been in touch with another supplier who sounded more, uhm, hopeful so should hear from them in the next few days. Hate being messed around by suppliers . . .

Raymond
 
Last edited:
Jim, I hope you will be able to wait a little bit longer - been in touch with another supplier who sounded more, uhm, hopeful so should hear from them in the next few days. Hate being messed around by suppliers . . .

Raymond
I'm good Raymond. Got plenty of projects to keep me busy.
 
With the excellent help of Raymond, Pete and I now have the stick on badges winging their way across the pond as we speak. Means I don't have to dig out the bondo'd badge mounts. :cheers: So... back to work. Sanded down the glaze on the pinholes. While it was shiny from the water I was picking up some minor waviness across the top. Added a thin layer of glaze to that. Also noticed on the sides just below the outside edge I made with the bondo that it was a little too flat for my liking. It didn't flow into a natural curve... so I glazed along it just below the edge. It looks and feels much better now.

Tank glazed.jpg


Found a few more small defects that are filled and drying. I'd like to get them sanded and full coat of fill primer on it tonight. If I can do that, I can do the final sand off of the fill and put the sealer on it tomorrow. We'll see. :er:
 
Your usual nice work Jim! It’s the details that count eh?
Last week, I did a little drywall repair job on our house. I’d put a skim of spackling on, let it dry overnight, sand it and put another layer on, next day sand and touch up with more spackling. On day three my wife ,who was getting tired of the mess, finally said to me “It’s just a wall Bob!”
Yeah, but I see all the little flaws! :laugh2: It’s a hard mindset to get away from.
So I said: Why do you spend so much time in the bathroom?
And then the fight started.
 
Your usual nice work Jim! It’s the details that count eh?
Last week, I did a little drywall repair job on our house. I’d put a skim of spackling on, let it dry overnight, sand it and put another layer on, next day sand and touch up with more spackling. On day three my wife ,who was getting tired of the mess, finally said to me “It’s just a wall Bob!”
Yeah, but I see all the little flaws! :laugh2: It’s a hard mindset to get away from.

Hi Mailman,
It ain't just bikes that have "dreaded POs" houses have 'em too and ours had
patched a kitchen wall with two different thicknesses of gyprock leaving the
wall with a 1/16" full height vertical offset.
I don't care too much about drywall patch jobs looking perfect but my wife does.
Best I could do was a ~2'' vee of spackle and a paint job.
Then hide the seam behind a tall pantry.
 
Jim, what's this sealer you used? What is its purpose? I do not recall running into issues with paint over bondo, or is that because my primer acted as the sealer?

I eagerly await your finished tank and maybe some tips about using metallics.
 
Jim, what's this sealer you used? What is its purpose? I do not recall running into issues with paint over bondo, or is that because my primer acted as the sealer?

I eagerly await your finished tank and maybe some tips about using metallics.
Bondo, fill primer and spot putty all react differently to the solvents in the finish coats. Most times there's no adverse reaction... but occasionally the fillers will show in the topcoats if there is one. The sealer just acts as a barrier 'tween the first topcoat and what's under. In this case, I'm just using the epoxy primer I started with as a sealer. but you can buy epoxy's specifically for the job.

71ApLZjt8fL._AC_SX466_.jpg
 
No joy Thursday night and yesterday was spent celebrating Sue's b-day. Finished the last of the putty today and gave it 2 full coats of fill primer. Next step is to sand off most of the primer and spray the sealer coat. Tomorrow's Superbowl day. Not sure if I'll get anything done or not.

Fill prime.jpg


And.... Pete's tins showed up so I started on them. They're in pretty good shape. The only tricky part is a dent in the right badge recess area.

pete 1.jpg


Since this is a how-to thread, here's how I do it. Once it's all cleaned up, some masking tape to block the bondo from getting into the recess.


pete 2.jpg


Then, when the bondo sets... and before it fully hardens, use an exacto knife to cut the bondo along the tape line.


pete 3.jpg


It'll need more bondo buildup in that area, but now we have an edge to work against.
 
Yeee haaaa!

....and thanks to Mailman’s mob for getting them to KC safe and sound.

I am so excited to have Jim looking after my tins - these are going to be very pretty indeed!

Pete

PS - the line forms behind me guys! ;)
 
No joy Thursday night and yesterday was spent celebrating Sue's b-day. Finished the last of the putty today and gave it 2 full coats of fill primer. Next step is to sand off most of the primer and spray the sealer coat. Tomorrow's Superbowl day. Not sure if I'll get anything done or not.

View attachment 159160

And.... Pete's tins showed up so I started on them. They're in pretty good shape. The only tricky part is a dent in the right badge recess area.

View attachment 159161


Since this is a how-to thread, here's how I do it. Once it's all cleaned up, some masking tape to block the bondo from getting into the recess.


View attachment 159162


Then, when the bondo sets... and before it fully hardens, use an exacto knife to cut the bondo along the tape line.


View attachment 159163


It'll need more bondo buildup in that area, but now we have an edge to work against.
If you ever start painting tins for a side line job I'm all in
 
Back
Top