Copied with permission from XJbikes.com Written by bigfitz52
A more or less generic petcock rebuild how to, very useful for your 650 petcock rebuild. gggGary
IF you are using a K&L petcock rebuild kit read here before you use the diaphragms and shaft part of the kit.
https://www.xs650.com/threads/vacuum-petcock-rebuild-kit-fail.65527
Photos all died in the photobucket FU of 2017, Here it is in PDF form with all the pics intact!
http://www.xs650.com/attachments/petcock-rebuild-pdf.104470/ Ian Vanore Thank you SO much!
Rebuilding Yamaha Vacuum Operated Fuel Valves (Petcocks.)
THEORY of OPERATION: The way these things are supposed to work is this:
When the petcock is in the ON or RES positions, fuel flow is held "off" by a spring-loaded diaphragm seal. When vacuum from the intake manifold is applied to the smaller port (see pic below) the diaphragm lifts the valve seal off the seat and fuel flows (out the larger port.) When the valve is in the PRI position, fuel is free to flow all the time.
Problems develop when the spring-loaded diaphragm valve doesn't seal anymore, allowing fuel flow when it should be off; when the diapgragm gets a tear or hole in it and doesn't operate properly plus allows fuel to get into the vacuum line from the intake manifold; and/or when the valve itself becomes worn so that it leaks, either externally or internally.
The cure is to rebuild or replace. This is for those of you who wish to rebuild and have it actually work.
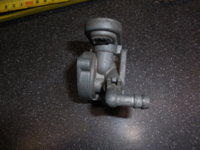
I bought this petcock off eBay for my 650:

It needs to be rebuilt.
Chacal sent me one of the larger ones from the 700s and 900s to rebuild at the same time. You will see both styles used in this article, differences and similarities will be obvious.
First thing we need to do is disassemble it:

CLOCKWISE FROM TOP: Tank mount o-ring; In-tank filter; petcock body; diaphragm block; diaphragm (magic o-ring above it diaphragm spring; vacuum port/diaphragm chamber cover, with vacuum nipple and vacuum nipple check valve (tiny disc
 cover retaining screws (4
 outlet pipe flange w/screws (2) and gasket; front plate w/ screws (2
 wave washer; fuel lever; o-ring for lever; valve body seal.
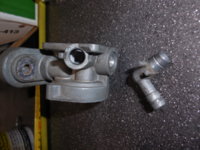
The larger valve is substantially the same except its output pipe is integral:

Now that the valve is apart, we need to examine it carefully to determine serviceability. Close examination of the valve seat will tell us if the unit is rebuildable or toast.
Salvageable seat:

Although there is some minor pitting and wear, this seat can be polished out with no problem.
This one's junk:

This valve seat is beyond any polishing. Deep pitting from corrosion has taken its toll, it's only useful as an example of a bad seat. Those craters aren't coming out.
So now let's begin rebuilding our petcock by getting everything religiously clean, using carb cleaner and some of my personal favorites:


There's a vacuum port check valve (nothing more than a tiny bakelite disc) in the cover plate. If you can't unscrew the vacuum nipple, don't sweat it; just flush it out with carb cleaner from both directions, and make sure it's free in there. You can hear it rattle about, and test by blowing in the port.
Once we have everything clean, let's begin the refurbishment by polishing the valve seat:

I use my Dremel, but you could use a "button" in an electric drill, or do it by hand using an industrial-sized wooden stalk Q-tip.


Once our seats are polished and the parts all flushed clean, we need to clean up all the mating surfaces. That includes the surfaces for the diaphragm block and cover; the outlet plate mating surface on the body (if so equipped the flat side of the fuel selector lever and the tank mounting flange.
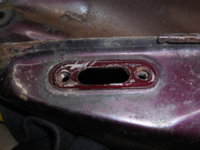
This simply won't seal well if reassembled as is:


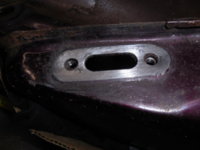
This needs to be "dressed" as well, even though it looks "OK."
Use anything from 800 to 1200 grit wet-or-dry sandpaper on a flat surface. You can tape a hunk to a small piece of glass; I use the little surface plate on the back of my bench vise:


Here's a "before and after" of dressed versus untouched mating surfaces; the parts that have been cleaned up will seal much better than the unsanded ones.

See how nicely the valve I'm holding in the pic a couple pics above turned out?
Now we need to polish the o-ring seating surface to remove any "wear rings" that might be present, and give the new o-ring a nice smooth seat:

Once again, I used my Dremel but I also did one by hand. Either way was equally effective, doing it by hand just took longer is all.
Now that we have our valve seats and o-ring sealing surfaces polished and our mating surfaces dressed, flush everything thoroughly with carb cleaner, scrub with an old toothbrush, Scotchbrite, or whatever you want to get everything sparkling clean.

Now we're gonna need some PARTS: I know this seems like a shameless plug, but chacal is the best source out there for this stuff; a lot of the other kits on the market simply don't work.

The big-body petcock kit is on the left (NOTE it DOES NOT include the diaphragm block, you will need to re-use the original) and the "standard" kit on the right (its diaphragm includes the block.)
REASSEMBLY TIP: When you put the vacuum check valve and vacuum nipple back in the diaphragm cover (if you took it apart,) put a dab of RTV on the threads of the nipple just in case. A TINY DAB and just on the threads we don't want to glue the little valve flap in place.
Now let's start by giving all the rubber parts a sparing wipe with silicone grease, and let's get the diaphragm ready to go on.
DIAPHRAGM ORIENTATION:
The "business" (valve) side of the diaphragm assembly:

The backside (spring side) of the diaphragm:

Note this passage on the valve side of the block:

You can see it in the pic of the big-body diaphragm block above; both styles have it.
The passage goes pointing down and toward the rear when the petcock is on the bike: The orientation is the same on both styles:

A word about diaphragm springs: Both styles of replacement springs are slightly longer than the originals:

In both pairs, the replacement springs are on the left. You can also use a washer as shown to increase spring tension and improve sealing; but if your seat is in good shape it should not be required.
Set the spring in place; and go ahead and install the cover.

Snug down the screws; then gently poke the stem of one of your q-tips in from the front and lift the valve off the seat and let it return a couple of times; "orbit" the cover/diaphragm assembly around a little bit so it all seats nicely.

Then tighten up your screws. Be sure you have the passage in the diaphragm block positioned correctly. (See above and below.)
Continued in next post
Ride safe--- Fitz
A more or less generic petcock rebuild how to, very useful for your 650 petcock rebuild. gggGary
IF you are using a K&L petcock rebuild kit read here before you use the diaphragms and shaft part of the kit.
https://www.xs650.com/threads/vacuum-petcock-rebuild-kit-fail.65527
Photos all died in the photobucket FU of 2017, Here it is in PDF form with all the pics intact!
http://www.xs650.com/attachments/petcock-rebuild-pdf.104470/ Ian Vanore Thank you SO much!
Rebuilding Yamaha Vacuum Operated Fuel Valves (Petcocks.)
THEORY of OPERATION: The way these things are supposed to work is this:
When the petcock is in the ON or RES positions, fuel flow is held "off" by a spring-loaded diaphragm seal. When vacuum from the intake manifold is applied to the smaller port (see pic below) the diaphragm lifts the valve seal off the seat and fuel flows (out the larger port.) When the valve is in the PRI position, fuel is free to flow all the time.
Problems develop when the spring-loaded diaphragm valve doesn't seal anymore, allowing fuel flow when it should be off; when the diapgragm gets a tear or hole in it and doesn't operate properly plus allows fuel to get into the vacuum line from the intake manifold; and/or when the valve itself becomes worn so that it leaks, either externally or internally.
The cure is to rebuild or replace. This is for those of you who wish to rebuild and have it actually work.
I bought this petcock off eBay for my 650:
It needs to be rebuilt.
Chacal sent me one of the larger ones from the 700s and 900s to rebuild at the same time. You will see both styles used in this article, differences and similarities will be obvious.
First thing we need to do is disassemble it:
CLOCKWISE FROM TOP: Tank mount o-ring; In-tank filter; petcock body; diaphragm block; diaphragm (magic o-ring above it
The larger valve is substantially the same except its output pipe is integral:
Now that the valve is apart, we need to examine it carefully to determine serviceability. Close examination of the valve seat will tell us if the unit is rebuildable or toast.
Salvageable seat:
Although there is some minor pitting and wear, this seat can be polished out with no problem.
This one's junk:
This valve seat is beyond any polishing. Deep pitting from corrosion has taken its toll, it's only useful as an example of a bad seat. Those craters aren't coming out.
So now let's begin rebuilding our petcock by getting everything religiously clean, using carb cleaner and some of my personal favorites:
There's a vacuum port check valve (nothing more than a tiny bakelite disc) in the cover plate. If you can't unscrew the vacuum nipple, don't sweat it; just flush it out with carb cleaner from both directions, and make sure it's free in there. You can hear it rattle about, and test by blowing in the port.
Once we have everything clean, let's begin the refurbishment by polishing the valve seat:
I use my Dremel, but you could use a "button" in an electric drill, or do it by hand using an industrial-sized wooden stalk Q-tip.
Once our seats are polished and the parts all flushed clean, we need to clean up all the mating surfaces. That includes the surfaces for the diaphragm block and cover; the outlet plate mating surface on the body (if so equipped
This simply won't seal well if reassembled as is:
This needs to be "dressed" as well, even though it looks "OK."
Use anything from 800 to 1200 grit wet-or-dry sandpaper on a flat surface. You can tape a hunk to a small piece of glass; I use the little surface plate on the back of my bench vise:
Here's a "before and after" of dressed versus untouched mating surfaces; the parts that have been cleaned up will seal much better than the unsanded ones.
See how nicely the valve I'm holding in the pic a couple pics above turned out?
Now we need to polish the o-ring seating surface to remove any "wear rings" that might be present, and give the new o-ring a nice smooth seat:
Once again, I used my Dremel but I also did one by hand. Either way was equally effective, doing it by hand just took longer is all.
Now that we have our valve seats and o-ring sealing surfaces polished and our mating surfaces dressed, flush everything thoroughly with carb cleaner, scrub with an old toothbrush, Scotchbrite, or whatever you want to get everything sparkling clean.
Now we're gonna need some PARTS: I know this seems like a shameless plug, but chacal is the best source out there for this stuff; a lot of the other kits on the market simply don't work.
The big-body petcock kit is on the left (NOTE it DOES NOT include the diaphragm block, you will need to re-use the original) and the "standard" kit on the right (its diaphragm includes the block.)
REASSEMBLY TIP: When you put the vacuum check valve and vacuum nipple back in the diaphragm cover (if you took it apart,) put a dab of RTV on the threads of the nipple just in case. A TINY DAB and just on the threads we don't want to glue the little valve flap in place.
Now let's start by giving all the rubber parts a sparing wipe with silicone grease, and let's get the diaphragm ready to go on.
DIAPHRAGM ORIENTATION:
The "business" (valve) side of the diaphragm assembly:
The backside (spring side) of the diaphragm:
Note this passage on the valve side of the block:
You can see it in the pic of the big-body diaphragm block above; both styles have it.
The passage goes pointing down and toward the rear when the petcock is on the bike: The orientation is the same on both styles:
A word about diaphragm springs: Both styles of replacement springs are slightly longer than the originals:
In both pairs, the replacement springs are on the left. You can also use a washer as shown to increase spring tension and improve sealing; but if your seat is in good shape it should not be required.
Set the spring in place; and go ahead and install the cover.
Snug down the screws; then gently poke the stem of one of your q-tips in from the front and lift the valve off the seat and let it return a couple of times; "orbit" the cover/diaphragm assembly around a little bit so it all seats nicely.
Then tighten up your screws. Be sure you have the passage in the diaphragm block positioned correctly. (See above and below.)
Continued in next post
Ride safe--- Fitz
Last edited:


