I had read before that adding salt to vinegar will expedite the process, I was trying to find the reason for that and I came across this article which I thought described a pretty good, inexpensive way to treat a lot of large parts. ( It came from a woodworking site )
Step 1: Use vinegar and salt to eat rust
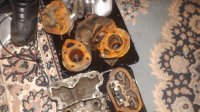
The first step is to completely disassemble the plane and hose it down to get rid of the deposited dust, dirt, and loose scale on the plane. Now grab a plastic container deep enough to fully submerge the tool or pieces. In the case of the old Stanley 220 block plane above, a take-out container worked perfectly. After everything is in the container, fill it up with some white vinegar from the supermarket or your cabinet until it is fully submerged.
Once everything is sitting in its vinegar bath, it’s time to add the salt. While vinegar by itself is a mild acid, the salt increases the acidity in the solution and let it chew rust even faster. When using a full gallon of vinegar, add a full cup of salt per gallon of vinegar. For this block plane, two hefty tablespoons, distributed evenly, was the perfect amount.
This is when you get to walk back into the house for dinner or a nap, and forget about that rusty plane for a while. Let it sit for at least 12 hours, but the longer you leave it in there, the more effect it will have. Usually one to three days will have the rust falling off.
Step 2: Start scrubbing
With the tool having sat in the solution, it’s time to get that rust off. Remove the tool from the container and scrub it down with a 3M-style pad. I prefer the pad at this stage because its woven strands won’t clog with the heavy sediment that will be coming off the plane. Any super tough rust can be hit with a brass-bristled brush.
Step 3: Neutralize the acid with baking soda
Now the acid solution covering the tool must be neutralized. Put everything back into the container and fill it with water. Wait, WATER?! Don’t worry, it won’t be in there long. Once things are submerged, add two tablespoons of baking soda (or about one cup per gallon, again) to the water and give it a mix. The baking soda will neutralize the acidity and also cause any vinegar trapped under or behind rust to foam and loosen even more.
Step 4: A final polish, then it’s time for a tune up
Pull the pieces out of the neutralizer after about 10 minutes and scrub everything with some 0000 steel wool. At this point, the steel wool should start bringing a nice cast sheen to your tool without removing the patina. After this final scrub, wipe it down with a rag soaked in denatured alcohol. The alcohol will wick away any moisture left on the metal so rust doesn’t come back to haunt you. Finish the cleaning with a light coat of camellia oil to make sure no new rust sets in.
I don’t know if this product is available to you where you live, but I also had great success with this product, that I used to clean the rust out of a gas tank, non toxic, no fumes, not caustic. It works by chelation at an atomic level.
$39 made four gallons.

I also threw some rusty old screwdrivers in a bucket of that stuff and let it sit overnight, the next morning they looked black, even after rinsing them off, but then I hit them with a hand held wire brush and this is what they looked like.