Splitting the crankcase

Thanks for the input,
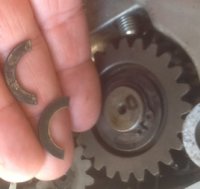
Got the engine out and on the stand last night and now have everything of except the stator, waiting for a puller (ordered the wrong 1 :banghead:)
While I wait I will add all the pics I took and write a step by step for anybody else that may do this.

Love these forums, everybody is so helpful.
:D
 
Btw
You don't need to remove the rotor inside the stator inorder to split the cases
Just remove the outer and the rest can stay attached to the crank. Unless your replacing it anyway then it doesn't matter
 
I assumed that I would have to replace the seal when case was split, thats great! once again, gotta love the forums. ( thanx Gary,Twin and Mrkil)

What about the kick start mechanisim? thats on the lower case can I leave this on?
 
Just started this task today. I've got all of the bolts, washers, nuts and Acorn nuts removed.

#9 was fun as I quickly realized that I had to remove Starter Gear #3 and the fasteners including those 2 interesting half-clips. Thought I had a broken washer at first. I'm thinking that I need to go ahead and remove all the starter motor gear parts back to the Pinion (Starter Wheel).

i had to run out to O'Reilly to buy my first set of snap ring pliers (Lang Brand). Also came in handy to remove the large external retaining ring from the kick start mechanism which I decided to remove, bag and tag.

Next up is splitting the case. I plan to use a Wagner heat gun and perhaps an overhead strap puller and a couple ratcheting straps, not to mention an assortment of hammers and wooden drifts.
 

Attachments

  • image.jpg
    image.jpg
    62.5 KB · Views: 406
Last edited:
Seems a bit excessive to me. Excess on an XS? OH MY!
 
I think I would use the rear opening on my motorcycle lift. It has an opening that I think the cylinders would fit into, allowing access to the lower end. I will have to check it out though. I think anything would be more stable than what YL76 had going on. If you didn't drop the motor count yourself lucky. To me it just didn't look stable.
 
Man, I've been looking into all of the shifting problems and answers to those problems and it all seems a bit familiar. What did the PO do to this poor bike? I need to get it right before I sell it. If I sell it after getting her fixed right. Then She'll be taken care of. I already did a PMA kit swap and PAMCO install. Guaged a tightened the lifters, redo on all the electrics and I need to get the jets swapped. And fix the trans. I am still thinking a total redo of everything at this point! I'm supposed to start College in the next couple of weeks too. I don't know if I'll be able to get to it till summer. Life seems to take over at times doesn't it?! Not enough time to get things done.
 
All years where about the same. No, there are no nuts are bolts behind the starter itself.
There is a nut above the starter gears inside the right side cover. Just to the rear of the clutch.
You can see the stub in YL76's pic, just above the gear.
Leo
 
I have a Wagner heat gun ("power stripper") that I used in conjunction with a rubber mallet to separate the bottom cylinder jug from the top of the crankcase. I'm hope this method will produce similar results for splitting the crankcase...
 
Hey guys, I'd thought I'd share the technique that worked for me in splitting the cases, in the hopes of helping someone with their project. The engine had been taken apart in the past and there was a healthy amount of Yamabond or similar holding the cases together. I didn't read anything about having the engine upside down before I did this and I'm sure I did some other cringe-worthy things in the process (including leaving the stator on while splitting, which doesn't seem to have hurt anything, fingers crossed).

I cut a 12' piece of 2x4 in half and drilled holes to attach them to the sides of the engine, using two of the engine mount locations and a few feet of threaded rod. Then I slipped the short end under the lower beam of my engine hoist, leaving the longer lengths of wood to provide leverage on the other side. I used a 1" jack handle to lock that end down. Then I slowly pulled the engine up with the hoist until the case popped open, pretty darn evenly. The materials cost about $20 but there's a good chance I'll use them again someday.


IMG_7990.JPG
IMG_7988.JPG
 
I tapped in a putty knife in a some strategic locations to break the halves free, then checked the edges there with a finger to see if anything was raised. Probably touched up one or two small places with a file.
 
Probably have split 6 or 7 cases now, Still haven't figured out a simple, cheap, and elegant case splitting method. So far every try is 2 out of 3............or less. Yes upside-down works best....
 
I'm going to apply the power of hydraulics when I finally give it a go. I have to say, wrapping raw chains all around my motor cases, cylinders, valve covers, etc. has NO appeal to me whatsoever, lol.
 
How 'bout a custom fitted plate, bolted to the sump opening, and/or the bottom engine mount holes. Precisely located bolts press down on the exposed case studs. Kinda like your piston pusher.

Use an old case bottom, bolt this plate contraption to it. Use that case bottom's stud holes as drill guides, drill through into the plate. Thread those holes. Or, if using plywood, nutserts.

Or, ..........explosive studs...:yikes:
 
Last edited:
Back
Top