Stock wiring from scratch - 1976 C with HHB CDI

GeorgeOC

XS650 Junkie
Messages
513
Reaction score
118
Points
43
Location
California
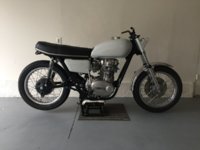
Hello everyone, I am seeking some help creating a wiring diagram, and the subsequent installation.

It's my hope that this thread will end up as a solid linked compliment to the build thread for this bike already in progress on the 1976 C model. I'd like to see if I can't (with the guidance from the experts here) wire this bike up form zero, and illustrate the process. There is a wealth of wiring diagrams on this forum, and lots of sage advice. However, there doesn't seem to be a comprehensive, very basic, illustrated how to. My guess, you guys have better things to do than deal with rookies like me! :bow: I will illustrate this thread for folks like me, with zero XS650 wiring experience, but good mechanical sense, and attention to detail.

Essential components for this set up:
- Stock instrument cluster
- Headlight front signals
- Stock starter motor
- Rear tail light and signals
- Neutral indicator
- Rear brake switch/light
- Hughs Handbuilt CDI
- Battery
- Motogadget M-Unit or other fuse/relay device

First step - looking for some help creating a wiring diagram. I am wondering if there may be anyone brave enough help create one taking the above components into account???
 
Here she sits as of now...
 

Attachments

  • IMG_0903.JPG
    IMG_0903.JPG
    117.6 KB · Views: 268
Been looking at the wiring diagrams and the 76C and 75B have been lumped in as the same. It cant be because the Gauges cluster set up is different.

I have found a couple of things wrong on the 76C Wiring diagram.

Some work i have done. No expert
IMG_7250 copy 1.jpg 76C Gauge Cluster Wires copy.jpg

This is the 75B/76C Wiring diagram that has been posted on the site. Has the Power from Dim Switch to headlight as Dg wire when it should be G. Also states it has a headlight failure warning light. The headlight failure warning light should be the Taillight failure warning light.
Originally Posted.........................Updated Wiring and Key
z 75_76_XS650 B&C Wiring Origional  posted.jpg d 75_76_XS650 B&C Wiring and Key Updated.jpg

Here is the same diagram with the changes made regarding the Stop lamp warning light and added the G/W and L/R to the wire Key. This is a cut down Diagram for the Gauge Cluster and Head/Taillight/Indicator loom.
e 75_76_XS650 B&C Wiring V Dash and Lighting circuit copy.jpg
 
Last edited:
Having just rewired my '76C with a MikesXS wiring harness and handlebar switches (the switches are actually for a '77D because that is all they sell), this is all very familiar. The definitely were some errors in the Mike's harness as well as on the diagram the tself. Also, the adaptation of the '77 clutch side turn signal switch to the '76 harness kept me thinking for a while - but it can be done and everything works very well now.

Great work Doug and a worthwhile project George.
 
I will be watching this thread as I have just replaced a harness on '76. Found and resolved some head scratchers, down to trying to figure out why the bulb in the dash for the right indicator still does not work.
However, given the up front cost of the Motogadget M-Unit, watching and learning will be the extent of my following.
 
Did you check the bulb itself? I have found that quite a few f those little bulbs seem to die quickly.

Pete
 
Yes, swapped it with the opposite side that was working and checked it with a tester from the electrics drawer. Going to leave it be for now. Sorry for the thread side track.
 
No prob. I found that a lot of the female bullett connectors were loose or corrodeds were a lot of the grounds here and there on my '76.
 
Thank you everyone, great insights so far! I'll begin diving in after the holiday madness. Huge thanks in the mean time.
 
This is the thread I ised for my M-unit with stock charging and Pamco..... I used the Revival Cycle wiring kit and the M-button for my controls, which will go in the headlight (as soon as my fingers thaw out)
The wiring diagram on here is good and you can easily adapt it for a PMA and CDI. The M-Unit is extremely simple and you can use stock wiring, but I chose to get rid of 35+ yr old wires. $80 is cheap insurance.
With the M-Button, you will only have 1 wire going back to the M-Unit. So no giant bundle of wires. The ground can go under the tank on the frame.
I will say that a kill switch should be added.
Also, I am using an Anti-gravity 8 cell battery, (kick only) but I have heard that some after market regulators can fry a lithium battery. Never seen it though.


http://www.xs650.com/threads/wiring...ier-regulator-not-a-nylon-screw-thread.39575/
 
The wiring diagram on here is good and you can easily adapt it for a PMA and CDI...
http://www.xs650.com/threads/wiring...ier-regulator-not-a-nylon-screw-thread.39575/

Thanks littlebill, finally tracked down that diagram from the tread you referenced. I believe this is it, (linked). Could I possibly trouble you for a little insights on adapting for the CDI PMA? What would you need to cut out/add? I'd be in your debt!

Post #16
http://www.xs650.com/threads/wiring...ier-regulator-not-a-nylon-screw-thread.39575/
 
Last edited:
I only have my phone and need my computer to see what is what.
Its very straight forward. Power comes into the bottom screw on the right (with all the red wires in the diagram). Thats hot "+".
The 12 o'clock and 6 o'clock screws are grounds.
Aux, on the output (bottom right) side feeds the ignition. The opposite side of the Aux is the "Lock" input (bottom left) which is your ignition/key switch. A wire would run from the "Lock" to the "+" screw. The key goes in there.
You have to have some switch in there as this is what sends the power from the battery to the Munit itself. On/off.
Your charging system will feed to the battery directly or to the "+" screw.

I'll look a little more later to see if I can figure out the correct wiring. You can search Munit diagrams and find a few to help.
 
Yes'r! Those are great videos. I have watched them many times, and learned a ton. I created a wiring diagram, however I don't have a lot of confidence in it... Might try to re-create.
 
Thanks to all in advance for your comments and guidance! Here is my first stab at a wiring diagram using the following components, including the Motogadget units.
- M-unit
- M-Button handlebar switches
- M-lock RFID ignition
- HHB CDI PMA
- SH847 R/R

Here goes nothing... I can't imagine how wrong this diagram might be, but I hope I am close... At this moment, getting this bike running seems a million years off!
 

Attachments

  • 1976 XS650 MotoGadget WD v1.0.pdf
    256.1 KB · Views: 187
Last edited:
First question I have here is about the regulator rectifier situation. Using the M-Unit, along with a Shorai lithium ion battery, consensis is the stock R/R from the HHB kit might be out gunned. I'd like to know if I am on the right track with replacing it with a higher quality Shindengen model. Are there any wiring / ignition experts out there able to help this scared rookie?
 

Attachments

  • rr compare.jpg
    rr compare.jpg
    77.9 KB · Views: 199
No expert but Hugh recently posted in a thread about the problems he was having with the Reg/Rect for the New PMA/CDI combo and was in the process of sourcing a new Reg/Rect. He posted a pic side by side of the existing and the one from the new source. As i said no expert but even to my untrained eye that Reg/Rect Combo he is/was selling has no fins for the heat dissipation.........I added the original TCI into the pic Hugh posted and it is easy to see why these things keep over heating.

Left is Hugh's new CDI Reg/Rect...................................... Existing one he is/was selling .............................. Yamaha TCI Reg/Rect
D E Final copy.jpg
 
As most people on this site know, I think PMAs are a poor choice for these bikes.
If the HHB CDI PMA only has 4 wires, that means the stator is only a single phase unit (substandard to a 3 phase unit).
If the SH847 has 3 wires on its input, that means its a 3 phase rectifier/regulator. I'd say the 2 are not compatible.
Not a good idea to mix single phase and 3 phase.
 
Good pics of that new stator system, George. Notice that the number of stator windings (for the charging system) is 8, not evenly divisible by 3, and has 2 yellow wires going to the rectifier. That is not a 3-phase alternator, but a single-phase. Although it can work with a 3-phase rectifier (just use 2 of the 3 yellow wire inputs), it will use a single-phase 4-pin bridge rectifier. More opportunities for alternative/emergency rectifier selections...
 
Back
Top