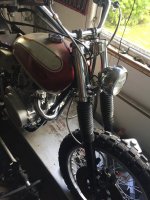
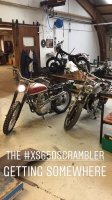
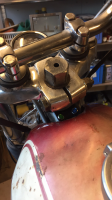
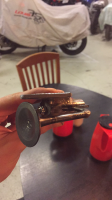
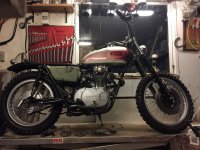
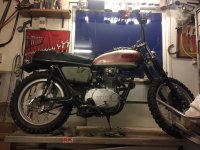
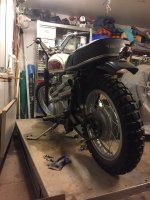
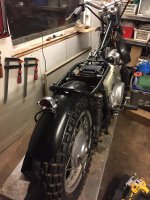
The new life of a 72' XS II - Build thread

Still going with the high exhaust, though I would love to run it straight through without a muffler, my ears just can’t handle that - my xs400 has proven that.

So I’m going for a 2-1 style, I know it divides the crowd, some hate it others love it, but it saves weight and looks great.
A few of my inspirations has this as well:
View attachment 172207 View attachment 172208 View attachment 172209

I think it looks nice, it’s not as if you’re doing factory restoration. Rock on brother! :cool:
 
They look good to me! Would have been a nice option for my ride-to-work XS650/Sidecar outfit! Well except that system would have probably cost more than the rest of the outfit!

Now if someone has a functional but some what ratty version of that exhaust for cheap I might be tempted to use it if or when I get around to putting together my next XS650 outfit.
 
Haven’t really had any time on hand, but I managed to get a few things done ✅

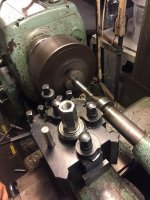
I used the lathe to cut the front axle to the proper spec:
A7DCEA54-1170-42BB-8543-669B96A9F821.jpeg
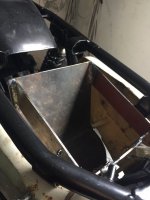
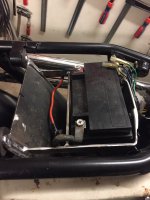
Fabricated a battery box, just need to finish the mounting points and weld a center rod to hold the battery (plus rubber around the battery and at the mounting points).
89201C9E-0B86-47C3-94CB-509520A333DE.jpeg
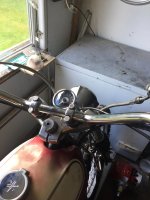
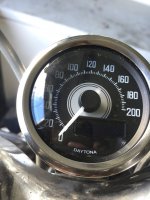
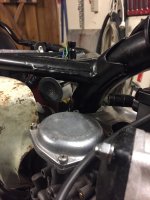
I fabricated a temporary bracket for the new speedo and mounted it - looks stellar. Plus routed the new stainless braided brake line.
B235DBAF-18C0-4FF3-BD0A-2955F49C6CB5.jpeg 525BA569-AE2B-4BF9-8C68-959800783CAE.jpeg 99E78F2A-3A92-4959-A992-B129A6C90B9D.jpeg
I love how simple the wiring looks up front, not the easiest task to hide stuff under the tank, with the Boyer ignition and wires but satisfying.

First exam is on Wednesday, so hopefully I’ll have time to finish it soon.
 
I finally finished my math course and got accepted into university - time to wrench.
I spent a fair while figuring out the wiring for the electric starter, still not quite sure I got it right, as my starter-motor might have kicked the bucket, when it’s connected the safety relay engages, when it’s not the starter relay clicks. I’ll have to check that part through.
EB281949-1412-4EFA-8CC9-26C36BB49C58.jpeg
Anyway I mostly finished wiring so I figured it was time to start her up, measuring 145 psi compression on both cylinders and a very strong spark with the boyers ignition.
I struggled a fair bit getting a few pops out kicking her, and adjusting timing & air/fuel not affecting it much. BUT then last night at 1am I got the idea to physically hold up the slides, like I had to do at my compression test, and bam!! Started up second kick!! I quickly called for one of the other guys in the garage community using the vapor blaster (yes, we wrench at all odd times of the day) to film a clip and get a huge high five, here’s the third startup this bike (Bella) have had in over thirty years:

Now I just need to figure out why the slides aren’t moving, possibly clogged somewhere or the diaphragm could be leaking.
 
Progress
I figured out the carbs, I was in a hurry when I assembled them and put the needle through the plastic shim in the slide instead of under, fixed it and now she runs beautifully-ish. ignition adjusted, carbs had a not perfect adjustment but runs pretty good - starts first kick every time.
Sadly she burns a bit of oil, so I probably installed a seal wrong at the valves or I forgot the oil gasket at the assembly between head and cylinders, though I’m sure I remembered - better check again for good measure
 
It’s been a second, I moved to a new city, started studying my engineer degree and my bikes are in a different city - therefore there hasn’t been much time to wrench, but first semester is done and while waiting for the next semester, which is sadly purely online, I’ve made some progress:

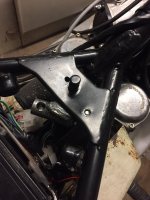
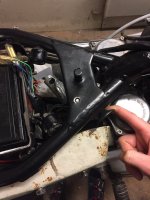
I designed a housing for some LED control lights (long light and neutral), that’s hidden under the tank up against the steering stem, and 3D printed it;
5EEEB8DA-237E-4C61-87E3-55DEABCB5959.png AD88C30A-87CC-4A35-824E-3097706EC7B1.png

I spent some time shortening the wiring loom, as the wiring is no longer going into the headlight, boring job but happy to see I still remembered most of the color coordinated wires. Found out the neutral switch probably isn’t working, need to check that further.
Bought a new rear fender, made the battery tray I fabricated, a bit neater.

Spent the first half the day today skiing in a forest in my parents backyard, then went to my garage community and fabricated a spring actuated seat latch, with a Yamaha valve as the pull lever.
4FD6EA7B-3117-4020-A996-18F0C5EBBAF3.png
Hopefully I have time to mount the rear fender and latch tomorrow, and then make a seat pan out of fiberglass, only time will tell. ✌️
 
Sadly I won’t be able to post as regularly as I would like, as next semester starts monday, and away my time will go.

But here’s a few pics of the current state, ish. (not the new fender, and making a new smaller seat, though it is beautiful, but doesn't fit with the smaller head-/ rear-light, speedo and overall minimalistic look)
D4F93DBB-1CFC-40E4-ADFA-410CD43C1880.jpeg 2FE915ED-E33C-4F96-B3FC-65F510346AC9.jpeg 2B139651-C128-4C0B-8DEB-89989387002A.jpeg
I’ll try to post a few more pictures in a few days, if everything goes as planned ✌️
 
Been a busy weekend(not for the bike), hopefully I’ll get to make the seat pan in the following days.

Mounted new rear fender.
83C3EAF8-31E9-4FC8-BD6C-03F47B7DC7C8.jpeg E05E3BD6-C4D9-49DF-81FE-9B8F44FB015B.jpeg
Finished the seat latch concept.
99EF973D-A23C-4BCF-8F6C-B9E62394B1C6.jpeg 464E92F2-3CF1-4C6D-838B-FBFD294FF4E7.jpeg A2A9CDC2-0C9A-4E97-9119-6FFBB3A7AD00.jpeg
Here’s a pic of the battery tray I made, plenty of room for some tools back there.
0BDCE55A-FA75-48BF-9153-12F40BA267A9.jpeg
And quick video:
Not the final front fender, but money is tighter than my time schedule thanks to uni ✌️At least it’s a free education - Scandinavia all the way.
 
Last edited:
Love the seat latch handle. View attachment 183933
I actually made that by coincidence! I needed some type of handle, but I originally drew the design as just either a screw or piece of flat steel to pull, but then found the old valve as I was looking for a spring with the proper spring-rate for the mechanism - figured I might as well use that as a handle.
 
Looking good.

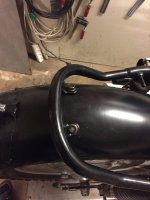
Hate to throw cold water on anything, my concern is the rear guard mounting.

All rear guards have cracking problems. On the early70-73 guards they would crack where the Bolt from the loop stay fitted and held up the guard.......later ones, (standards), around the taillight/no-plate, bracket mounts where the bolts went through the guard......... the early Specials where the taillight and No plate light mounted to the rear of the Guard and on the edge of the very back end of the guard......later specials would still crack around the no plate light although it was way lighter than the earlier Specials........all these mounting points also had rubber dampers as well.........some one did say these bikes have a vibration problem.:whistle:

All guards from the Standards and specials fro 74-83 had extra bracing around the bolt holes where the tail lights and no plate light bolts went into the guard and yet they still cracked. The guards were mounted on each side to the frame and these mounting points were heavily strengthened to stop the guard from cracking.

Here is my point........your 2 bolts off the frame need to have extra bracing under the guard and on top of the guard. Ideally some rubber dampers as well. I think that it will crack around those two bolts real quick and if it does happen on a ride it could be quite dangerous having the back of the guard jamming into the tyre.
I'll get some pics of the bracing on the guards i have mentioned so you can see what i am talking about

All good, thanks for your concern! I was planning to make a brace shaped to the inside of the guard, to reinforce that area, as well as mount the front of the fender to the rubber mounted battery tray. I was hoping some o-rings on each side of the fender would be enough, but perhaps not?
 
Slow progress.. new semester has officially begun.
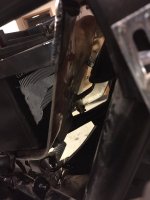
Made the third mount for rear mud guard.
F6B1F304-F2BB-4D44-8D98-0F719CC33FE5.jpeg
It’s hard to see, but it’s really just a bit of plate I cut out, bent and welded a screw onto one end and welded the other end to the battery tray.
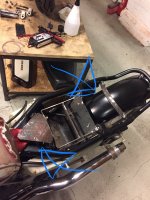
Just need to cut and bent a plate to fit inside the fender, under the two rear mounts and then weld the nuts to it - then the rear fender should be ready to make the seat pan directly on top (epoxy and glassfiber).
 
Had a few hours available tonight, after a long day studying. Fabricated the mounts for the seat, u fork to lock it in the back and the plate (with the rod for the locking mechanism welded underneath) for the front latch.
E67BBF4C-12D7-4D91-A5A7-5A43B7A4CB6F.jpeg
Tomorrow I’ll sandblast and powdercoat the brackets and the battery tray - if I have enough time and energy I’ll do the seat pan.
 
Last edited:
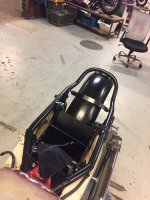
I did the seat pan yesterday, 4 layers of fiberglass with extra reinforcement at the mounts - hopefully it’ll be enough, if not I guess I’ll have to add more ‍♂️
5DA5468E-D02D-46D5-A617-92A02BB879A1.jpeg 51B1D5F1-4AE6-455F-8723-90FBA5D2EFE3.jpeg FC94EE50-FDB5-46EA-B5D9-81D7AFE2C752.jpeg
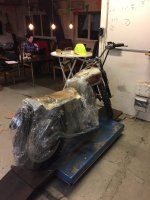
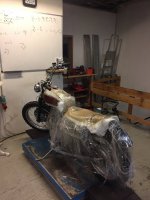
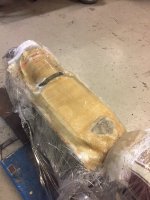
I bought a new roll of foil to cover the bike, so I figured I might as well go all in and just use a shit ton to make sure the bike didn’t get covered
 
Back
Top