The Patience build.

Yea, I didn’t think so. It’s like that on both sides. FA01B9F2-7914-4862-A76C-1AF4897B6EB2.jpeg
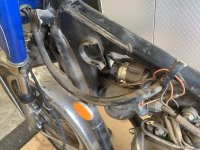
So do I assume it should be tucked up tight inside the tank tunnel? Not that I’m in a hurry, lol that won’t be a problem for a while.
 
I also spent an hour on the phone with a tech for Chamberlain Door. We were having an issue setting the limits so I had to call and go through the motions when Inalready had suspicions to the problem. Both openers were giving us the same issues and I had noted the serial #’s which were 8 digits off and the same manufacturing date. So yep, getting new limit circuits shipped out and should have them next week. Guess that wasn’t a good day at the factory…..
Did make it to what I was shooting for.529CFC06-B5EA-479F-B7C0-4F98B0807046.jpegE953FA29-9294-4761-ABB0-EE4EB6386DA9.jpeg
Tomorrow should see the front end apart and start the rebuild/refurb.
 
I also noticed how the wiring harness was ran under the tank. I haven’t looked elsewhere yet but is it supposed to hang down like this?

When I tore down my XS2 the wiring harness was routed like this. It is rather long and they had it looped up and over the steering head lock.
11BF9F7B-BE79-4DDC-A043-19B1F26A1FAB.jpeg
And this is how it looks now that I’ve finished it. I also secured it with a clamp just to keep it from flopping.
4C14734D-A787-484B-83CC-7D4C4820CEE0.jpeg 19A68948-AB93-4809-B166-7E6E50E1E203.jpeg
 
Both sides of the harness seem to sag and work their way out of the headlight bucket over time. I install what I call a harness "sling" to hold these two harness sections up in place. Yamaha was kind enough to provide a small hole in each side of the steering neck gusset plates and this is perfect to thread the "sling" through. I use two 8" cable ties, one fed through the holes from each side. They are looped around the harness and snugged up to lift and hold it where I want it. I also install a grommet in the hole so it's sharp edges don't cut the cable ties .....

4j8N7CY.jpg


Here's the other side, an earlier pic of my 1st install with no grommet. It only lasted a year or so before the cable ties broke, lol .....

AKNpZnn.jpg
 
All apart and ready to clean things up. I think my best approach at this point is start at ground level and work my way up. I only have a couple weeks before I have to go back home(wifey duties) but that will give me enough time to get some things cleaned up and painted.B393686A-6E0C-4568-AEDF-07A4EB8FC8E3.jpegEDEF6949-DBEA-4BF9-A00C-FD8783650027.jpeg
 
My progress seems to depend on how many variables are thrown at me. Went like hell all morning then bro-in-law showed up so we did the hang out thing for a couple of hours and gave my Dad crap while he tried to fab up a soda blaster nozzle to use on the carbs. Went to start my Bobber and kicked until I was dripping wet! WTF, grabbed a meter and the battery had 3 VDC lol ordering a new one from Amazon tomorrow.
 
Started on the wheels today and this will be the boring, dragged out seeming part of this build. I truly grasp everything when I get into the individual components of the bike. What I mean is I can actually see how F’d up something is when I break it down lol. The wheels are structurally sound but they look like ass. I’m going to be spending some time cleaning and polishing.62D246E7-13A7-4660-8A1C-2DC740C30993.jpeg The old tires were hard as a rock of course but I had this little jewel to help me break the bead.image.jpg
Back tire came off with no issues but I had to use a hacksaw on the front one.285CF007-CBD4-47FC-963D-AA239E13F29E.jpeg
While I pondered that course I put all my bags of goodies together.9701D166-EEDC-46AF-AEB3-0F3FE53B0525.jpeg
 
Even after a good cleaning they look like crap. Anybody want to talk me out of replacing the spokes and polishing everything?image.jpg
 
Nope, I'm not going to talk you out of that wheel work, it needs to be done, lol. I recommend you use stainless spokes. The cad ones only look good for a few years. Best place to get them is XS650Direct out of Canada, they have the best price. A tip on your headlight bucket - paint the interior white or some light color, helps to see all the wires and their colors. It's all hidden so no need to get fancy. You can just brush paint it .....

21ESiHu.jpg
 
5T that’s a good suggestion thank you. I picked up some Walnut shells to see if I can clean them up to get my best case.the Ancient one came up with this to soda blast the carbs. May as well see how it works with fine Walnut shell.6F31396B-D5DD-4624-B016-91A8506FD43E.jpegE45D11A3-2001-4063-AA6F-3A4737B27E2B.jpeg
 
Getting a plan together for the wheels but in the meantime cleaned and prepped the frame. I’ll leave it in the fan all night to get rid of any moisture from the wash job I gave it after the wire wheel/cup brush/wire brush/sandpaper treatment.image.jpg
 
Back
Top