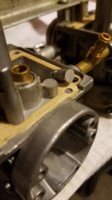
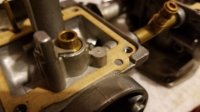
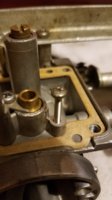
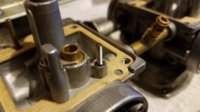
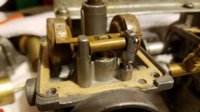
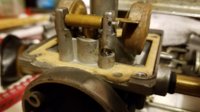
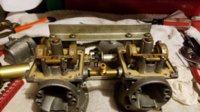
So would it be safe to say that I could buy some sort of aluminum brazing rod, a propane torch, and then solder this thing back together after cleaning the two surfaces?

Hi Jax,
unless you are a qualified welder with lots of experience working with Zinc-based alloys the 4th or 5th carb body you try to braze won't just melt into a blob and the 10th might even be a successful repair.
Try a mechanical fix. File the post stub-end flat and drill and tap it M4. Take a length of M4 threaded rod, pound the end flat and drill it through to fit the float pivot pin. Screw the new post end into the hole.
 
I am a bit surprised the JB weld didn't hold. Which version did you use? The Original JB or the JB Kwik?
I have found the original to be much superior, I have even drilled an tapped it for the hold down nut on a facet cutting machine.
But you need to give it a couple days to fully cure then it turns into something close to a Rock. The Kwik has a tendency to flake and crack when
put under heat and pressure. I also would have thought there would be another 2 part Industrial Epoxy.
Please let us know how it turned out.
 
I was fortunately very lucky with the location of my break......

My approach to a break like your one would be to square up the metal on both the base and the top section of the post. Then drill and tap both sections and insert a small brass stud. This will allow the post to be screwed back together and adjusted to the correct height. A petrol resistant locking compound would probably be needed, or a 1mm pin pressed through each section of the post to lock the stud. However, initially I would gamble on the float pin locking everything in place.

Whatever your final decision, be very careful, you may only have one chance at a repair like this - Good Luck.

Regarding a tape size: I would go for 2mm less than the post diameter because the alloy is quite soft.
 
Apologies again - The idea I propose above is flawed. If the stud is threaded at both ends it is not possible to get the height exactly right. This is because the top portion of the post must take a specific orientation. Adjustments would be limited to the pitch of the thread or maybe a half of the pitch. If my idea were to be pursued then the stud should only be threaded at one end i.e. the end fitting the top portion. The bottom of the stud would just sit in a hole drilled in the base and then be locked into its final position and height with a petrol resistant adhesive, or a pin.

That's just my thoughts and I realise that others have offered very good alternative ideas above. Sorry for messing up this thread a bit.
 
I am a bit surprised the JB weld didn't hold. Which version did you use? The Original JB or the JB Kwik?
I have found the original to be much superior, I have even drilled an tapped it for the hold down nut on a facet cutting machine.
But you need to give it a couple days to fully cure then it turns into something close to a Rock. The Kwik has a tendency to flake and crack when
put under heat and pressure. I also would have thought there would be another 2 part Industrial Epoxy.
Please let us know how it turned out.
I'm pretty sure I used the original JB wield when I first tried to fix this problem and let it cure for a couple of days till it turned rock solid. Never sanded the excess off or anything and when I took the carb back apart the stuff was just crumbling.
 
I looked at the back of an unopened JB Weld package and it said impervious to: (list of fluids including gasoline) but it said "When completely cured"
I am wondering if you had,(1) not let it cure long enough,or (2) had the mix of the 2 components unequal (I have done this), or used JB Kwik Weld
instead of the original formula. I fixed an Engine intake manifold that had been dropped and a piece broken out, gas in vapor form did not bother it.
I would try again making sure you clean the parts with a toothbrush and make sure it is completely dry, then be careful to use Orig formula, and squeeze
the 2 parts side by side so they are exact. When you epoxy it use a clamp to squeeze down the parts, then coat a band around the crack to seal it.
it 48 hrs before assembling the floats and bowl. JB Kwik 5 min. weld is ok for fixing a coffee cup but isn't nearly as strong as the original, and I found exactly as you stated it tends to flake.
Good luck.
Cousin Larry
 
Somethings to consider if using the "reinforcing tube" method.
- Very little of the JB-weld is exposed to fuel.
- An enormous area of the broken part is bonded.
- The cracked zone is buried, away from fuel.
 
2m I can't for the life of me see how that could possibly fail. A key would be to make sure the height
is the same or within a mm so the float isn't working crookedly.
 
Well, you could do it in two steps. Glue it back together, with the float pin installed for alignment, just like the original fix. Then, after it's cured, paint it and the inside of the tube with the JB-weld and slide the tube over it. Wipe off the excess...
 
Okay so I got some free time and took some of your guys advice and came up with a fix for this carb post. I liked the idea of a mechanical fix such as drilling and tapping a bolt into the carb, but didn't want to have to drill a hole through that bolt to make a new hole for the pin, plus the size of the bolt needed would of made it more difficult to center the drilling and tapping for the bolt.
So what I did was file down both ends of the post where it was broken.
20160921_182849.jpg
Then center punched both ends.
20160921_183058.jpg
Then drilled and tapped a m3 bolt.
20160921_184815.jpg
Cut off the head of the m3 and cleaned up the threads.
20160921_185638.jpg
Then screwed the other end of the post onto the bolt and figured out the height needed to line up the pin. Then took it all apart and covered the threads in JB weld (made for sure the mixture was right this time) and made sure the pin lined up while making sure the float went up and down freely.
20160921_195036.jpg 20160921_195043.jpg
This fix I think is going to work out pretty nicely and was fairly easy compared to some of the other solutions discussed in this thread. Thanks to everyone in this thread for the suggestions and input!
Bonus picture of carb almost all the way back together
20160921_195047.jpg
 
Very nicely done! The great thing about this place is the care members give to one another. I hope and am glad if some of my suggestions have been of a little help. I am also using the vast knowledge, (see Thread one step forward), 2M and Parallel have been a great help to me with my own carb issue.
I have never seen another web site with a better "Scratch my back, and I'll scratch yours" mentality.
But even if the JB somehow were to fail, you could always cut a bit more off the posts and lock them down with 2 nuts, since it is only holding the Float it does not need to be that strong to work.
Again, I give my compliments to you and your Mechanical skill, this Thread may be a candidate for a sticky for others that (I assume), have a post broken off while trying to loosen a Needle Valve seat with a wrench instead of a socket.
 
Ah yes I can see that happening, my first thought was what I just about did trying to pull the seat when I didn't have the correct socket.
 
I had the same problem but it broke near the top.
The repair I came up with was not difficult.
I cut a short piece of coppper tubing (1/8¨) that I pressed and squeezed onto the broken post. Then it was just a matter of drilling a hole in the copper tube in the right place for the float pin. It has sood the test of time for many years now.
See pic.
I also am having the same problem with the idle circuit / pilot jet. I had the carbs apart numerous times, cleaned the orifices, and it still only idles on one cylinder.
Let me know if you find a fix for that issue.
Good Luck
IMG_0482.JPG


km
 
Kirk do you know if the cylinder that won't idle is rich or lean at idle ?
I'd start by checking the compression on both cylinders for a comparison they should be close . You may have a sticking or non seating valve .
Resetting the valves would be a wise precaution and checking the throttle valves are in sync

You might check /replace the choke body/assembly gaskets they frequently get overlooked and can be a source of unmetered additional air .

I applied a little Threebond to the gaskets and dressed the choke body faces on some wet n dry to make sure I got a good seal. The gasket faces are very narrow so be careful not to block the air and gas channels.

I've not tried it but I imagine it must be possible to disconnect the choke linkage and try applying a little choke individually to the non idling cylinder to see if it picks up (lean) or it bogs (rich) . Choke can sometimes be a useful diagnostic tool because it doesn't alter any jets or other settings and gives you a separate fuel supply for testing.
 
Last edited:
For the record, for all the talk of tapping the pin out with a hammer, the easiest and safest way to get the pin out on a BS34 is put a wire cutters under the head of the pin and rock the cutters backward to pull the pin out. Just squeezing the cutters under the head will do most of the job. You don't cut the pin, of course. When you put it back, it just needs to be barely tight.
 
Last edited:
Back
Top