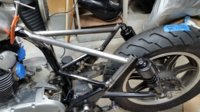
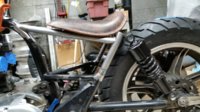
What have you done to your XS today?

oh 2M that makes perfect sense ! it's a thingamgiggy with an off center hole !..... now the big question is what's it fer ?
hehehehhe ! some more hints ?
.....
Bob........
 
i know it'a pre curser for a spin on oil-filter !
......everyone wants a spin on oil filter that is out of the way....<grin>
Bob..........
 
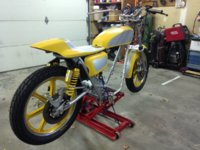
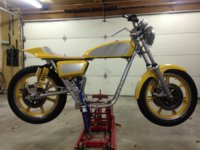
Finally got all the engine castings back from the ceramic coater and the body work picked up from the painter. It's only in base coat so it looks like satin. It has a lock down clear on it so I don't have to hurry to get it lettered and striped. Our local premium pin striper burned out and quit so I am now trying to line up one that is about 80 miles away. Once thats done we will get it cleared and finished up.Were headed to Arizona for March so I will get back after this in April. IMG_1668.JPGIMG_1666.JPG
 
Doug79
You can do the pinstriping yourself and have it more of your creation ! ....the automotive paint stores sell pin striping and decorations
that really look good after about 5 coats of clear..... it comes as a thin tape and anyone can put it on.... I've done it before and the results were supprisingly good and for this old rancher, if I can do it I know darn well you can ! LOL
just letting you know !
that frame is looking really good .... needs an engine though because it looks kind'a vacant !
nice build !
....
Bob........


!
 
Being a person who has no delusions about my abilities, I am going to leave it to the pros. Way too much time and money spent to get it this far for me to screw it up trying to save a few bucks.
 
Replaced the old solid front disk with an XS1100 drilled disk. I'm either going to leave the center section raw as is or paint it gold, Have not decided. Now I need to upgrade the rear.
Front rotor.JPG
 
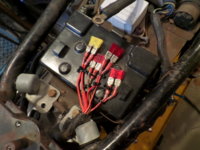
Replaced the glass fuses on my '80 Special with up to date ATC fuses with a twist -
The usual way of patching in ATC fuse pigtails so often results in lots of wires all in a bunch under the seat looking ratty.
The red spade terminals are an exact fit to the normal size ATC fuses, so I crimped them on and isolated them with heat shrink tubing (only had clear in stock). Drilled 1/8th " holes in the old fuse holder to tie them into place with zip ties to keep everything tidy and to make things more durable.
An open question is whether this minimal construction will be sturdy enough for regular use.
 

Attachments

  • SAM_6652.JPG
    SAM_6652.JPG
    327.4 KB · Views: 207
Finally got all the engine castings back from the ceramic coater and the body work picked up from the painter. It's only in base coat so it looks like satin. It has a lock down clear on it so I don't have to hurry to get it lettered and striped. Our local premium pin striper burned out and quit so I am now trying to line up one that is about 80 miles away. Once thats done we will get it cleared and finished up.Were headed to Arizona for March so I will get back after this in April.View attachment 113697View attachment 113698

Looking good there Doug, and Arizona says welcome!
 
hay lakeview !
it wouldn't hurt to wrap black electrical tape around those bare connectors to prevent shorts....
I passed black tape between the female spades as well just incase they tried to touch once it's all taped together with black tape then tie it down
and your in like flynn ! .... mine don't look as nice and tidy as yours does that's for sure but I tuck them up under the gas tank mount bolt and can't even see them ! .....getting them out is another story....hehehehhe !
Bob....
 
Bob: clear shrink tubing in place. Wish I woulda had some black for better visuals!
 
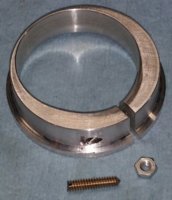
... prototyping a rotary vane pump for the XS...

Hey, hotdog!
Sorry, no. But, youse guyz have definitely been a'thinkin'.

Progress with this thing has had some design setbacks. AND, a skunk crawled under my barn, died, and stunk-up the place.

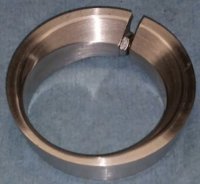
It's still quite incomplete, but, ok, a couple more teaser pics.

Apart:
20180216_015641.jpg

Assembled:
20180216_031956.jpg

It's about 2" in diameter...
 
LOL a shim for cranks that have slipped ? HAHAHHAA !
that way the main gear on the crank will still turn true ???? nah..... that's a bandaid and your not a bandaid guy !
nice work though ... damm man I wish I could do that ! LOL
Bob...........
 
The screw/nut acts as an expander, but can't be accessed with anything around the unit, the offset center to either let you get it next to an obstruction or allow the band to flex more easily. There's nothing to apply a turning force to so it doesn't rotate. Installing/driving a seal is my best guess so far.
Bob; watch for a thread I will start soon, it should be of interest to you.
 
Last edited:
Back
Top