What have you done to your XS today?

Okay, you guys ready for a good laugh? I mean a real belly splitter. If you've read any of my other posts when attempting to fix something, or some of the ignorant questions I have asked you probably won't be surprised by this. So, one of the two little screws holding the face plate on the tachometer had vibrated loose and I had recently read on the forums here how to take the bezel off to get to it. So I carefully remove the windshield so I can get to the nuts holding the tach to the instrument bracket, remove the headlamp so I can unplug the wires and then remove the tach. Now time to get that bezel off. Well I thought I understood, but after prying up the entire FRONT rim of the bezel I realized I was supposed to be working on the back rim. So another 30 minutes later and I have the bezel off and found the faceplate screw and put it back in and snugged the other one up as well. Took me another 20 minutes to get the bezel back on and then 15 more minutes to reassemble everything. I now have 2.5 hours invested and a mangled tach to show for my efforts. BUT at least my tach will be working again until I can buy a replacement. Cranked Lucy up and the tach needle doesn't move. WHAT? How can that be? Upon closer examination I see that I left the needle BELOW the little stop post so now it can't move.

Guess who is not going to remove the bezel again? Unless it will hurt the tach cable to have it hooked up and the needle being blocked from moving. Will it hurt it? Guess who is now searching for a replacement tach?

By the way, anyone got an old tach that will work on my '81 xs650? I'll be happy to pay the going rate.

View attachment 137934

Well, I guess you’ll be able to go down the road in silence while getting really good fuel economy now that your engine won’t be visibly running....

Hmmmm....perhaps there is something wrong with my logic there.....
 
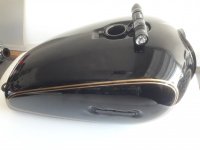
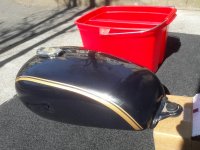
Wondering how many guys looking all around inside their fuel tank drop the flashlight on the fuel tank ? Yup, nother dent :lmao:
Shaking this other tank with polishing stones & solvent inside. Whew, lot of exercise this afternoon
o_O
 

Attachments

  • 20190329_142535.jpg
    20190329_142535.jpg
    90.4 KB · Views: 157
  • 20190329_142728.jpg
    20190329_142728.jpg
    218.8 KB · Views: 180
How about Alt. Rotors? I found one for $30 delivered to the house on evilbay. Asked the sellers to ohm it. They did and it was good. It came in the mail Wed and I checked it again and it was truly a good rotor. I just installed it and cranked the SG up and got 14.1V ! I'll finish checking the wiring in the headlight and button that up and probably go for an extended ride tomorrow. Jim, I will install your rebuilt one after it comes in and keep this OEM one as a spare.
 
Oh dang, Gary, just figured out your little quote. Nice brakes! Whats that rotor from? I miss your old avatar, that was a good angle
 
Okay, you guys ready for a good laugh? I mean a real belly splitter. If you've read any of my other posts when attempting to fix something, or some of the ignorant questions I have asked you probably won't be surprised by this. So, one of the two little screws holding the face plate on the tachometer had vibrated loose and I had recently read on the forums here how to take the bezel off to get to it. So I carefully remove the windshield so I can get to the nuts holding the tach to the instrument bracket, remove the headlamp so I can unplug the wires and then remove the tach. Now time to get that bezel off. Well I thought I understood, but after prying up the entire FRONT rim of the bezel I realized I was supposed to be working on the back rim. So another 30 minutes later and I have the bezel off and found the faceplate screw and put it back in and snugged the other one up as well. Took me another 20 minutes to get the bezel back on and then 15 more minutes to reassemble everything. I now have 2.5 hours invested and a mangled tach to show for my efforts. BUT at least my tach will be working again until I can buy a replacement. Cranked Lucy up and the tach needle doesn't move. WHAT? How can that be? Upon closer examination I see that I left the needle BELOW the little stop post so now it can't move.

Guess who is not going to remove the bezel again? Unless it will hurt the tach cable to have it hooked up and the needle being blocked from moving. Will it hurt it? Guess who is now searching for a replacement tach?

By the way, anyone got an old tach that will work on my '81 xs650? I'll be happy to pay the going rate.

View attachment 137934
The other day I drained my oil, swapped in fresh filters, cleaned up my sump plate, fresh gasket, buttoned everything up and proceeded to pour 2 quarts of fresh oil right onto the garage floor, all the while staring blankly at my two drain plugs, which were sitting on my shop table
 
The other day I drained my oil, swapped in fresh filters, cleaned up my sump plate, fresh gasket, buttoned everything up and proceeded to pour 2 quarts of fresh oil right onto the garage floor, all the while staring blankly at my two drain plugs, which were sitting on my shop table
:laughing: :bow::laugh::bow2::laughing:

Running the motor with a valve cover left open "on the other side" will do a better job of thoroughly coating everyF'n thing in the shop with oil.....
 
Today I machined 2 alloy sleeves for that step in the exhaust ports, as I am using 38 mm OD/ 35 mm ID single wall pipes. I ended up with just above 39 mm OD, 35 mm ID, bored 1 mm offset. So thickness is 1 mm at the bottom and 3 mm at the top. And around 14 mm long. With a slight interference fit, so they had to be tapped in. Hopefully this will help a little bit power wise.
 
Took my bike on a couple kms run to see if the new 35mm HD fork springs and old BMW rear shocks have been a good upgrade and they have. :thumbsup: real smooth drive and not much nose dive upon braking. Still too much snow/salty runoff on the roads but in a few weeks will be good to go! :D
 
Today I machined 2 alloy sleeves for that step in the exhaust ports, as I am using 38 mm OD/ 35 mm ID single wall pipes. I ended up with just above 39 mm OD, 35 mm ID, bored 1 mm offset. So thickness is 1 mm at the bottom and 3 mm at the top. And around 14 mm long. With a slight interference fit, so they had to be tapped in. Hopefully this will help a little bit power wise.
pics!
 
Took my bike on a couple kms run to see if the new 35mm HD fork springs and old BMW rear shocks have been a good upgrade and they have. :thumbsup: real smooth drive and not much nose dive upon braking. Still too much snow/salty runoff on the roads but in a few weeks will be good to go! :D
What’s the story with the beemer shocks? Same length or shorter? Same 10mm mounting holes? I’ve been looking at old sportster shocks as a cost effective alternative but I’d imagine r series shocks would be alittle more forgiving
 
Okay, you guys ready for a good laugh? I mean a real belly splitter. If you've read any of my other posts when attempting to fix something, or some of the ignorant questions I have asked you probably won't be surprised by this. So, one of the two little screws holding the face plate on the tachometer had vibrated loose and I had recently read on the forums here how to take the bezel off to get to it. So I carefully remove the windshield so I can get to the nuts holding the tach to the instrument bracket, remove the headlamp so I can unplug the wires and then remove the tach. Now time to get that bezel off. Well I thought I understood, but after prying up the entire FRONT rim of the bezel I realized I was supposed to be working on the back rim. So another 30 minutes later and I have the bezel off and found the faceplate screw and put it back in and snugged the other one up as well. Took me another 20 minutes to get the bezel back on and then 15 more minutes to reassemble everything. I now have 2.5 hours invested and a mangled tach to show for my efforts. BUT at least my tach will be working again until I can buy a replacement. Cranked Lucy up and the tach needle doesn't move. WHAT? How can that be? Upon closer examination I see that I left the needle BELOW the little stop post so now it can't move.

Guess who is not going to remove the bezel again? Unless it will hurt the tach cable to have it hooked up and the needle being blocked from moving. Will it hurt it? Guess who is now searching for a replacement tach?

By the way, anyone got an old tach that will work on my '81 xs650? I'll be happy to pay the going rate.

View attachment 137934

I say you get the award for gentle hands...........how you didn't break the glass is beyond me...........Gauge looks nice......maybe look for and buy a dud rev counter and replace the bezel on your good gauge........even if you buy a good one at least you have a good spare, if it breaks down

http://www.xs650.com/threads/70-83-...damper-replacement-replace-face-decals.52013/
 
Upon closer examination I see that I left the needle BELOW the little stop post so now it can't move.
Guess who is not going to remove the bezel again? Unless it will hurt the tach cable to have it hooked up and the needle being blocked from moving. Will it hurt it? Guess who is now searching for a replacement tach?
By the way, anyone got an old tach that will work on my '81 xs650? I'll be happy to pay the going rate.
View attachment 137934

Hi ramblin,
dontcha just want to beat on the cheapskate who dreamed up coining the bezel on instead of having it threaded into place?
And your tach face ain't even sun-faded either so it's well worth the effort of re-prying the bezel now that you've learned the trick of it.
Rather than prying up the bezel's rear flange to access my speedo's loose face I cut it into two C-shapes with a thin Dremel wheel and pulled them off sideways. Stuck 'em back again with epoxy. Warning! That trick only works once.
BTW, until you decide on fix vs replace, pull the tach drive cable inner.
 
dscn3433-jpg.132893

Wrap some electric tape round the bezel then snug on a hose clamp keeps from marring, scratching it. Don't try to straighten all at once, spend the time, take a couple trips around slowly standing up the edge.
 
Last edited:
What’s the story with the beemer shocks? Same length or shorter? Same 10mm mounting holes? I’ve been looking at old sportster shocks as a cost effective alternative but I’d imagine r series shocks would be alittle more forgiving

I bought a bunch of parts from a buddy and he had them on his bench. I took them home and installed them. I can measure them but seems they are over 13". The bottom fit the swingarm, but the top had to change out the rubber bushings and inserts. I got the preload set to max and they ride quite nice.
 
I bought a bunch of parts from a buddy and he had them on his bench. I took them home and installed them. I can measure them but seems they are over 13". The bottom fit the swingarm, but the top had to change out the rubber bushings and inserts. I got the preload set to max and they ride quite nice.
Thanks for the information! I thought the bmw shocks were longer, the ones I was looking at were in the 13”ish range, but thought maybe you’d stumbled upon some shorter ones. I’m looking to lower, but only if I can do so cost-effectively. Since the emgo’s are notoriously stiff I think I’ll end up with somethin off a used sporty (and save some $$ in the process) btw is that your scoot in your bio picture? That thing is mean!
 
dscn3433-jpg.132893

Wrap some electric tape round the bezel then snug on a hose clamp keeps from marring, scratching it. Don't try to straighten all at once, spend the time, take a couple trips around slowly standing up the edge.

Hi Gary,
you didn't mention the custom-ground slip-joint pliers shown in the photo.
Another blindingly obvious customization once you've seen it, eh?
 
Back
Top