What have you done to your XS today?

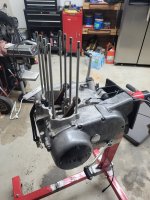
Back to the bike. Idle is hunting. Right cyl points solid as a rock, timing dead in the middle and running 22 degrees on the 4 cylinder scale. Left side advanced and jumping around like a crotch full of fire ants! Had them hanging on their leader. Replaced with a Yamaha set. Gapped at .010, caught the light between the timing marks, locked em' down and fired it up. Dwell was 22 degrees, steady as a clock. (Lucky puppy) Re-checked right and good to go. Ordered a push pull gage, 0 to 2000 grams. I've got OEM, K&S ( china) and some branded China points to check! Book say points should open between 700 and 800 grams pressure. At the least you can match up a pair that will break the same!
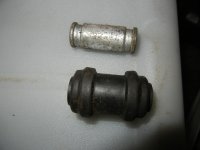
Still don't sound just right. May have an air leak? Replacing the Pea-shooters had nothing to do with the points but it may the mix.
Thu
PS Yamaha Service Manual, Mods 74-77 XS650 pg. 2-21 Para 14. States to 'Bend the advance weight stoppers'!
Clymer Yamaha pg. 20 Para. 9. States "DO NOT bend the advance weight stops to change the amount of advance." "The stops will snap off!"
You do ya' trust? We know not to bend them! :rock:
 
Last edited:
Ah, the joys of a points ignition, lol. I stuck with them for the first few years I owned my '78. I was used to and familiar with points after using them on my old BMWs for many years. But, that BMW system is nicer, just a single points set-up and very well made. This Yamaha dual points set-up is much more complicated to get set right. And now it's getting harder to find quality points. Back while I still had mine in use, MikesXS sold the quality Daiichi points, but not any more.

Glad to see you using a dwell meter. It makes getting the gaps perfect (and matched) a bit easier at least.
 
Hey, 5T.
Yeah. Tough decision. Old Biker had an Elect Iggy. It jumped all over so he went back with points. Steady freddy. So I suppose you can install the Elect Iggy and with the timing marks dead on, you can rev to 3K or above and the max advance will fall, 3mm to either side of the mark?

I do happen to have Hugh's Hand Built, full enchilada, about $600 bucks worth. But... I'm teetering on the edge of an Installation. If it ain't broke and all that.
 
I eventually got a Pamco and never looked back. One thing I did while the points were still in there to calm down the jumping around of the marks was to shim out the excess lateral freeplay in the advance rod. Mine had quite a bit of end play, like .015" or .016". When you pushed/pulled on the end of the advance rod, you could easily see it move in and out of the cam. If you pulled out on it and let it go, it would snap back in with an audible "click". I thought this might be adding topend noise or "clatter" so that's why I shimmed it. It really didn't do anything as far as noise goes but it did seem to stabilize the timing marks some so they didn't jump around so much any more. I shimmed the endplay down to about .005" or .006". I did so by adding shims on the points side under the points cam. I left them there when I switched to the Pamco.
 
That's interesting. I totally went through the advance unit making sure it was as factory new as I could make it. Seals and lube but never gave any thought to the end play. Pamco. Back when I was building her up Hugh's was getting good reviews so I went with that. Dang near plug and play.

Pamco's are out of stock

Now that you mention it, I think I remember Pamco Pete pulling the plug.
 
Last edited:
Yes, unfortunately Pamcos aren't being made any more. Too bad, mine is a very, very early one, almost a prototype, that Pete sent me many years ago to test and report on. It's never missed a beat and it's been a good dozen years.

If you want to try the advance rod shimming, here's a little write-up I did about it long ago. You can get shims from McMaster-Carr. See the 1st post on page 2 .....

https://xs650temp.proboards.com/thread/1372?page=2
 
Tore down the top end as I found a bunch of small shavings in my sump filter. Turns out it was my cam chain guide getting sawed down. Replacing the guide and tensioner. I was debating doing a big bore, but now it's kind of "why not?"
 

Attachments

  • 20210912_200910.jpg
    20210912_200910.jpg
    224 KB · Views: 111
Thu
PS Yamaha Service Manual, Mods 74-77 XS650 pg. 2-21 Para 14. States to 'Bend the advance weight stoppers'!
Clymer Yamaha pg. 20 Para. 9. States "DO NOT bend the advance weight stops to change the amount of advance." "The stops will snap off!"
You do ya' trust? We know not to bend them! :rock:
Yamaha changed their mind and issued a service bulletin to NOT bend the tangs.I have epoxied shims inside the tangs to reduce the advance. Also have reshaped the weight round ends to reduce slop in the notch.
 
Developed a loud scrape/shudder in the rear calliper and replaced the shims but no change. When I removed the calliper and inspected the lugs that hold the shims which the brake pad's slide on it evident the four lugs are not even/square. I purchased a new/ used hanger from a xs parts supplier and it is actually worse than the one I have. Has anyone seen this before or know if they were actually straight/even/square when new??. With the twin discs callipers on the front the lugs on the hangers are even/square and there is no movement/ slop in the shims/pad's or calliper but they cannot be fitted to the rear. Any assistance is greatly appreciated.
20210914_153236.jpg
20210721_163022.jpg
20210908_171644.jpg
 
No biggie on the shape of those lugs pressure is all sideways. Might want to look inside the caliper see it the rotor is scraping, if so look into some sort of alignment issue 'tween mount, caliper, wheel. Remove, clean, LIGHTLY lube, the caliper slide pin in it's rubber cocoon.
If you haven't; a full strip rebuild of the caliper MC etc. is always a wise investment of your time. Especially on the rear brake, fill, bleed BEFORE you remount the caliper. Otherwise an air bubble in the line will fight you til you give up in disgust.
A caliper rebuild how to, front and rear are about identical (bleeder location).
https://www.xs650.com/threads/help-with-caliper-rebuild.41676/#post-417294
A quick Great way to bleed the brake. (works for rear also)
Jim's 1980 SG Miss September
That rotor could use a bit of facing.
 

Attachments

  • late caliper rebuild 003.JPG
    late caliper rebuild 003.JPG
    193.1 KB · Views: 58
Last edited:
Thanks for the info on the lugs, thought they must have worn that way. I rebuilt the calliper last year and it is working good, just not sure why there is so much play when in it sits in the hanger . Even with the large shims in place there is side movement where as the front callipers are a firm fit in the hanger and so are the shims and pad's. I have a new/ used disc to install and I replaced the wheel bearings and swingarm bearings and rear shocks six months ago but turning the wheel by hand the disc has a slight wobble as though it is warped.?.
 
I couldn't pass up a deal on JIS screw drivers, with magnetic tips. First set I've ever owned. Yeah, that's right. But did you notice how they look so much like a Reed and Prince? I'd hate to live on the difference!
(Wait for the edit)

Hey, I got my Tail Lite Strobe Controllers in today. Jim's look to be as big as a bread box. Not so, these are little bitty and mount with a piece of sticky back whatever it is.
flash.jpg

Am I gona use these? ( I got one for the Yam and one for the Honda) Probably not. At least with the Chicken Squat 1157 LED's I have. I have an LED set coming in tomorrow and a "Universal safety light alert" with four flashes then solid. I don't want it to cook in fourteen different languages, I just want it to blink and then go solid. Cool beans. But, I'm gona wire up and try both sets. I just want to see the difference between the two systems.
 
Last edited:
New LED 1157 bulbs work great. Plenty of brightness separation between tail and brake! This is only the tail light. It's a white LED and looks white on camera but it's red.

brake light.jpg

As you can see in the photo of the controller above, the strobe controller has a pos and neg IN and a pos and neg OUT. It's made to be used with a brake light that does not have a common ground (un-like the 77 Yam where you have a yellow brake light wire, a blue tail light wire and a black common ground.)
EDIT:
My Controller is a knock off of a GS-100A. This tube tell you all about it.


On a 77 with active Light Checker, you will have to disconnect the checker. The checker reads system ground through a resistor. You will no longer have the warning lite in your eyes at night telling you your riding the brake. :thumbsup:
I moved as many connections to where I could get to them when I built up the bike. You can see the plug, check-ER. Made it easy to unplug.
Drag out the connectors and heat shrink. I needed some wire too.
I already had a pig tail on the Neg Batt post, so one black ground went there. The other got a piece of heat shrink.
Unplug the yellow brake wire at the rear fender grommet.
Plug the "V In" red wire into the bike side of the harness.
Plug the Red OUT wire into the yellow brake side of the harness.
control.jpg


I'm leaving the mess to see how she goes. If smooth, I'll tidy it up and stick the unit down.
 
Last edited:
Just take the controller ground (on the light side) and run it to the frame ground. The strobe comes from the power wire.... pretty sure the ground side won't care where it's grounded, long a the electrons make their way back to the battery.
 
Just take the controller ground (on the light side) and run it to the frame ground. The strobe comes from the power wire.... pretty sure the ground side won't care where it's grounded, long a the electrons make their way back to the battery.
I tried hooking up one of those controllers last winter and couldn’t get it to work so it’s sitting in my parts bin somewhere. With this new intel from the two of you, I may give it another try.
 
Lets see. I hooked up the red wires between the yellow brake wires. No problem there. If the brake light was mounted in plastic, it would have it's own dedicated ground wire. Break that wire and insert the two black controller wires and your off and running. But the brake light shares a common frame ground with the tail light. Touch one or both controller wires to the (frame) ground and the brake strobe works perfectly. However, the tail light goes into constant hyper flash, not just when you hit the brake but all the time the lights are on or the controller is grounded.
Probably has something to do with the light checker. The Light checker does work normally with the led. Hit the brake and the warning light comes on. Unplug the yellow and the warning light lets you know.
I'm doing a straight bench test today of a tail and brake light circuit without the complication of the Checker. That will let me explore all the grounding combinations.
Jim, if your not getting a tail hyper flash, could be because you trashed the checker?
Mine is an 80. Don't think it has the checker.
 
Back
Top