Why Is the Order of Clutch Plates Important?

abyssmaltailgate

Greenhorn Mechanic
Messages
148
Reaction score
9
Points
18
Location
Chicago
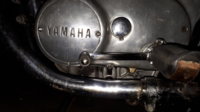
Why is the order in which you replace the friction plates in the clutch so important? After removing all the pressure and friction plates, I accidentally knocked them off the table before tagging and bagging them all so now I have no clue the exact order they were situated! How can I figure in which sequence to reinstall them?

Additionally, I'm wondering what I should look for to determine whether the friction plates need replacing. The whole engine's under going a rebuild so I might as well refresh or upgrade this aspect as well.
 
On the later clutch, the order isn't important other than the fact that you alternate steels and frictions. As far as which steel or friction goes where in the stack, that makes no difference. Early clutches were different, having a couple different plates that needed to go in a specific spot somewhere. I never dealt with one of those so I can't really explain the particulars.

You can measure the thickness of the friction plates to determine whether they're worn too thin. Specs for new and the wear limit are in the shop manual. Most I've inspected have still been good.
 
On the later clutch, the order isn't important other than the fact that you alternate steels and frictions... Early clutches were different, having a couple different plates that needed to go in a specific spot somewhere. I never dealt with one of those so I can't really explain the particulars.

My engine's a '75 XS650B, does that fall into the category of and early model, or a late model XS? I haven't measure with electronic calipers yet, but all the friction plates appear to be the same thickness...
 
'73 and older are the "early" type. They had 6 friction plates @ 3.5mm thick. Your '75 should have the later, actually middle style clutch with 7 friction plates. The plate thickness was reduced on these to fit that extra plate in there. They would be 3mm new, 2.7mm wear limit. The steels are 1.4mm thick but you usually don't need to worry about them wearing. A visual inspection of them is usually good enough. You don't want to find any that are all scored up or discolored blue from over heating.
 
Most of us face the sharp edges in. The thinking behind this is that the plates will separate easier without an edge hanging on something when you pull the clutch lever in with the rounded edges facing out. But, it's also a quick and simple matter to knock the sharp edges off the teeth of the steel plates on a wire wheel. That way they should move in both directions easier .....

RbBetwp.jpg
 
Ok well Ive reassembled before reading this and alternated them cos I think thats how I did the clutch on my Victory ..but old age is such a wonderful thing that I cant be sure..
Anyway shes all together and seems to be working fine with no slip 2 up up a hill in high gear with the whip out!
Got a sheet of glass some 400 with degreaser on it and swirled both sides of the frictions and moreso the steels that were a lil rusty...
A mate a few sheds down spun me up some spacers for under the clutch springs from some 1.8mm washers.
Fitted em to a bolt . Nutted em tight and slowly shaved em down to 16.9mm outer.. Works a treat!
Still got plenty oil leaking but.
Think its the already stripped bottom stud on the rear rh valve cap..
JB Welded a cutdown screw thread in there but it pulled out when tightened.
Need to leave longer than 12 hours to set I think.
Anyway its getting there slowly.
Nice sunny day but wasnt wasted in the workshop sorting clutch and did get a half hour test ride in.
 
On my test ride on the return leg I started getting difficult upchanges from 3rd and 4th and had to reach down and click it up with my hand, jockey shift style...Ive had the primary off the clean the clutch plates and shim the springs...could I have upset something in there?
to get the shifter clear pf my boot its set fairly high and needs a concerted effort to upshift./...needs to be high to get my boot under it.
or do you think it better to set the shifter lever under the boot and maneuver my boot back under it for upshifts?
Logistics of layout of controls just not quite right I think
 
I adjust the lever so it sits level. I keep my foot angled out a bit, Tip toe down to slip under shifter to up shift.
Leo
 
I adjust the lever so it sits level. I keep my foot angled out a bit, Tip toe down to slip under shifter to up shift.
Leo

Thanks Leo , I tried that yesterday for a couple of laps around the block after re torquing the head to try to eliminate oil leaks.
Its very awkward but the upside is all my gears are there and it shifts ok, its just bloody awkward to maneuver my left toe under to upshift...
Been a while..are the ergonomics on these bikes really that awful?
Ive measured the length of shifter in a straight line from CL of shift spline to shift peg at 5 1/2 inches...is this normal ?..or has the shifter been switched at some time.
Thinking of cutting and welding a couple more inches into it though that will make the shifter throw longer, but will allow my boot under without contorsions....
 
I never had a problem with the ergonomics. Your lever length of about 5 1/2" sounds right. There is another option besides cutting and welding - the lever from an XS1. It's about 1/2" longer .....

Xm4Vi0d.jpg


Here's my original. The end of the lever barely reaches through the "H" in "YAMAHA" .....

5IXW4Oi.jpg


Here's the XS1 lever. It reaches all the way to the middle "A". Sits a little higher too. I like it .....

ZDePHHa.jpg


An easy way to tell the 2 apart is the mounting bolt goes in from the top on the XS1 lever. It threads in from the bottom on the later levers.
 
Last edited:
Ok then..mines original, and comparing pix needs to come up a spline on the shaft
Ill give that a try, along with my motorcycle boots as opposed to the steel cap workshop boots I was wearing when I went for the rushed testride yesterday.
Rushed as I had an appointment to be at and the only bike with nightime capability right now the C90 Honda its rideable in workboots with its heel shifter..just stomp away! Confusing switching from bike to bike but
 

Attachments

  • 20180116_101156.jpg
    20180116_101156.jpg
    113.8 KB · Views: 60
Ok back to my oil leaks now.
JB Weld should be set on lower stud of valve cap.
I loosened all valve covers before borrowing a Snap On digital tension /torque wrench
Took off tank and top mount set wrench to 25ft lbs cracked each headnut in order and took back up to 25 ft lb then the 12mm heads I had to use a smaller inch lbs unit and with a conversion chart do all the 12mm in order
The ten mil at the rear down low was no chance for correct reading but it felt tight enough to me.
Then went to 30 ftlbs with the Snap On and gingerly redid the order hoping nothing stripped with the extra 5lbs torque.....went ok☺
Went over 12mm heads in order giving them a lil bit more and then rechecked the 17mm heads.
All Good , nipped up the valve covers put top mount and tank on and started up.
Fair bit of smoke from lhs exhaust
Geeze Ive stuffed it I thought but a minute later the smoke cleared and all good.
Coupla laps of the block then late last night when all cooled I sprayed degreaser on the engine and hosed it clean ready for todays test.
Oh and changed the oil yet again and cleaned some crap off the small filter.
Next oil change after today I intend to drop bottom strainer to check my JB repairs and reclean than filter.
As well as fit a new gasket down there this time around as theres a decent oil leak from there too.
Think that cover everything....so far so good!
 
Yep thats the best spot for the gearlever and Rossi motorcycle boots work better than Steel Blue steelcap workboots.
Oil leak ...well degreased again and blew talcum powder over engine and went for a half hour ride.
This is the result...
Graphic illustration of the oil coming from the valve cover and running down and across and then down and across again.....gotta seal that valve cover better...
20180116_191213.jpg
20180116_191222.jpg
20180116_193714.jpg
20180116_193732.jpg
 
Back
Top