74 TX650A Project – AKA “The Parts Bike”

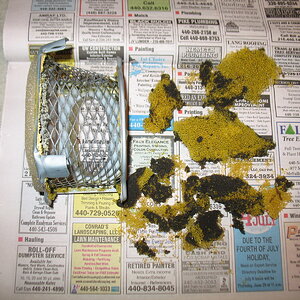
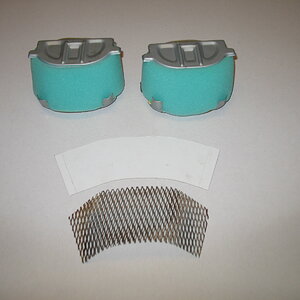
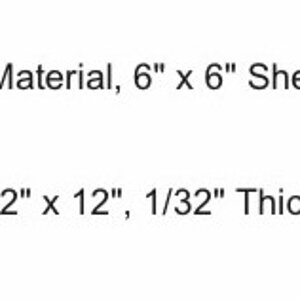
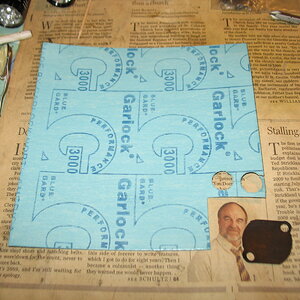
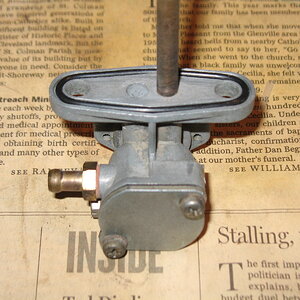
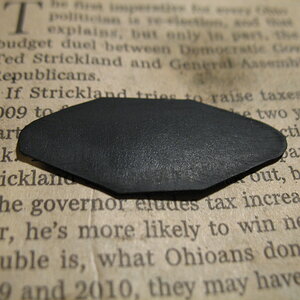
When I rebuilt the petcocks I used the Yamaha four-hole gaskets but thought the price for the rear gasket (under the plate) and the seal between petcock and tank were a bit steep for what they were and decided to try and make the gaskets myself and find an O-ring that would seal to the tank. I bought some Garlock 3000 sheet and some unreinforced Buna-N (same as most O-rings are made from) sheet from McMaster and used the back plate as a template to cut them out and a HF hole punch to punch the holes. I figured trying out one of each material would increase the chance of finding something that works and they weren’t expensive. I also made some sealing washers for one set of the petcock screws from the Garlock to see if the material would work there as well and the other I used copper crush washers.(also from McMaster) Here’s the part numbers for the sheet if anybody else wants to try this.


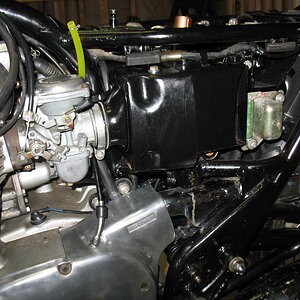
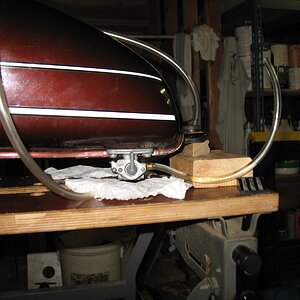
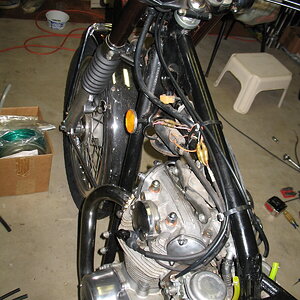
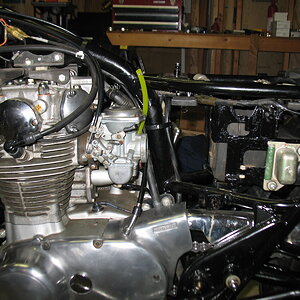
I thought it would be a good idea to bench test the petcocks before installing the gas tank on the bike (and hoping for the best) so I installed the petcocks and put about an inch of gas in the tank and let it sit with the petcocks off for about ten minutes. There were no leaks so I put them on reserve with a piece of clear tube to catch the gas and left them for three hours. There were still no drips or weeping so I turned them back to off, removed the tubing and will leave them overnight and see how they do.


So far, both materials are working as back gaskets and the Garlock and copper washers work as a sealing washer on the screws so we’ll see how they do long term. If they start to leak or the Garlock disintegrates, I will report back with the information.

As far as which one is better, the plain sheet is easier to cut but squeezes out easier so the screws can’t be tightened as much as with the Garlock but it’s harder to cut the Garlock cleanly so it’s kind of a tossup for me. I will probably stick with the plain rubber sheet as I like it better and it seems to work. Also the copper sealing washers, the used original sealing washers and the Garlock washers are all sealing as of now so it’s a use what you like/have situation there.

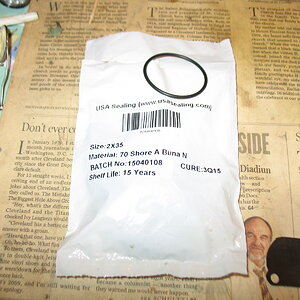
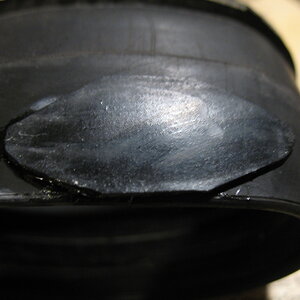
The O-ring I tried is also from McMaster (love that place) and is a 2mm x 35mm Buna-N. The groove was just a hair under 1.5 mm deep so with a 2mm diameter O-ring there is 0.5mm (0.020”) compression which is working so far.

 
Last edited:
And to end the day, I found that the rubber connector between the two airboxes had some cracks. It is probably useable for now, but the cracks are likely to grow until it stops sealing. So, my “cash conscious ethos" kicked in again and I decided to try and patch the cracks using some of the Buna-N sheet I used on the petcock. If it works, I will be able to install the airboxes tomorrow and not have to wait for a new part to arrive. I cut a piece of the rubber sheet and tapered the ends to hopefully spread the stress in the rubber out rather than cut the end square and have a sharp reduction in thickness at the ends of the patch. I then scuffed both parts with 80 grit sandpaper, cleaned them with lacquer thinner and glued the patch on with super glue. If it doesn't work, I can always peel the patch off, make another and try a different adhesive, like maybe tire patch cement. (which just occurred to me...)


As always, time will tell...
 
The gas tank and petcocks were dry this morning so looks like no leaks from my DIY gaskets and seals. With the valves turned off all night there was just a trace of gas on the outlet. It seemed there was just enough of a weep to keep the end slightly damp but no gas smell in the basement so it was very small and evaporating as fast as it was leaking. It seemed to slow down as time went on so maybe the four-hole valve is swelling and sealing better. Even if it continues, It's not a problem.

The first project today was putting the airboxes back on. I don't have a before picture, but they were about as crusty as the battery box was before cleanup and paint.


A couple of minor tweaks and they are back in and look much better. Surprisingly, the rubber was pretty soft for 50 years old and the patch on the connector seemed strong after trying to pull the cracks open before installing.

 
Next was making a simple jumper from the old connector for the front brake pressure switch to the new master cylinder mounted switch. I wanted to leave the existing wires intact so if the future owner wants to return to stock it will be simple to put things back as they were. Originally the connector split from the main harness where it goes into the headlight bucket and connects to the pressure switch on the lower triple clamp. In order to protect the wires, and provide better support, I pulled the wires into the bucket and removed the rubber cover.


This is the jumper. It has bullet connectors on one end and 3/16 x 0.020" female spade connectors on the other and is 18" long. I covered it with braided nylon sleeving from McMaster for abrasion but mostly for appearance.


Two more items crossed off the list.
 
Last edited:
I had a couple of little jobs to take care of this morning. I started bleeding the brakes until they started to build pressure and tied the lever against the grip overnight and will finish bleeding in the morning. I also filled the engine with oil, took the valve covers off and kicked it with the plugs out until I got tired, but oil still wasn't showing in the top end, so I hooked up a decent size battery and spun it for about 20-30 seconds until oil started filling up the rocker cover and dripping off everything. While I was spinning it, I noted both plugs were sparking so...

I decided to put the tank on, fill the float bowls, put the battery in AND....IT STARTED!! I had to shut it off after about fifteen seconds or so because of the increasing haze and stink in the basement but IT'S ALIVE!!!

I don't have air cleaners so it was a bit on the lean side and didn't want to accept much throttle, but it did idle on its own so that's a good sign. I still need to finish bleeding the brakes and make some air cleaners for it and then it will sit until spring.

Speaking of air cleaners, one of the originals was disintegrating and the other was pretty rough, so I bought a pair from YamahaXS650.com and figured they were advertised as made in Japan, so I thought they'd be good (or at least good enough) quality. I was wrong. The case is pretty decent, but the foam is a sticky crumbly mess that I just rubbed off with my fingers down to the expanded metal underneath.


I have some green filter foam so I'm going to put that on and use them anyway, but they were disappointing to say the least. I bought them a year and a half ago so there is no point in going back for a refund, that's on me for not checking them over. I did write a letter to YamahaXS650.com so hopefully they can find another vendor or get this vendor to fix them, I haven't heard anything back so far but it has been less than a week so we'll see. For all I know they have already done that and it's no longer a problem. I will say that one of the filters arrived damaged and an email had a replacement shipped the next day and without question so I can't put this entirely on them since I didn't give them the opportunity to make it right. Other parts I have bought from them have been good quality. Lesson learned.

In any case, it's officially a runner and didn't make any bad noises or doing anything alarming or unexpected so I'm relieved and very happy. The only thing I will definitely have to do at some point is upgrade the starter spring as the starter gear was reluctant to engage and kicked out easily. Not a big deal as I usually kick start anyway, but it would be nice to have the option and for it to be reliable.


I'm especially pleased BECAUSE now I can make room (that's what REALLY motivated me to get my butt in gear and get this done) for the NEXT project which is very much a horse of a different color...details to follow in a separate thread.

See how I created some anticipation there! Hmmmm....what's this all about?

I will say that it doesn't have tires, never had 'em never will. Hopefully next week I will have some pictures to post but it's definitely "some assembly required".
 
Last edited:
I still have the original stock filters, which are falling apart, and removed the expanded metal from one to use as a template for the filter foam. I cut the template about 1/2" taller and 3/4-1" longer than the EM so it will (hopefully) hold itself in-place but still be removable to make cleaning and oiling easy. I used 5/8" thick UNI green filter foam and it fit very snugly in the filter case.

 
When I put the first application of baby oil on the seat, after a day, about half the seat cover looked dry again. I put another coat on at the end of each day as long as there were dry looking areas. After five days there were no more dry spots so I took an old T-shirt and removed the excess oil. It looks much better than I expected and hopefully it helps the vinyl last longer. I wouldn't call it baby's-butt soft, but it does feel a bit more flexible than when I started. A side benefit is it evened out the color difference between the cover and the patch I added.

 
The only thing left now is to finish bleeding the front brake. It was still pretty squishy after bubbles stopped coming out the bleeder, but it built up enough pressure to make it worthwhile to tie the brake lever to the handlebar overnight. The next morning it was noticeably harder but still soft, so I tied the lever back again and this morning it was a bit better but still not as firm as it should be so today I pulled the front wheel off and levered the pads back to force fluid back to the master and hopefully drive the bubble into, or at least closer to the master cylinder. I had the front wheel all the way to the left and levered the bleeder side pad first and then the caliper inlet side so that the fluid (and presumably the bubble) is always moving uphill from the lowest point.

I'll give it overnight to allow any bubbles to float up to the master and see how it is in the morning. It may take a few tries, but this should get it eventually along with tying the lever back each night. At least that's the theory...
 
Last edited:
If you didn't replace the original rubber lines, that's probably why the brake lever "feel" is soft. Old lines go soft and swell under pressure.

If you want some really nice original style thin wall black rubber fuel line, get a roll of this from YamahaXS650.com, wonderful stuff (and it's even on sale, lol) .....

https://yamahaxs650.com/product/black-rubber-fuel-line-1-4-x-25/

It matches the O.D. of the original perfectly so those anti-kink protection springs fit on perfectly.
 
The brake line is braided stainless so shouldn't be flexing. The master cylinder is smaller so that will make it feel a little softer but shouldn't be pulling the lever back to the grip so pretty sure there is still air in there. I read that the early calipers are harder to bleed than later style so I'm not surprised it's taking more effort.

Thanks for the tip on the fuel line, I need the starter spring repair kit so I can order them both.👍
 
Last edited:
Quick update on putting mineral oil on the seat...

I had set the seat aside and did a few other little things (air filters and brake bleeding) and a week later when I went to put it back on, it was as dry as an old BONE! There was no evidence I had ever put oil on it. Soooo, I put some more oil on and in the morning, there were multiple dry patches. Apparently, it wasn't done absorbing oil.

I read that mineral oil doesn't evaporate but wanting to prove it to myself, I put some on a piece of plexiglass and 48 hours later it looks the same as when I applied it so it seems that is true. If after 24 hours of sitting, some of it's gone and it isn't evaporating, then it must have been absorbed unless mineral oil has some strange property that I'm not aware of. It's a while to Spring riding time so I'm going to keep applying oil on a regular basis and see what effect it has on the vinyl. The experiment continues...
I’ve been using mineral oil on vinyl for over 30 years. I used it extensively in the vintage car hobby. I use it on vinyl upholstery, dashboards, etc. The effect on vinyl is positive, I can assure you.
 
Back
Top