8-1 COMPRESSION
Just like taking the cam out and putting another in its place........stone simple...........there is one drawback and one good thing........a brand new chain I don't think would go on because the head is .040 thousands higher..........BUT a good used chain will return to it to factory like new adjustment......and I have taken these used chains apart and inspected the rollers and pins and found no visible or measurable wear.....just that every link has kind of broken in and the entire length of the chain is a bit longer.......not wore out just a bit longer.........The engine will run much cooler and quieter and have better pulling power at lower rpm's and the timing should be retarded 1/8” from the F mark at 1200 rpm to give it that great pull at lower rpm's….without effecting the high end very much at all…..
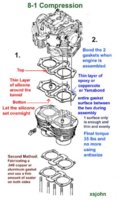
Preparing the head gaskets.........I used 2 used factory gaskets.........but using 2 new gaskets would work fine except you will have to torque it a few more times till the gaskets stabilized and the final torque should be 35lbs and no more using anti seize on the head bolts……
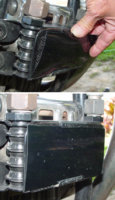
First a ""thin"" layer of high temp silicone with the end of your finger around the tunnel portion on both sides of each gasket that mate with the engine and left overnight to cure before installing...the silicone will squish down then and not out.........just a '''thin'''' layer of silicone..........Then a layer of Yamabond between the gaskets when it is put on the engine
Here is the sequence for preparing the gasket
1......apply a very "thin" later of silicone to both gaskets around the chain tunnel on one side only...the side that will be upward and on the other gasket the side that would be downward that fit against the engine cases…...a very thin layer with the finger......let set overnight to cure.....then on assembly use a good sealer in between the 2 gaskets and place them together as you assemble the engine.....the silicone surfaces being on the outside top and bottom.....
2….I spray pam on the 2 engine surfaces so when disassembled the gaskets won't stick and can be used again.....replacing the ‘Very” layer of silicone around the chain tunnel of course on the gaskets.....pam is optional but it does save the gaskets for reuse..........
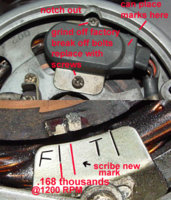
3….Timing…….when using taller gears it is best to retard the timing 1/8” from the F mark at 1200 rpm….so it will pull down to too without getting cranky using 2nd around corners.............
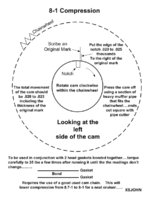
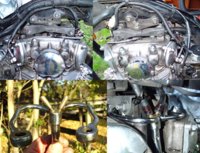
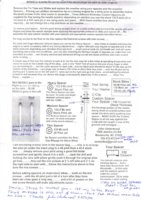
The cam "has" to be moved within the chain wheel to place it back to stock configuration....raising the head turns the cam forward...I built a jig to see how many degrees the extra deck height was effecting the valve timing....securing the chain and then placing the gasket under the chain wheel....found it to be 2 to 2 1/2 degrees (advanced when raised 40-45 thou)...these things are already advanced to the wall....to put the cam back to stock position with the raised head....FIRST I marked it where the cam is pressed on the chain wheel....then I moved the cam clockwise 20-25 thousands (retard) when looking at the notched side of the cam…..”have” to move the cam or you will experience artificial leanness from too much advance....has to do with the intake closing event….closes to soon and the cylinder won’t fill completely....(found that out the hard way)....if you play with this you will "have" to do that also.......easy to push the chain wheel on and off the cam with a 8” piece of heavy muffler pipe that fits on the chain wheel and cut cleanly with a pipe cutter and using a hydraulic press........
....takes me a couple of hours or more to move the cam.....couple of tries or more to get it in the right position and degree it.........hope all this makes since........really is a very simple mod and we are only changing the cam and nothing else...........and a new cam chain will not fit on the new configuration……..and good used chain is required (seems we all have them) and the adjustment will return to like new adjustment because the cam rests .045 thousands higher as well as the head…….
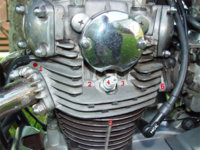
Pretty straight forward lifting the head....a good manual is handy....and following the instructions on centering the cam in the engine and making the gaskets...............chain wheel has to be removed and repositioned.......as for timing a light is the only way that's accurate for me..............
And it's good to have 145-150 compression to start with.........lowers it to 135.....wouldn't do this to a wore out engine............hold the throttle open on a warm engine while using a compression gauge...........
this does make them a lot more user friendly especially in the summer...........ad it will loose just a bit on the high end but with the timing retarded and the lower compression it pulls wonderful at the lower rpms and also has a lower exhaust note........a poor mans Harley one might say...or a smart mans Harley....Tee He...
xsjohn
Attachments
Last edited:

