Can't get the oil strainer plate off

GraemeH

XS650 Member
Messages
16
Reaction score
60
Points
13
Location
Vienna
I thought I'd do a simple oil change today and clean the strainer in the bottom of the crank case. Removed all 6 bolts and it won't move. Whacked it quite hard in various spots with a block of wood and also a screw driver along the joint but it is solid.

Any tips? I assume there are only the 6 bolts holding it on...
 
..... and when you install it, don't use any gasket sealer. That's why it's stuck on there now. I just oil the gasket. That makes it cling a little to ease install but allows for easy removal next time. As long as you don't damage the gasket during that removal, you can usually reuse it, and usually several times.
 
If you already used a screwdriver at the joint, once you get it off with the wood block, you should check to see it you deformed the case slightly at the joint surface. Might need to use a fine file to get it flat again.

I use heavy grease smeared on both sides of the gasket. It helps it cling quite well.

.
 
Success - bought a heavier hammer, though needed a metal chisel as would didn't cut it... got a slight bash in the plate and scratched the underside gasket surface a little as it's a bugger to get down there for cleaning.

How important is it to sand out all scratches, or will a new gasket seal it fine? Won't be using the old gasket again, nor cement ever !

20221127_111319.jpg


20221127_111333.jpg


20221127_111557.jpg


20221127_131708.jpg
 

Attachments

  • 20221127_111319.jpg
    20221127_111319.jpg
    277.3 KB · Views: 39
  • 20221127_131708.jpg
    20221127_131708.jpg
    227.1 KB · Views: 43
  • 20221127_111557.jpg
    20221127_111557.jpg
    316.9 KB · Views: 37
  • 20221127_111333.jpg
    20221127_111333.jpg
    203.4 KB · Views: 48
All the gasket HAS to go.
I'm more about scrapers than sanding.
scraper blades.jpg
Avoid (or remove) sharp corners on scrapers.
After the gasket is gone; 400 grit on a flat plate then work the cover with water to remove any high spots.
oil pump clean up (2).JPG
 
Won't be so easy on the underside of the bike though :(
Many of us lean the bike way over to make the underside accessible. There are various methods for holding the bike stable while leaned over.
If you do this, make sure to have a smaller amount of gas in the tank.

You can remove gaskets much more easily by brushing on some paint remover and letting it sit for 10 minutes.


.
 
Our late friend Robin had a method of leaning the bike and propping the handlebar in a plastic bucket, as I recall. Maybe Bob (Mailman) will be able to dig out a photo of this technique.

I hook up my ceiling hoist to the bike and lower it down.


.
 
>>Who said life would be easy?
Yeah, just beginning to realise that...
Will need to wait for my new gaskets and drain plug washers to arrive before finishing. Hope it doesn't snow before then.
 
>>Who said life would be easy?
1 option is to just park over a drip pan...
16695739822635762344622535490692.jpg
...
Actually having done 2 this past summer, I use a dense rubber/eurothane mat 2 inches thick or flattened card board boxes 4 layers thick to lay on. Having exhaust out of the way helps. It is really only a 10 minute job. Address nicks and scratches with a fine flat file, I get to say "flat bastard' :) " gently.
 
Last edited:
How important is it to sand out all scratches, or will a new gasket seal it fine? Won't be using the old gasket again, nor cement ever !
Congrats! I don't see anything in the pics thats non-recoverable or likely to not reseal with normal gasket. As Gary said: scrape the surfaces of old gasket without gouging - perhaps a surface plate sanding on the cover, but I don't see issue at present. My prefered weapon (small):

s-l640.jpg

https://www.fc-moto.de/en/MOTION-PRO-Gasket-Scraper
 
Late to the party... as usual... :cautious:


One of our brothers over on your side of the pond... 
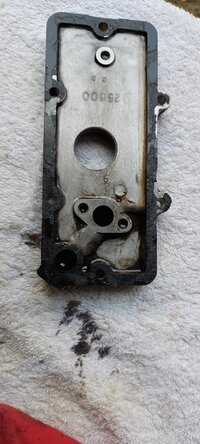
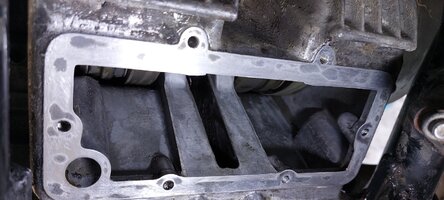
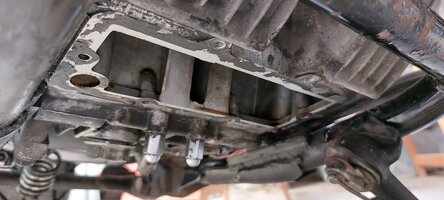
@Grimly maybe??? recently pointed out that there's a handy pry point on the sump plate. Right side aft. Next time I pull one that's stubborn, I'll give that a go.


Sump plate pry point.jpg


For a flat surface to work the plate on, my table saw has a nice flat, machined cast iron top... prefect for surfacing... so there's another option. Any saw with a cast iron top will be machined flat and do the job.
I use contact cement (3M Super 77) and glue the paper down. That way I can butt multiple sheets together to make a large work area for stuff like the side covers.
Another thing I'm doing now is starting with 240 wet/or/dry paper. It saves a lot of elbow grease. 240, 320, 400 and done.
I also use WD-40 for a lubricant. Seems to work better than water for keeping the paper clean... and not rusting the cast iron top. ;)

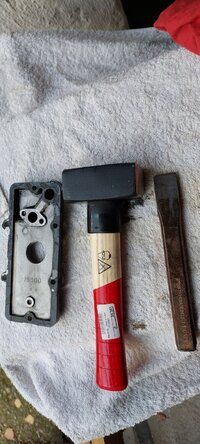
...and yeah... dragging a single edged razor works great.
 
Last edited:
Yes, paint stripper. It literally melts the old gasket away and makes it very easy to remove. It may take several applications to get it all off. All that sanding you did was totally unnecessary work, lol.


Stripper.jpg


On the original install, you'll find the gasket sealer Yamaha used dripped down the sides and also over-brushed on the interior. Apply the stripper to that too .....

Stripper2.jpg


Let it soak for 10 to 15 minutes and that over-brushed sealer along with most of the gasket should remove easily .....

Stripper4.jpg


Stripper5.jpg


Stripper6.jpg


There will probably be a few remaining bits. Apply more stripper to them .....

Stripper7.jpg


Stripper8.jpg


Getting those last stuck spots off may require a couple stripper applications, but eventually you'll have a nice, clean, undamaged cover .....

Stripper9.jpg


Done.jpg
 
Finally got the sump plate all cleaned up and new gasket and nice clean oil.
Had same issue with upper oil filter gasket:

20221226_144706.jpg


I do have a question about the inner gasket (no 19 in this picture. I didn't find one on my bike when I removed the filter. Is it necessary?

20221228_130340.jpg


Drove round the block and no oil is leaking yet :)
Too cold to ride longer though. Can't wait for spring...
 
Back
Top