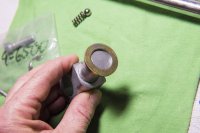
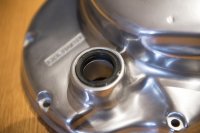
Also... there's a thin shim washer that goes on the shaft before you install the cover. Sometimes it comes off with the cover. I always put masking tape on the shaft to keep it there 'till assembly.

-
Enjoy XS650.com? Consider making a donation to help support the site.
XS650.com receives a small share of sales from some links on this page, but direct donations have a much greater impact on keeping this site going.
You are using an out of date browser. It may not display this or other websites correctly.
You should upgrade or use an alternative browser.
You should upgrade or use an alternative browser.
Crabby's Build
- Thread starter CrabbyCustoms
- Start date
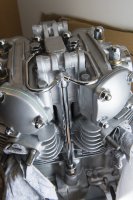
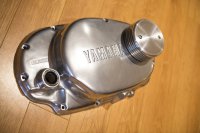
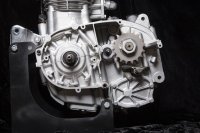
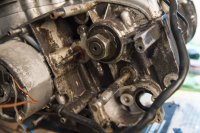
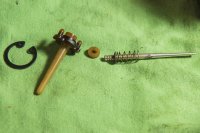
I'm getting closer. I installed the oil delivery pipe, the breather and cam tensioner.
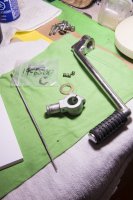
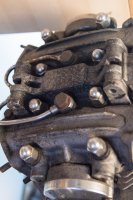
I cleaned up the kick arm and boss. I can't figure out how to get the washer on the boss? I had to cut the original off, I'm filing out ID to make it fit.
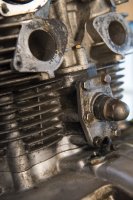
Cleaned the exhaust flanges. I was amazed at how easily they cleaned up. I thought I was going to have to paint them.
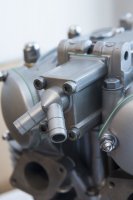
Installed kick starter oil seal and a HHB oil cooler.
Installed the Tach gear but I forgot to put in the oil seal so I have to take it apart.
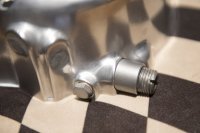
Quick question? when I installed the oil pipe did the holes in the banjo bolts up top need to be oriented a certain way?
Thanks.
I cleaned up the kick arm and boss. I can't figure out how to get the washer on the boss? I had to cut the original off, I'm filing out ID to make it fit.
Cleaned the exhaust flanges. I was amazed at how easily they cleaned up. I thought I was going to have to paint them.
Installed kick starter oil seal and a HHB oil cooler.
Installed the Tach gear but I forgot to put in the oil seal so I have to take it apart.
Quick question? when I installed the oil pipe did the holes in the banjo bolts up top need to be oriented a certain way?
Thanks.
Attachments
-
 February 12, 2021-1.jpg162.9 KB · Views: 183
 -
 February 12, 2021-4.jpg88.3 KB · Views: 182
 -
 February 12, 2021-7.jpg105.6 KB · Views: 190
 -
 February 12, 2021-11.jpg144.2 KB · Views: 192
 -
 February 12, 2021-15.jpg159.1 KB · Views: 184
 -
 February 12, 2021-18.jpg131 KB · Views: 191
 -
 February 12, 2021-21.jpg202.1 KB · Views: 190
 -
 February 12, 2021-24.jpg127.3 KB · Views: 190
 -
 February 12, 2021-26.jpg102.8 KB · Views: 191
 -
 February 12, 2021-28.jpg98.4 KB · Views: 193
Nope.Quick question? when I installed the oil pipe did the holes in the banjo bolts up top need to be oriented a certain way?
Thanks!
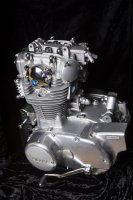
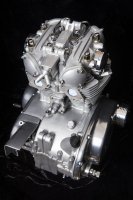
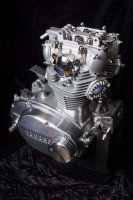
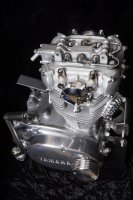
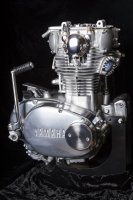
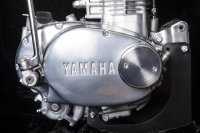
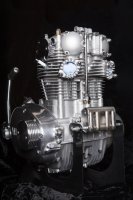
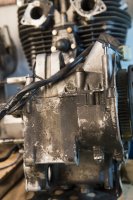
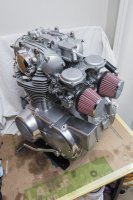
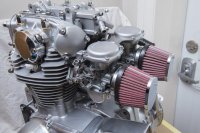
The engine is complete (I hope!?) it's amazing to think that a year ago I'd never even changed the oil on a motorcycle. The only reason I decided to attempt a bike restoration was because I was getting a completely rebuilt engine (That ended up being junk) to put in it. It took a year but this engine looks beautiful, whether it will run is another question?
Thanks for all of the great advice you all gave me, this engine would not have happened without it.
I added in a few before photos.
Thanks for all of the great advice you all gave me, this engine would not have happened without it.
I added in a few before photos.
Attachments
-
 February 16, 2021-32.jpg133.8 KB · Views: 186
 -
 February 16, 2021-7.jpg133.1 KB · Views: 189
 -
 February 16, 2021-36.jpg128.2 KB · Views: 185
 -
 February 16, 2021-46.jpg136.8 KB · Views: 181
 -
 February 16, 2021-55.jpg141.5 KB · Views: 185
 -
 February 16, 2021-64.jpg141.8 KB · Views: 192
 -
 February 16, 2021-65.jpg128.7 KB · Views: 197
 -
 February 16, 2021-67.jpg140.2 KB · Views: 197
 -
 February 16, 2021-77.jpg129.4 KB · Views: 196
 -
 February 16, 2021-83.jpg134.5 KB · Views: 188
 -
 February 7, 2020-18.jpg154.1 KB · Views: 196
 -
 February 7, 2020-13.jpg151.2 KB · Views: 178
 -
 February 7, 2020-15.jpg173.3 KB · Views: 180
 -
 February 7, 2020-17.jpg163.1 KB · Views: 185
 -
 February 7, 2020-18.jpg154.1 KB · Views: 181
Engine porn!!!  If it runs as good as it looks, it'll be a terror! Fantastic job, Crabby!
If it runs as good as it looks, it'll be a terror! Fantastic job, Crabby! Thanks man, I appreciate it.Engine porn!!!
Hi,
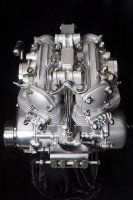
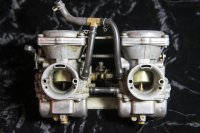
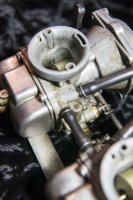
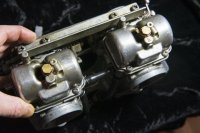
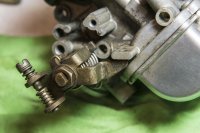
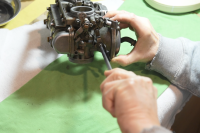
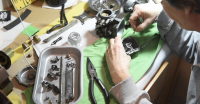
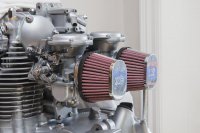
I decided to tackle the Carbs next. Thanks to the search function I was able to determine that my carbs are BS38's ('78-'79) which meant a main jet #135 and Pilot Jet #27.5 I rebuilt the carbs and replaced the needles (they were looking banged up). I went up to 2 sizes on main jet and 1 size on pilot jet. They look good but will they work?
I started fabrication next as I'm hoping to start painting in May. I finished the shifter and rear brakes, as well as the rear brake stay.
I also had to figure out where my electrical components are going to go before I actually do any electrical so I can make the boxes. The site was really helpful in this regard. I'm mounting my regulator/recitfier on the front under the motor mount. I made a mount that combines a horn mount. I have an old horn off of my Road Glide I thought I would see what it would look like? but it's kinda big so I may just get a small vintage chrome horn.
lastly I made a circular tank for my coil (which i'm going to vent), ignition and electrics. I'm making a battery box to go under the swing arm. I have an EarthX lithium battery.
Exhaust next. Also thinking about colours as well.
Attachments
-
 February 18, 2021-5.jpg610.5 KB · Views: 167
 -
 February 18, 2021-6.jpg601 KB · Views: 174
 -
 February 18, 2021-15.jpg652.3 KB · Views: 164
 -
 February 18, 2021-45.jpg607.4 KB · Views: 156
 -
 Screen Shot 2021-03-12 at 2.30.06 PM.png1 MB · Views: 159
 -
 Screen Shot 2021-03-12 at 2.32.03 PM.png1 MB · Views: 154
 -
 February 18, 2021-27.jpg838.4 KB · Views: 160
 -
 March 03, 2021-12.jpg142 KB · Views: 164
 -
 March 03, 2021-37.jpg159.2 KB · Views: 161
 -
 March 03, 2021-39.jpg167.9 KB · Views: 167
 -
 March 03, 2021-12.jpg142 KB · Views: 154
 -
 February 25, 2021-13.jpg608.3 KB · Views: 152
 -
 March 12, 2021-708.jpg754.2 KB · Views: 155
 -
 March 12, 2021-704.jpg792.1 KB · Views: 160
 -
 March 12, 2021-700.jpg662.5 KB · Views: 152
Your jetting should be good to start but may require more on the mains depending how open your pipes are. Also, you must lean the needles a step with those larger mains on your carb set.
But, the pods you've chosen aren't good. That pleated K&N style doesn't work well or right with these CV carbs. They cause turbulence in the air flow and that messes with the slide lift. You'll get stumbling in the upper midrange under heavy throttle applications. Your first impulse will be to attribute it to incorrect jetting, but it's the pods. Best pod choice is the straight foam UNI pods. For your BS38s, you'll want the UP4200.

But, the pods you've chosen aren't good. That pleated K&N style doesn't work well or right with these CV carbs. They cause turbulence in the air flow and that messes with the slide lift. You'll get stumbling in the upper midrange under heavy throttle applications. Your first impulse will be to attribute it to incorrect jetting, but it's the pods. Best pod choice is the straight foam UNI pods. For your BS38s, you'll want the UP4200.
That pleated K&N style doesn't work well or right with these CV carbs.
Good to know, I had read about how some pods can cover the air flow holes but I thought these pods were good. I will pick up the UP4200's.
I did move the needle 1 step so hopefully it will be leaner.
Thanks!
Yes, some pods can block air ports, but this isn't about that. This is about the pleated surface of the filter disrupting smooth air flow. The slides in these CV carbs are lifted by vacuum. You want a smooth flow of air to create a smooth vacuum signal to lift the slide smoothly. With a "choppy" flow of air and subsequent messed up vacuum signal, you get slide "flutter". That's kinda just what it sounds like - the slide bounces up and down rapidly instead of lifting smoothly. It's like rapidly opening and closing the throttle, and it causes a stumble. You'll chase your tail trying to tune it out, thinking the jetting is still off, when in reality, the pods are causing it. You may get it tuned out but you'll end up with jetting that is less than ideal, especially the main, leaner than could be run with the proper pod.
Wow - nice work Crabby! What tenacity!
I've just read your whole thread this morning. I look forward to seeing more
I've just read your whole thread this morning. I look forward to seeing more
650trader
XS650 Addict
5 Twins - What you say about choppy air is BS , There is no restriction with the XS Pods.
Mike say's he was one of the first distributors of the UNI's back when they all came from Australia.
Uni's are good but if you ever get a backfire they go up and melt in about 1 second.
Joe
Mike say's he was one of the first distributors of the UNI's back when they all came from Australia.
Uni's are good but if you ever get a backfire they go up and melt in about 1 second.
Joe
If I'm not mistaken, you sell XS pods, right? Of course you're going to say that, lol. I experienced the issue first hand. I had genuine K&N pods at first and couldn't run a big enough main without upper midrange break-up. Switching to UNIs cured the problem. I was able to step the main up another size (which the plugs indicated was needed) without any break-up. Your K&N clones may not restrict air flow but the pleated surface doesn't flow air smoothly. A CV carb needs a smooth flow of air to operate the slide properly.
Wow - nice work Crabby! What tenacity!
I've just read your whole thread this morning. I look forward to seeing more
Thanks Van Islander, I appreciate it. It's been a lot of fun and a definite learning experience.
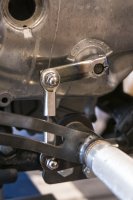
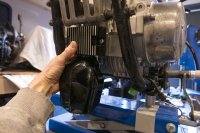
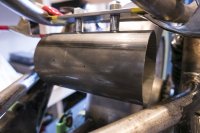
Hello! Just wondering if anyone has any experience with the Lowbrow Custom XS650 exhaust builders kit?

I can't seem to figure out how the machined spigots are supposed to fit with the exhaust flanges? I can't get proper fitment?
First goes the exhaust gasket.
 I'm assuming that this is the order?
 But I end up with big space.

Even if I leave the gasket out altogether I still have a 1/4in space?

Any guidance would be appreciated!
I can't seem to figure out how the machined spigots are supposed to fit with the exhaust flanges? I can't get proper fitment?
First goes the exhaust gasket.
Even if I leave the gasket out altogether I still have a 1/4in space?
Any guidance would be appreciated!
I used the same exhaust kit.

I suspect the after market exhaust makers do that because the aftermarket flanges are not as thick and spacing them out that allows domed nuts to be used with the danger of the stud bottoming out on the underside of the dome.
Looks sweet. Does your flange sit flush with the exhaust port?
Similar threads
- Replies
- 20
- Views
- 580