First Impression: the 1980 XS650 Special II

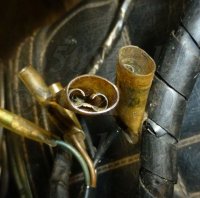
I was writing while you added the pics. Looks real good. ............ Just my personal preference but i wouldn't even wash the bike with water. Using the combination of what i have written above and the bike will look like it has been restored from 10ft, maybe even 5 ft. Chrome should come up nice as well.

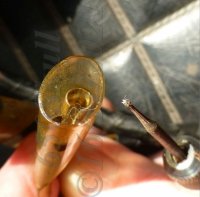
Some of the guys on here have done some nice restorations and have rejuvenated the chrome parts, (not re-chromed), that were a bit worse for wear and they have come up real good.

Ask and they will reveal them selves and the methods they used. ........I know mailman did this on his XS2 and he is fussy, (no not our Bob), so if they didn't set a standard he wouldn't be using them
 
Yea lots of pics are good and these are great............sometimes close ups are good but a little further back , (from close up), can be better for getting an overall.

Those rims look real good. Again the lanolin will protect them from rust as well as make them shine/blind in the light
 
Those rims look real good.
These pictures have given way more justice than what meets the eye, That rear hub near the outer flange is pretty spunked in the groove. It was a beautiful sunny day that day. It was sunny and cold this morning and when I returned from the DMV it had clouded up and remained colder. And I left my skull cap at the DMV by the clerk's window, the whole time walking out, wondering what I had forgotten. In spite of the cold my discovery occurred when I got home.
 
I see someone put K&N replacement filter elements in. That's a nice, expensive (about $80) upgrade. They never need replacing, just a cleaning and re-oiling from time to time. Looks like yours are due. The special oil for them is red and stains freshly oiled filters pink. Yours look white so, as I said, probably could use a servicing. You can get a K&N filter service kit at most auto parts stores. It comes with the special cleaner and the special oil needed to re-oil them.

But, these K&N elements should flow better and more air than stock. The BS34 carbs on your bike came from the factory borderline too lean and ANY change to the intake or exhaust usually requires some jetting tweaks. In your case, just bumping the mains up one size should do (132.5 stock to a 135).

Your brake squealing may simply be from the brakes being all dusty and dirty. Your rear drum brake most likely needs a servicing besides just blowing the dust out. See post #3 here .....

http://www.xs650.com/threads/how-difficult-is-it-to-replace-the-rear-drum-brakes.25632/

In particular, check the brake cam to see if it's oriented correctly. It may only work about half as good as it could if it's not.

arKDkY2.jpg
 
I can now thank MJ Auto Brokers for dealing fairly with me and holding the 1980 XS650G for 10 days after I made an offer, and the 29 days for the transfer to my name. Thanks Alex.
I put the License Plate on the "Beauty" today, 1 month to the day I brought him home. I also decided on removing the headlight bucket and blinkers with an especially pretty day outside. I got the headlight, blinkers, and hardware off and brought them inside. Blinkers.JPG And then I bumped into this insanity here. Bucket.JPG I had thought the removal would be as simple as unhooking the lines to the blinkers, but no! After sprinkling my first blood onto the bike after struggling with a connector and seeing there were a 'few' more I rightly decided I needed to look into the matter deeper. I will be searching for headlight bucket removal on the Specials. See what all need to be done and follow through with it. Meanwhile for those threaded rods to the blinker assembly I will get some cardboard and see if I can bend them back without buggering the threads. That will be an indoor project. After quietly assessing the situation inside the bucket, I came to the conclusion it would be best to disconnect the battery and bring it inside, knowing this may take some time to fix.
 
I don't think they have locks and I don't have the time to open mine up right now. I'm pretty sure those just pull apart and yes, they're usually stuck.
Big grin on that for sure. All these connections on close inspection appear to be stuck and need revitalization. I was curiously thinking I remembered I could pull out each single wire at a time and replace them with new plastic. There is no way to get a good grip on the coupling and I will damage the wires if I continue in this way. I am not ready to pull each wire individually from its socket, so I halted for the reason I stated above. Thanks,
'TT'
 
I squirt a little plastic friendly lube into them then just pull. Yes, they can be stuck pretty good. To remove the headlight bucket, besides the signals through the sides, you have to remove the bracket on the bottom. This locks in the headlight "tilt". With everything being rubber mounted through the sides, even when the signals are tight, they still don't hold the bucket from tilting.

Some bucket tips - while off, paint the inside with something light (white, silver, whatever). You can just brush paint it as it never gets seen. The light color will make seeing the wires easier .....

21ESiHu.jpg


Also, the single top hole is rather crowded with all the wiring looms Yamaha chose to stuff through it. Move the two looms coming from the handlebar switches to the bottom holes.
 
Some bucket tips - w
Beautiful job there. Forgive the skip above with the addition and no comment. I had thought of redoing the couplers by pulling the wires. on each one, singly, but I need to figure if I can reattach those wires correctly with replacement couplers. Thanks, love the pic!
Edit: I found it was more tangled up in there on mine when I tried to sort it out.
'TT'
 
Yes those connectors can be stuck. May need to use some other tools to help get them apart. I think i used an adjustable pliers to help wiggle then to get them loose.........Like these and be gentle
water-pump-plier-500x500.jpg

All wires are joined by colour............the exception is the power wire from the indicators could be black. These go to the Dark green and Chocolate wires...........These 2 wires, (Dg/Ch), if dirty, can look black so make sure you wipe the wires to be sure of the colour

DSCF7015 3.jpg
 
Yes those connectors can be stuck. May need to use some other tools to help get them apart. I think i used an adjustable pliers to help wiggle then to get them loose.........Like these and be gentle
View attachment 202902

All wires are joined by colour............the exception is the power wire from the indicators could be black. These go to the Dark green and Chocolate wires...........These 2 wires, (Dg/Ch), if dirty, can look black so make sure you wipe the wires to be sure of the colour

View attachment 202901
I will soon pull my chair outside and learn to enjoy a total state of confusion. Inside I can learn to frustrate myself on bent blinker bars without damaging the contents. The true satisfaction only comes by fulfillment of the project. It is Zen, and there so happened to be a sudden remorse when I realized this was going to preclude a daily adventure for riding the "Beauty". I am missing it already! I like the advice on one of the posts I read here or elsewhere; "Meanwhile, get to know the motorcycle and become familiar with it!" Very good advice indeed.

I always thought about those aviation pilots, and the maintenance and checklists before any flight. I want to reward their attentiveness with a huge respect to regularity. We so often just want to jump on and go until a problem occurs. We all have need to be more aware. Why trust an unattended motorcycle that has been left alone for even a small amount of time? In our present times, I check mine whenever I return to the parking lot after shopping inside. Only because I am familiar with the Bullet do I know nothing has happened in my absence, and it is ready to go.
 
Well, you've got yourself a pretty old bike now. Even if it looks good on the outside, believe me, it needs a thorough going through. For starters, you should check all the wiring (and connectors), refurb the brake systems, and service the forks. Bump the mains up one size, the bike will be much happier. There's a good chance it needs steering bearings as well, most do.
 
Well, you've got yourself a pretty old bike now. Even if it looks good on the outside, believe me, it needs a thorough going through. For starters, you should check all the wiring (and connectors), refurb the brake systems, and service the forks. Bump the mains up one size, the bike will be much happier. There's a good chance it needs steering bearings as well, most do.

I do think the brake systems should be done before any amount of riding. Also, the electrical situation is more decrepit than I had realized, simply because everything was intact. Looking through the wires in the headlight bucket, I realize I am the first person to mess around in it. The wiring harness is fully wrapped as it came from the factory as far as I have seen, and very few connectors if any have been changed out, maybe a few close to the coil tower behind the right-side panel. The forks I am afraid of still. That will take some major effort for me because of fear alone. I can prod myself into it eventually with the proper frame of mind. And the rear shocks may need replacing. I am a lightweight and they are at the lowest setting, but if I bump them up I may lose that foot on the ground that is so comfortable now. In the long run, I have a cylinder head that appears to be weeping a little bit of oil, and I was curious if it affected my compression, and whether it would harm the engine if left unattended. It does not look very bad. Pictures follow for the left side (weeping) and the right side (dry). Thanks,Yamaha 88.JPG Yamaha 89.JPG Yamaha 90.JPG The dry side is noticeably cleaner. Yamaha 27.JPG I can run a rag over the left lower head and return the next day and still have a slight amount of seepage. This is the side that had the breather tube disconnected and the filter was completely dry. The right side had oil on the filter material, not heavy, but enough to discolor it. Could the disconnect affect the gasket?
'TT'
 
Head gasket leaks are pretty common on these and the usual cause is the head bolts and nuts have loosened up and need to be re-torqued. You can see the major offenders in your last pic above. See those two big acorn nuts at the top of the head, above and on either side of the spark plug and that round chrome cover? See the rubber washers under them? Those two studs flow oil so needed to be sealed, hence the rubber washers. But, while soft enough to seal, they aren't hard enough to hold the nuts tight. In similar situations, most other manufacturers use copper washers, soft enough to seal but hard enough to hold the nuts tight. We do the same .....

BVWCAkd.jpg
 
........Connection security is jamming up the posts.........or lack of security as Firefox tells it
 

Attachments

  • P1000974 1 text.jpg
    P1000974 1 text.jpg
    213.9 KB · Views: 118
  • P1000980 1 Text crop.jpg
    P1000980 1 Text crop.jpg
    141.8 KB · Views: 112
Last edited:
Back
Top