Forward controls

Jardine puts out a beautiful set of forward controls for the Virago 750....I bought them and use them on my XS650 chopper. These are bolt on and ready to go.
268121_10150264092185688_655245687_7572142
 
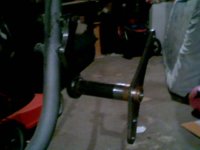
thanks for the blueprints vicegripe. sorry the photo's aren't great had to use the web cam
 

Attachments

  • 2011-11-11 09-24-41.823.jpg
    2011-11-11 09-24-41.823.jpg
    123.2 KB · Views: 751
  • 2011-11-11 09-24-57.161.jpg
    2011-11-11 09-24-57.161.jpg
    125.8 KB · Views: 682
will do got the frame loaded in the truck right now ready to head to get it's hardtail. should have her back in a couple weeks. hopefully i can sneak them in with the stuff at work for some sandblasting and paint next week
 
keep this one going. you got those on your bike yet radar? so not being a computer guy how come i cant download your cad file? those look awesome, thanks for your work visegrippe
 
Here's what mine look like. DIY using HD takeoff linkages and levers. Just find the right bushings, some tubing and some plate and you're pretty much set. Oh and the little bolt on peg mounts for like $15 from Dennis kirk.
 
OK, I think I am gonna use the drawings and modify the design a bit to incorporate some sealed bearings. I also plan to make them from aluminum.
 
sorry been in the middle of moving to the farm. i got the bike loaded in the truck tonight hopefully i can get it into the new shop and get started on it again. the aluminum is cool i started to make a lever out of it but that kinda stalled out with the move. there drilled and half cut out i know there in one of the 6 milk crates of parts i'll try and take a pic of them to
 
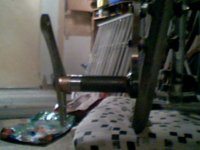
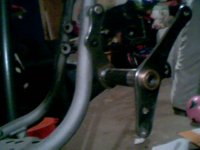
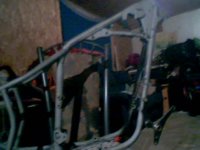
here's some pics of them on the frame. sorry for the delay. hopefully i can get it into the shop tomorrow and start on the fenders and tank. i used the plugs that were left over from the hole saw for the spacers to keep them even from the frame rail. the 3/8ths plug is on the top and the 1/4 is on the bottom bolt hole.
2011-12-16 20-08-53.047.jpg2011-12-16 20-09-27.193.jpg2011-12-16 20-11-01.448.jpg2011-12-16 20-11-18.163.jpg2011-12-16 20-09-46.187.jpg
 
they are in a very comfortable position. started on a second set yesterday. going to weld the next set with the torch. the first set is fine but i'm way better at welding with a torch than the mig. hopefully they turn out smooth enough for chrome
 
I have modded out the mount plate and lever slightly in Bobcad to give them more flowing lines. I will be attaching the cross shaft via 1/2-13 stainless spiked bolt instead of a weld. I have incorporated abec-3 skateboard bearings into the lever to give long lasting lubrication free movement. I still need to draw up a peg clevis to allow folding pegs. And, of course, I'll end up making the pegs as well with an O-ring grip. I plan to paint the controls flat black.
 
I need to put my drawings into solid model, and then I'll post them so you can see the modifications I've made. Bear in mind, they need to be cut, assembled, and tested. But I'm pretty sure I have taken everything into account as far as function.
 
here's some pics of them on the frame. sorry for the delay. hopefully i can get it into the shop tomorrow and start on the fenders and tank. i used the plugs that were left over from the hole saw for the spacers to keep them even from the frame rail. the 3/8ths plug is on the top and the 1/4 is on the bottom bolt hole.
View attachment 12931View attachment 12932View attachment 12933View attachment 12934View attachment 12935

Hey looks like you have a brass bushing on the end. just wondering if it was. i am making mine this weekend and had a pretty good idea of how i was gonna do them. figured id ask how you did your ends where it pivots.
thanks
 
yup i did use brass bushings it worked out good they were just tight enough i had to go use my grandpa's shop and press them in
 
Back
Top