Heavy Metal. Rust Removal and plating

My immediate thought was to add a little Dawn dish soap, but then I worried that it might degrade the solution in some way. Good to know that it is working for you.
I'm still working things out, however my nickel plating has very much improved. I am now using a charger with a stated output of 3V and 300ma, but I haven't actually measured my current or voltage. Guess I should start doing that.
I do not have problems with bubbles adhering to the work. My bubbles are extremely fine, and they immediately rise to the surface. I'll take a video of them the next time I plate.
 
Thank you 2M. It turns out these surfactants for bubble release are called Anti-Pitting Agents or Wetting Agents. Bubbles of hydrogen gas which are formed at the cathode may cause pitting if they cling to the surface. The role of anti-pitting agents is to lower the surface tension of the solution and to facilitate release of these bubbles. Anionic surfactants such as sodium lauryl sulphate are normally used and these are found in cleaning products and personal care products. Personal care products always state what they contain but unfortunately contain a hundred other products that may mess things up so the best approach is probably to try various washing liquids and see what works best. So far I know UK's Fairy Liquid is reasonable.

Edit: Fairy contains sodium lauryl sulphate. Sodium lauryl sulphate can be bought pure on Ebay.
 
Last edited:
In the interest of increased understanding I have to be honest about my failures as well as my successes. I ran a 24 hour "corrosion test" on the parts I have done, and about 50% showed some signs of corrosion. I believe this is partly due to uneven plating and the fact that I buffed some of the parts after plating, and wore through the nickel. In my frustration i ordered a small electric burner and thermometer so i could raise the temperature on my solution (195 F?) and reduce the plating time. I have also decided to make a log book and start standardizing my times for the acid bath as well as the plating to achieve more consistent results. That said I just finished a couple of engine mounts that look great and have resisted degradation, so I am inspired to keep at it.
 
The Nickel Institute Guide gives 40 - 60 Celsius as the usual operating temperatures. Increasing the temperature lowers the resistance so a higher current will flow and also can lower the burning effect. With Nickel electodes it is best not to have them to close to the object to be plated to avoid burning. The first 20 pages are probably the most useful for starting out:
https://www.nickelinstitute.org/media/2323/nph_141015.pdf
 
DSC00030.jpg

This is my second plating attempt, from a few days ago. The four sleeves on the left are before and the four on the right are after plating.
The main change from my first try is that I diluted the salt in my solution by 1/2 by adding more vinegar, and I also went to a less powerful power source. Both in order to lower my amperage, which I think was my main problem. I also used a larger container so that the anodes would be further from the work.
The sleeves were rusty, but not otherwise dirty or oily. Prep began with removing the rust with a wire wheel, but I did not polish them on the wire wheel, as you can see from the discolration on the four on the left. Sleeves were then de-greased with acetone, etched with HCL, rinsed and plated.

DSC00029.jpg

This is what is really weird. The pits rusted AFTER the plating. I am working on a new post-plating rinse procedure.
I ran this particular sleeve past the wire wheel again, and it not only very quickly removed the rust, but polished the sleeve up really nice, and very quickly.
Before plating the remaining four sleeves I decided to really polish them up good on the wire wheel first. I also re-plated the above sleeve along with the four others.

DSC00033.jpg

Final results. After plating, all sleeves were lightly polished with white compound on a medium buffing wheel. Very lightly, because I didn't want to polish off the plating. It's the post-plating polishing that really makes the difference. The really shiny sleeve in the center is the one that got plated, wire-wheeled, plated again, and then polished.
 
Forgot to mention that I also heated the solution when I did the above plating using an eBay aquarium heater. Unfortunately, the aquarium heater has a thermostat that limits the temp to 89 degrees. No need for fish to be hotter than that. So, it wasn't much use. I have since purchased an eBay immersion water boiler, suitable for up to 5 gallons. It was even cheaper than the aquarium heater, which was less than $10.
 
DSC00015.jpg

Couple days ago, my third plating attempt. Still using the almost useless aquarium heater while I wait for the immersion heater.

DSC00018.jpg

Parts were cleaned and then de-rusted AND POLISHED using a wire wheel. Parts were then de-greased with acetone, etched with HCL, rinsed and plated.

DSC00019.jpg

After plating and then polishing with white compound on a medium wheel.
I don't think the pre-plating polishing is that important, but you do need a consistent surface, and you can't see what's happening with the surface until it's polished. If you de-rust using acid, I think that also results in a consistent surface and will yield good results without polishing. I think that any pre-plating polishing just gets un-done in the HCL etch.

DSC00021.jpg

Not too bad, and shinier than the original finish on the part was. You can see evidence of the pitting -- go back to the first pic in this post.

DSC00022.jpg

Not too bad for an old, rusty part.

DSC00025.jpg

This is one of the later-year steering stem bolts that had a threaded hole in the center to accept a "decorative" plastic cover. I have enlarged that hole to 1/4" and drilled it all the way through -- more on that later in a different thread.
Anyways, these later stem bolts were not chromed like the earlier ones, but did have some kind of coating. I removed whatever coating that was with the wire wheel prior to plating.
These parts were all plated for one hour and twenty minutes, using a two-anode tank so that both sides were plating simultaneously. Parts were rotated every 10 minutes anyway.
I think the plating is relatively thick. I was more confident with the plating, and more aggressive with my polishing on these parts.
While final polishing the above stem nut, it caught on the buff and flew out of my hands and hit the concrete floor very hard. It dinged the edge of the nut, and you could see that the plating deformed along with the underlying steel, but the plating was otherwise completely intact and sound.
 
Caution: In my enthusiasm I applied a well known chemistry principle, " I little bit is fun, a lot more is better". Regarding dish washing liquid I tried a small amount and Nickel plated a bolt. Then I added more dish washing liquid and continued plating the bolt. The result was a nice shiny finish but the Nickel blistered and and peeled off easily to leave the first layer. I think I will stick to agitation for bubble removal.

Note: I took pieces of the peeled Nickel and measured thicknesses in the range 0.015 - 0.020 mm i.e. 15 - 20 micrometres. From the Table I predicted 20 micrometres for the bolt with 25 cm squared area, 0.08 Amp and 5 hours.
 
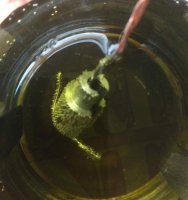
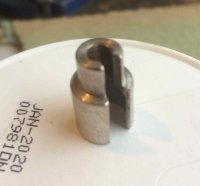
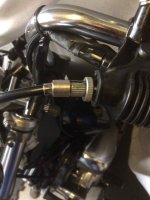
Finally after many months I decided to make a small steel adjuster to take up some of the slack in my clutch cable. Then I electroplated it with nickel, but unfortunately the plating flaked off easily. After a little research I found that flaking is usually due to surface contamination e.g. oils and mill scale. So I sanded off the Nickel in the lathe, washed it in paint thinners then left it to soak in caustic for a couple of hours. When I replated it the Nickel stayed firmly in place:

Honey Jar Plating Tank
Plate1.JPG

Plated Adjuster
Plate2.JPG

Adjuster Fitted
Plate3.JPG

Note: Click on the images to enlarge.

I found the following list of lubricants and their ease of removal prior to plating:

Easiest to Clean Off at the TOP
  • Animal/Vegetable Oils and Fats
  • Light Mineral Oils/Water-soluble Coolants
  • General Metalworking Lubricants
  • Synthetic Oils
  • Heavy Grease
  • Buffing Compound
  • Waxes
  • Mold Release Compounds
  • Silicon Bases Lubricants
Hardest to Clean Off at the Bottom

So if you are going to machine a part to be plated use a vegetable oil, light mineral oil, or water soluble coolant oil. A caustic wash will clean these off easily.

Edit (11/03/21): Unlike hydrochloric acid, cleaning with caustic does not etch the surface of steel.
 
Last edited:
Been experimenting with rust removal again. Hydrochloric acid (aka muriatic acid) does an excellent job removing rust quickly. The down side is an almost instant flash rusting of the steel surface. I've read that has to do with it adding (removing?) iron ions. Can't remember exactly what I read now, I just know that steel rusts pretty easily after treating with hydrochloric acid.

Phosphoric acid doesn't so much remove rust, it alters it to an inert state (?) stopping any further rusting.... and it's painfully slow... like watching grass grow. The advantage being that it inhibits further rusting.

So here's what I've been experimenting with. A quick bath in hydrochloric acid for fast rust removal, followed by a quick bath in phosphoric acid. Here's one half of an alternator rotor. In the first pic you can see it next to it's other half. Both were equally rusted. It was dipped in a hydrochloric acid bath for 30 min, rinsed with fresh water, dipped in phosphoric acid for 30 min, rinsed with fresh water and allowed to air (drip) dry. There was no signs of flash rusting. Using just the hydrochloric acid would have left it covered in flash, or surface rust.
Note: the small bits of brown/orange you see are residual bits of epoxy that I hadn't removed.... it's not rust.


11.jpg


2.jpg


3.jpg
 
Been experimenting with rust removal again. Hydrochloric acid (aka muriatic acid) does an excellent job removing rust quickly. The down side is an almost instant flash rusting of the steel surface. I've read that has to do with it adding (removing?) iron ions. Can't remember exactly what I read now, I just know that steel rusts pretty easily after treating with hydrochloric acid.

Phosphoric acid doesn't so much remove rust, it alters it to an inert state (?) stopping any further rusting.... and it's painfully slow... like watching grass grow. The advantage being that it inhibits further rusting.

So here's what I've been experimenting with. A quick bath in hydrochloric acid for fast rust removal, followed by a quick bath in phosphoric acid. Here's one half of an alternator rotor. In the first pic you can see it next to it's other half. Both were equally rusted. It was dipped in a hydrochloric acid bath for 30 min, rinsed with fresh water, dipped in phosphoric acid for 30 min, rinsed with fresh water and allowed to air (drip) dry. There was no signs of flash rusting. Using just the hydrochloric acid would have left it covered in flash, or surface rust.
Note: the small bits of brown/orange you see are residual bits of epoxy that I hadn't removed.... it's not rust.


View attachment 192231

View attachment 192232

View attachment 192233
Have you tried Evaporust? Works great and environmentally friendly. Not sure if the cleaned part can be plated though if that’s the intended end result.

441CC997-FB2E-4211-BF20-48C171704C34.jpeg
 
Have you tried Evaporust? Works great and environmentally friendly. Not sure if the cleaned part can be plated though if that’s the intended end result.

View attachment 192239
I've tried it several times. It's slow.... tries my patience. :sneaky:
 
Been experimenting with rust removal again. Hydrochloric acid (aka muriatic acid) does an excellent job removing rust quickly. The down side is an almost instant flash rusting of the steel surface. I've read that has to do with it adding (removing?) iron ions. Can't remember exactly what I read now, I just know that steel rusts pretty easily after treating with hydrochloric acid.

Phosphoric acid doesn't so much remove rust, it alters it to an inert state (?) stopping any further rusting.... and it's painfully slow... like watching grass grow. The advantage being that it inhibits further rusting.

So here's what I've been experimenting with. A quick bath in hydrochloric acid for fast rust removal, followed by a quick bath in phosphoric acid. Here's one half of an alternator rotor. In the first pic you can see it next to it's other half. Both were equally rusted. It was dipped in a hydrochloric acid bath for 30 min, rinsed with fresh water, dipped in phosphoric acid for 30 min, rinsed with fresh water and allowed to air (drip) dry. There was no signs of flash rusting. Using just the hydrochloric acid would have left it covered in flash, or surface rust.
Note: the small bits of brown/orange you see are residual bits of epoxy that I hadn't removed.... it's not rust.


View attachment 192231

View attachment 192232

View attachment 192233
I looked up phosphoric acid as rust remover, and I think you're on to something. Will be interesting to see what happens when you plate the part, if you plan to do so.
 
I looked up phosphoric acid as rust remover, and I think you're on to something. Will be interesting to see what happens when you plate the part, if you plan to do so.
I don't think this will apply to plating... at least not for me. Anything I plan on plating will get polished first. That will effectively negate any finish the phosphoric acid applies to a part. Was more thinking along the lines of painting after the acid baths. This would give more time between the bath and the paint... at least vs the hydrochloric treatment that re-rusts almost immediately.
 
DSC01530.jpg

It's been over a year since I plated my parts, so time for a longevity update followed by DEEP THOUGHTS on DIY plating.
All of my parts have spent the last year in a completely non-climate controlled space. Other than being protected from rain, they may as well have been outside.
The above part has held up well.

DSC01533.jpg

However, there is some red iron oxide rust on the back. To some degree or another, almost every part that I have plated get these little rust spots. On this piece, and in the following pictures, the rust appeared very quickly, like within 10 days. However, the good news is that it never progressed beyond that 10 days. So, I have to conclude that the plating somehow did not "take" in the rust spot areas, while the surrounding surfaces resist rust well.

DSC01531.jpg

These have held up very well. Probably my most successful pieces. The marks are pits, and the plating seems to have gotten into the pits and protected them.

DSC01536.jpg

The other side of this piece, which is the side that shows, plated way better than this side.

DSC01535.jpg

This side of this piece was pretty successful. The pits, cuts, and marks all got plated and protected.

DSC01532.jpg

However, the back side has a big rust track along the bend. I plated this piece several times, trying slightly different parameters each time, but I always got rust here. Most vexing.

Here are my Deep Thoughts regarding DIY plating. If you go back to post #2 in this thread, and watch the video, that guy is plating in a vinegar solution. Vinegar is acetic acid, and like all acids (with the possible exception of phosphoric acid), it etches steel. Think about it, your part is in a vinegar solution which is removing material, while you are simultaneously trying to deposit nickel on that material. Logic tells me that something has to give.

I got poor results when I followed the video instructions to a tee. He uses a weak nickel solution and a low electric current. I concluded that you need to really hit the part hard, getting a layer of plate on it as quickly as possible, before the ascetic acid can remove much material.

So, that's what I did. I made a very dark green nickel solution, and I used a more powerful power supply. I also went to a much smaller container, to "concentrate" the voltage, so to speak. And, I started getting much better results.
If your voltage is too high, the plating will flake. I tried beginning the plating with a high voltage to quickly "cover" the bare metal and prevent etching, and then I'd switch to a lower power supply to build up the nickel thickness. This seemed to work pretty well.

My results are okay, but I wish they were perfect. Others seem to be getting better results, either that or they're lying, and I'd like to know what they're doing that I'm not.

I spent a lot of time researching commercial plating, trying to find out if they are plating in acid solutions. I never found my answer, but I suspect not. I also looked at the Caswell nickel plating kit instructions. They use distilled water, but I don't really know what the chemistry of their process is.
I'd like to be plating in a non-acid solution, if that's possible.
 
Last edited:
However, the back side has a big rust track along the bend. I plated this piece several times, trying slightly different parameters each time, but I always got rust here. Most vexing.
From what I've read, that's most likely from uneven current distribution due to it's irregular shape. Maybe try changing the relationship of the current source (anode) and the part?
 
I've tried it several times. It's slow.... tries my patience. :sneaky:
What did you think of the results? I use it a lot. It does take time, heating it to 40-50c will increase speed considerably. Somethings have come out 10 times better than expected. It's not a true miracle worker. What's your hurry anyway?
 
I like evaporust or the equal, just bought a concentrated pint that makes a gallon. From reading up on evaporust they pretty much control he secret formula and sell it to other venders. who remarket as they see fit.
These were typically rusty but not horrible. inserts worse than the finned rings.
Started on a fine wire wheel then some evaporust overnight. it was a mix of some previously used and some that was new in the bottle.
As removed from the chemical rinsed and wiped dry.

20210525_072857.jpg

I still haven't done any plating beyond a couple small pieces with a Caswell brush plating kit. about as minimal as it gets.
 
Back
Top