It's past time to start XS2 Resurrection

Besides side to side and out of round...being centered on hub part of it too...lots bikes different length spokes side to side (rear wheel mostly) so can get wheel "true" but it not centered correct...affects handling quite a bit...that is where "dishing" tool from bicycles comes in handy...correct dish with both wheels needed so they not not ride offset parallel line
 
Last edited:
300hz, that would be real close to the D string on my fiddle. Spokes tuned to the A string on my fiddle (440hz) would probably be too tight. I'm guessing that 300hz to 400hz would be about right. I'm gonna dig up a battery for my chromatic tuner and see what some of my spokes are at. I don't have perfect pitch, but I do have close pitch. But yeah, like 2M said, it all depends on the diameter and length of the spokes. That sounds about right.

Scott
 
When doing an old, used rim that may not be absolutely straight, you won't be able to set each spoke so it "rings" with the same pitch. The rim won't be true if you do. You want all the spokes tight so they ring, of course, they just may not all ring at the same pitch. I don't use a dial indicator for the up-down run-out, just a pointer. The bottom edge of the rim, or inside it where the tire bead mounts, is usually too rough for a gauge. I do use the dial gauge for side-to-side true though. I think it works very well for this and is easier than a pointer. I press the gauge in and pre-load it against the side of the rim so the needle points about straight up or down. I also make it so the needle moves in the same direction as the rim (i.e., rim moves to the left, so does the gauge needle). This makes it easy to determine which way the rim is off and which side's spokes need to be adjusted to get the rim true. Also, since I'm right handed, I place the dial gauge on the left side of the rim. That leaves the right side wide open so I can reach in with the spoke wrench easier. But, I do the majority of my spoke tightening and adjusting with a screwdriver in the slot of the nipples. The wrench is mostly used for final tweaks and tightening.

I have a homemade wheel stand. It consists of a steel plate base large enough to be stable and allow room for attaching the dial gauge magnetic base (about 10" x 12"). The uprights are angle iron and one is fixed with an axle clamp on it. The other adjusts for height. I feel this is necessary and needed because the bench or place you put the stand to do your work may not be level. Also, many axles are stepped so you need a way to compensate for that.

T8Lnb99.jpg


llT2CL0.jpg


Most wheel balancing stands don't make good truing stands because the wheel is free to float and move side to side. You can't have that on a truing stand. The wheel has to be held fast so it can't move side to side. I use spacers on the axle (mostly washers) to take up the extra space so the wheel can't move sideways .....

full


full
 
Gentlemen thank you for all the input. I appreciate it.:)
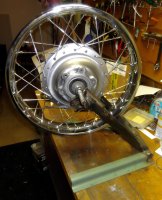
Using my rude and crude setup the rim looks to be within .030 in up/down and side to side. It also looks to be centered on the spool. All the spokes have a nice ting to them no thuds. For a 40 something steel rim probably not to bad.
Good enough until I can make a truing stand and get a more accurate check. Something along the lines of 5Ts. I had never thought of making one side adjustable. Witch brings me to.
TOOL ALERT TOY ALERT
Just got back from F+F with a welder. They have them on sale. I had my mind made up to by a less powerful (cheaper) welder. When I got there I found they had a $100 rebate on their best one. I know it's probably more than I really need but one never knows what the future might hold. Plus it's dual voltage and better duty cycle. Granted on 115 it won't do what it will on 220. Since I'm not going to roast a turkey tomorrow I may roast some steel.
Happy Thanksgiving to everyone.

upload_2018-11-21_15-32-20.png
 
Just for you Jim. A teaser for now. Need to get a 220 outlet put in. Maybe tomorrow I'll have a pic of it's first weld. :geek:

upload_2018-11-21_17-9-34.png
 
My old Craftsman MIG is a Hobart. For 20-30yrs it's stood the test of time.
Gas or flux core?
 
My old Craftsman MIG is a Hobart. For 20-30yrs it's stood the test of time.
Gas or flux core?
Will do either. Came with a regulator. Plus a small spool of flux core wire. If I decide to go with gas just need to make a polarity change. And they made that easy enough.
upload_2018-11-21_17-42-59.png
 
My old Craftsman MIG is a Hobart. For 20-30yrs it's stood the test of time.
Gas or flux core?
Will do either. Came with a regulator. Plus a small spool of flux core wire. If I decide to go with gas just need to make a polarity change. And they made that easy enough.
View attachment 130198
upload_2018-11-21_17-43-44.png
 

Attachments

  • upload_2018-11-21_17-43-33.png
    upload_2018-11-21_17-43-33.png
    581 KB · Views: 167
Wow, 210 amps, that must be capable of using some really big wire. Shop around for the gas, I think I paid $60-$70 deposit for a good sized tank and the refills are only $10-$12. Would be a shame to only use flux with a welder like that. That 220 line can be used for other things too, like a powder coat oven.

Scott
 
Now that you have a welder a truing stand is a good project.

DSCF6484.JPG
DSCN8444.JPG
20160407_143501.jpg
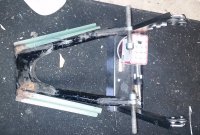
Pictures should splain it .
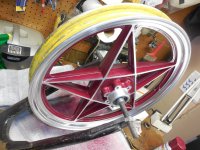
This one's done many wheels. Handy for mag painting, polishing also.
 
A good day. Welder drop in and wired. Decided to take it for a test drive. The weld weren't real pretty. I don't think it's the machines fault. It works better than I can weld right now. I just need to practice. I can see a bottle of gas in the future.
17.PNG
16.PNG

And to make it a better day the Bears won. :yikes:
Now I have to do fire watch. Time for a beer.
 
Weldin' with flux core is like sanding paint with water and beach sand... you can do it, but there's a better way.;)
Do yourself a favor. get the Stargold bottle.
 
Back
Top