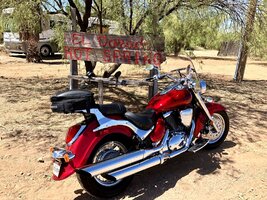
Mailman’s Suzuki C50 Boulevard

Didn't read, or realize you had bought a new one, why it's so clean n shiney.
I had purchased a used wreck Kaw 900 Vulcan Custom a few years ago partly to help out a friend of my wife who had bought it for her son who wrecked it then didn't turn in on insurance because he had been drinking, and with the thought of rebuilding it for my wife to replace her 750 Shadow.
Took a couple years of off/on ebay and Kaw forum work to get the replacement parts, get the paint matched to the used two tone tank I bought, seat reupholster, and go through it doing all maintenance and service so that it was Right.
In the end she didn't like the ergos so I sold it to a young Mexican guy who was happy to get it. Probably didn't break even but felt good about the finished product. Decent running cruiser and sounded well even with stock pipes.

Nice save on that Kawasaki! I actually really like that model, they call it the Custom, with the mag wheels and the skinny front tire, it made the handling very light! They used to have this neon green version one year, I was at a Bike show that had free demo rides, I kept going back to that Custom , just because it was so fun to ride. I think I took it out three times! :laugh2:
E1913B2A-0010-4E86-BB71-4E75F5109827.jpeg
 
It was a project for sure, Thought as long as frame and forks are straight, which they were, how much could it cost.
Tank, pipes, wheels, handlebars and lever assemblies, right side decorative body cover, head lamp and front turn markers all replaced.
Was going to have it painted Red/Gold if she liked it, black if was going to sell as the original bike was black with trim striping.
Wife saw the used tank and said I should paint it to match the Red so I had my painter do that. Then had the seat guy play with the seat and that is what he came up with, with materials he had.
I wanted the larger 7" headlamp of the Classic and found that if I bought a classic lower tree then I could fit the classic headlamp and light bar and that the fork tube shrouds would fit the Custom forks so that's what I did and really liked the beefier look to the front end. Also went with standard type risers instead of replacing the "T" bar that allowed me to fit more natural Classic bars. All cables and hoses were long enough.
Gave $500 for the wreck and probably another $2500 in parts and services, I changed all the fluids, made all adjustments, easiest valve adjustment I've ever made on an engine.
In the end sold it for $2700 just to get it out of my garage.
 
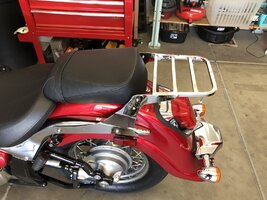
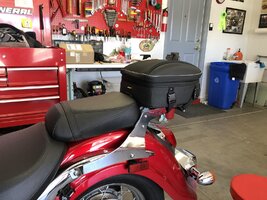
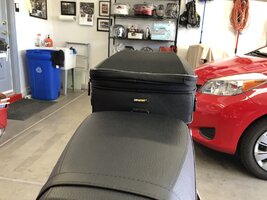
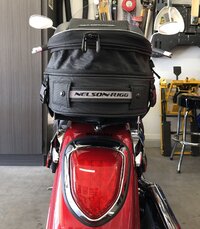
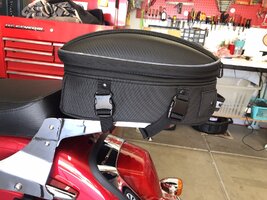
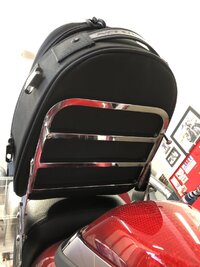
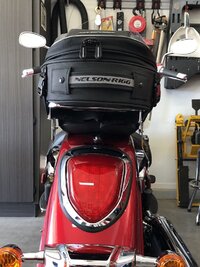
I got my new luggage rack a couple days ago, bought it on EBay , it came with a back rest which I chose not to use. I also bought a new Nelson Riggs seat / tail bag. Its their commuter series, they come in three sizes, I chose the middle size bag. It has semi rigid sides and top so it holds its shape, plus the sides unzip and it is expandable. I really like it, it’s just what I wanted for around town and day trips. It also came with a long shoulder strap, and it can be quick disconnected and carried.
I like this more streamlined look better than the width of more traditional saddle bags, or the sheer size of a top trunk.
DE18CD58-8155-4D79-8D48-732856EFFDC3.jpeg

86FDE826-9E1B-48D5-AB84-9CC4EF08D805.jpegA289C370-C0EC-45DD-9731-2474D315078C.jpeg
D8173FCC-E52A-464C-9D58-DAB7651D50E2.jpegC28C61E6-AC46-49C7-9BF8-218E673182C6.jpeg3F84865F-E344-4609-B5A7-151300C198AC.jpeg
I was reading an old road test on my bike, a few days ago, and this magazine tester was commenting on how engine vibration makes the handgrips tingle at highway speeds. I never noticed any……I guess that magazine writer never rode an XS650. :laugh2:

Puny girly man!
8CA11C65-B0D6-423C-88B2-00087189CACB.jpeg
 
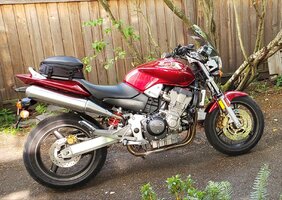
That is a great bag. I had the same one on my Honda 919 and used it for 1000s of kms over at least 3 years and then sold it for over half what I paid. Unfortunately it was a bit large for my TX650A. I could have used it on my DR650, but mounted a pelican case on that instead, just to have some pseudo security on my bike. Just realized the National windscreen I had is in this photo too. Great choices Bob!
 

Attachments

  • 20200705_134857.jpg
    20200705_134857.jpg
    515.5 KB · Views: 60
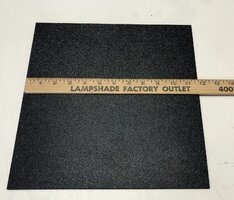
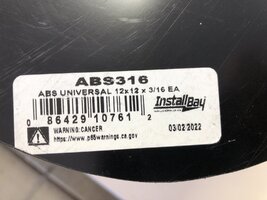
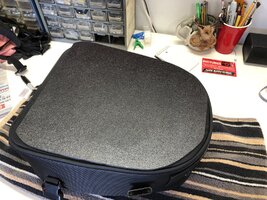
I just came up with a quick and easy solution to fully support my tail bag on my luggage rack. My luggage rack is not that long and the rear of my tail bag overhangs it by several inches. Even though the bag is internally reinforced and semi rigid, I know that the part that over hangs the rear will start drooping. So I wanted to create some sort of hard deck to place it on. What I settled on was a 12 x 12 x 3/16 sheet of ABS plastic, I found on Amazon for about $6.75. It’s very rigid but still soft enough to easily cut with a coping saw, a little sandpaper on the edges and done! Now the bag is fully supported all the way to the end. I also cut a square of black non skid drawer liner to place between the rack and the ABS so it doesn’t slide around. 👍
ECA82B27-7467-4776-90F7-E68E686DD461.jpegCE205FBC-D921-416B-B34D-281DBDFD56D6.jpeg79C441D0-C4AC-4CEF-AE6E-3B470B632482.jpegF14E76A7-F721-4970-B170-FEF59CE1F60C.jpeg8B2AC4A1-4EE5-4E5E-9436-588822994F72.jpeg
 
I just came up with a quick and easy solution to fully support my tail bag on my luggage rack. My luggage rack is not that long and the rear of my tail bag overhangs it by several inches. Even though the bag is internally reinforced and semi rigid, I know that the part that over hangs the rear will start drooping. So I wanted to create some sort of hard deck to place it on. What I settled on was a 12 x 12 x 3/16 sheet of ABS plastic, I found on Amazon for about $6.75. It’s very rigid but still soft enough to easily cut with a coping saw, a little sandpaper on the edges and done! Now the bag is fully supported all the way to the end. I also cut a square of black non skid drawer liner to place between the rack and the ABS so it doesn’t slide around. 👍
View attachment 214873View attachment 214874View attachment 214875View attachment 214876View attachment 214877
Very nice. I should do that on my Water Buffalo.
 
So last week, I rolled my bike out of the garage to go for a ride. The bike was not running, and I simply pushed it out onto my driveway, which has a slight downhill slope to the street. Normally when I stop the bike, I turn the front wheel full lock to the right when I put my kickstand down. For whatever reason I left my front wheel pointing straight ahead, put my kickstand down and let go. Just as I was turning away, the front wheel flopped to the left and that was all it took for my bike to roll forward and fold up the kickstand. :yikes: Luckily I was still next to the bike and I threw my hip into it and quickly grabbed the bars and applied the front brake to stop the forward movement, but the bike had already started going down and had broken over center and for a moment there I was really struggling to push the bike upright. I managed to save it , but barely. I would’ve had a fit if I had caved in my gas tank or done God knows what other damage to it , before I’ve even done my first oil change!

All this is my long winded explanation for why I bought a new crash bar! 😄
I ordered a Cobra Highway bar to be exact ( I guess they think the word “crash” carry’s a bad connotation :cautious: )
I had considered a cheapo EBay special, but they got pretty poor reviews ) So I popped for the good stuff, I’m glad I did, it’s heavy and it fits like a glove, they supplied all necessary bolts and washers, and the chrome looks thick and beautiful. It took me longer to get my tools out than to mount it.

But first, I want to show you my Harbor Freight parking stand I picked up right after I bought my bike. It allows me to park the bike upright in my space challenged garage, and it does double duty for doing maintenance work, since this bike does not have a center stand and nobody makes one for it. ( tie downs not included ).
0B9881F9-67E4-4667-8910-67E082CADDF9.jpeg
51C6EB80-CE48-4160-A49F-7D515EAF3474.jpeg
DBFC4CB8-CBA5-43CE-B9D7-6724A3AB1875.jpeg


I didn’t plan on adding a crash bar, but I think it looks nice and it fits the character of the bike, and hopefully I’ll never have to find out if it will protect my bike, or me! 😉
CDFEF84D-CC04-4D9D-9989-9A0E888A0C85.jpeg
4D25B939-CDCC-413A-B384-C8EDF036AFAD.jpeg
BB6CE49A-D182-49D8-9AAC-936B0A3F299F.jpeg
956F2934-622B-4B98-A2E7-13AB61024D20.jpeg
FD46D7EB-BD31-4692-AFA1-27E275DA233F.jpeg
 
So last week, I rolled my bike out of the garage to go for a ride. The bike was not running, and I simply pushed it out onto my driveway, which has a slight downhill slope to the street. Normally when I stop the bike, I turn the front wheel full lock to the right when I put my kickstand down. For whatever reason I left my front wheel pointing straight ahead, put my kickstand down and let go. Just as I was turning away, the front wheel flopped to the left and that was all it took for my bike to roll forward and fold up the kickstand. :yikes: Luckily I was still next to the bike and I threw my hip into it and quickly grabbed the bars and applied the front brake to stop the forward movement, but the bike had already started going down and had broken over center and for a moment there I was really struggling to push the bike upright. I managed to save it , but barely. I would’ve had a fit if I had caved in my gas tank or done God knows what other damage to it , before I’ve even done my first oil change!

All this is my long winded explanation for why I bought a new crash bar! 😄
I ordered a Cobra Highway bar to be exact ( I guess they think the word “crash” carry’s a bad connotation :cautious: )
I had considered a cheapo EBay special, but they got pretty poor reviews ) So I popped for the good stuff, I’m glad I did, it’s heavy and it fits like a glove, they supplied all necessary bolts and washers, and the chrome looks thick and beautiful. It took me longer to get my tools out than to mount it.

But first, I want to show you my Harbor Freight parking stand I picked up right after I bought my bike. It allows me to park the bike upright in my space challenged garage, and it does double duty for doing maintenance work, since this bike does not have a center stand and nobody makes one for it. ( tie downs not included ).
View attachment 216353View attachment 216346View attachment 216347

I didn’t plan on adding a crash bar, but I think it looks nice and it fits the character of the bike, and hopefully I’ll never have to find out if it will protect my bike, or me! 😉
View attachment 216348View attachment 216349View attachment 216350View attachment 216351View attachment 216352
Glad to hear you saved it! Now go ice that hip! Haha also glad to hear you ponied up for the heavy duty quality set. Whenever I purchased crash protection I did the math of what money I’d save compared to the expensive bits, vs how much it would cost if my cheap out failed. I always ended up buying the more quality piece
 
So last week, I rolled my bike out of the garage to go for a ride. The bike was not running, and I simply pushed it out onto my driveway, which has a slight downhill slope to the street. Normally when I stop the bike, I turn the front wheel full lock to the right when I put my kickstand down. For whatever reason I left my front wheel pointing straight ahead, put my kickstand down and let go. Just as I was turning away, the front wheel flopped to the left and that was all it took for my bike to roll forward and fold up the kickstand. :yikes: Luckily I was still next to the bike and I threw my hip into it and quickly grabbed the bars and applied the front brake to stop the forward movement, but the bike had already started going down and had broken over center and for a moment there I was really struggling to push the bike upright. I managed to save it , but barely. I would’ve had a fit if I had caved in my gas tank or done God knows what other damage to it , before I’ve even done my first oil change!

All this is my long winded explanation for why I bought a new crash bar! 😄
I ordered a Cobra Highway bar to be exact ( I guess they think the word “crash” carry’s a bad connotation :cautious: )
I had considered a cheapo EBay special, but they got pretty poor reviews ) So I popped for the good stuff, I’m glad I did, it’s heavy and it fits like a glove, they supplied all necessary bolts and washers, and the chrome looks thick and beautiful. It took me longer to get my tools out than to mount it.

But first, I want to show you my Harbor Freight parking stand I picked up right after I bought my bike. It allows me to park the bike upright in my space challenged garage, and it does double duty for doing maintenance work, since this bike does not have a center stand and nobody makes one for it. ( tie downs not included ).
View attachment 216353View attachment 216346View attachment 216347

I didn’t plan on adding a crash bar, but I think it looks nice and it fits the character of the bike, and hopefully I’ll never have to find out if it will protect my bike, or me! 😉
View attachment 216348View attachment 216349View attachment 216350View attachment 216351View attachment 216352
Now your Stylin that highway bar fits right into the look of the bike
 
Time for my first major service! 😃

The first major service is at 600 miles. It’s been really hot here and I just haven’t been riding my bike much. The morning of the 4th of July, I got up early and put on 75 miles which put me up just over 600 miles. This service is fairly extensive and would set you back about $600 at the dealership. I have decided to do as much of my own work as possible. This actually represents several days work for me, done a little at a time. 😉 This service calls for,
Oil and filter change
Drain and refill the drive shaft differential
Inspect valve clearances
Check, tighten chassis bolts
Check brakes
and lubricate numerous friction points.

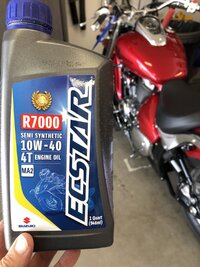
So immediately when I got home from that ride, I drained the oil and pulled the filter. I intend on using Suzuki‘s oil filters, so I went ahead and bought the factory filter wrench to make things easier. I also intend on using Suzuki oil , at least until my warranty expires. I am surprised at just how thin the oil is that the factory calls for. Modern engines I guess.
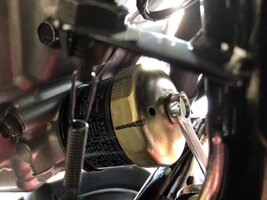
882CB1A8-5C66-447F-A5C9-0D2A6D352D84.jpeg0286D285-AA7C-4DB1-90A9-8D8B090CDB8D.jpeg
I also drained and refilled my rear differential. I used Bel Ray Gear Saver for that.
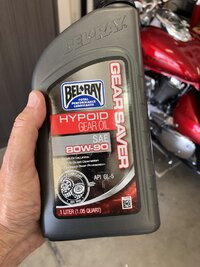
201A1AA3-8923-496A-9A49-A09095D41BA0.jpeg
That was all for day one.

Next day, prepping the bike for the valve clearance inspection. Man o man! These valves hard to access! 🙄
I knew the work area would be tight, but a whole lotta stuff has to come off to get to them.
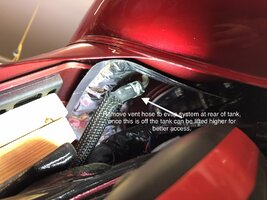
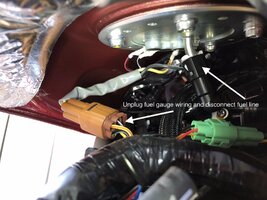
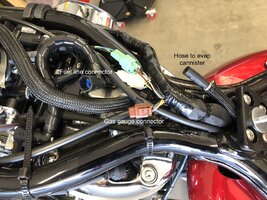
First the instrument cluster has to come off. Then tip up the rear of the tank and pull the vent hose off, then tip it up some more and unplug the wiring for the gas gauge and pull the gas line off.
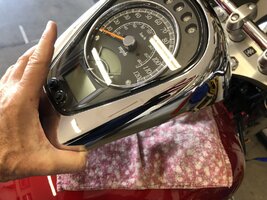
95207A2F-1172-4914-94B6-AB384A0A2704.jpeg6FD8B045-4091-4A3E-88D7-10B231A6949E.jpeg9F60EBF5-C4A9-41C2-AC62-E3A5B48CA872.jpeg6614FD07-0ED4-434A-A249-71C753841F71.jpeg
How do you like the size of this tank tunnel. No wonder the tank is so wide.
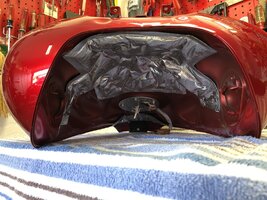
72BD08D7-F99C-45D9-8710-D78B04B79BD2.jpeg
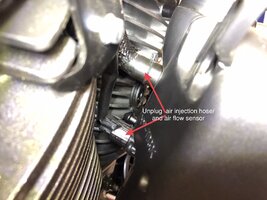
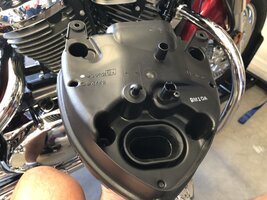
Remove the air filter housing, disconnect the air flow sensor and the hose that supplies air for the air injection.
1DA5E766-6B3D-466A-9407-FAEE9C2476CC.jpeg160BFA79-F2A0-4E1C-8BC1-D03275D2F703.jpeg42B622CF-8E95-4304-9829-A2EC165737F2.jpeg

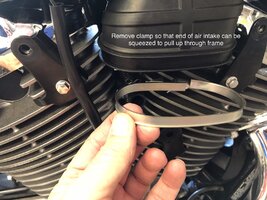
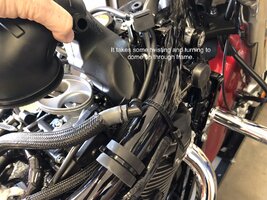
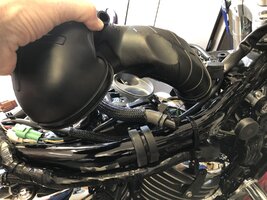
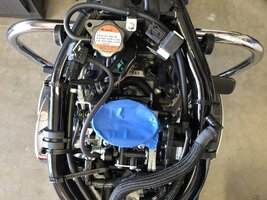
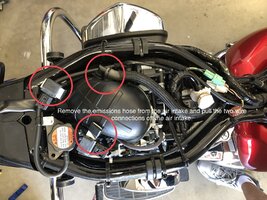
Prepare the air intake for removal, pull off wiring connectors and emissions hose, remove clamp from the bottom and work it up out of the frame,
BA347BEC-9511-4CBB-A6D7-318EA737207E.jpegDA4CEAAD-BD63-4F05-B42C-B31F1C4F1195.jpeg2571B699-10F9-4C70-8D31-3AA078E0BE96.jpeg65CDECEB-5434-482A-A41C-469ADDE901BD.jpeg

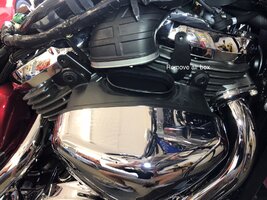
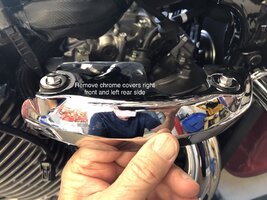
Remove chrome covers from top of the heads,
C7A0E912-64EB-410E-BC8E-C3D83547D47C.jpegEF647EFE-F956-4274-B5A5-660F3ED95F36.jpeg

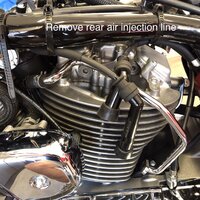
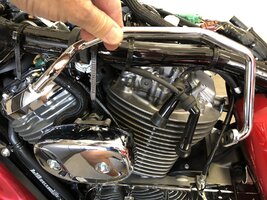
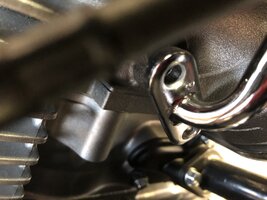
Remove the air injection line from the rear cylinder , it runs right over the valve inspection covers,
D804225E-B68C-4C27-A712-8F6971751729.jpegC95ED3B7-2AC3-46E9-A73C-1928F2740FA2.jpegC9F31CBB-0B99-46A7-97FF-F64C1154BC58.jpeg

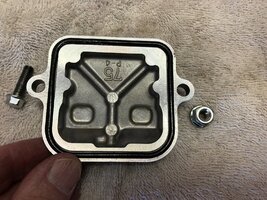
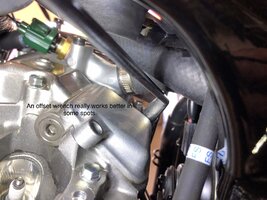
Remove all the valve covers, the rear cylinder intake is especially hard to access. I was able to make good use of my box end offset wrenches.
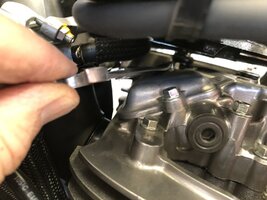
8DAB191F-C7CB-472E-B8D7-443CE0603955.jpeg5EF79CB0-BA27-4FCD-BE21-B5F1B77B471E.jpegD2A017E2-7320-4110-AB60-9042BDF61451.jpeg

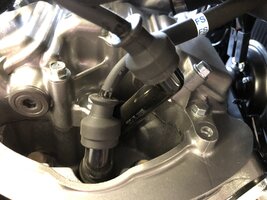
Pull the spark plugs out……and here is where I ran into a snag. The spark plugs take an 18mm spark plug socket and I didn’t have one, not only that but they are deeply set in machined holes that require a thin walled socket.
So that’s where I stopped for the day, I ordered my special spark plug socket from Amazon and took a few days off while I waited for it to arrive.
The valve covers are underneath all this! :doh:
A6AA4D67-6D85-4DC4-BA33-5F470F241101.jpeg

Not for nothing, but here is where the evaporative emissions canister is located, under the right side cover. At least they hide it. I’ve seen some bikes where this thing just hangs out in the open.
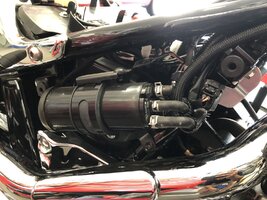
337F2057-00B5-4B40-AE52-5BABB9AD57C9.jpeg

Next up, the valve adjustment. 🙄
 
Back
Top