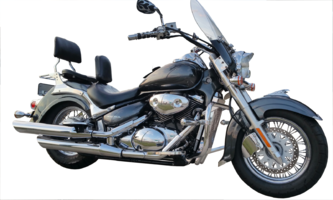
Mailman’s Suzuki C50 Boulevard

600 mile service part 2, valve clearance inspection / adjustment

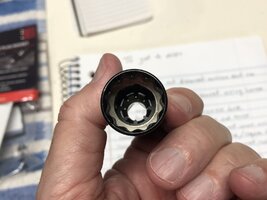
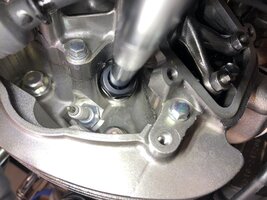
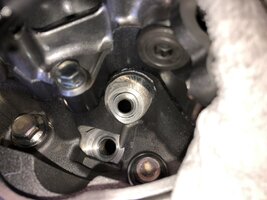
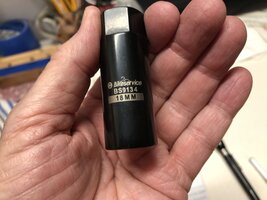
The mailman brought my socket yesterday, so first thing this morning I pulled my spark plugs. See how tight the clearance is and deeply set they are?
23041F79-32B9-43AA-AF80-09D174F87550.jpeg535F14AA-7DCB-4D92-9549-AE25898140A5.jpegE8D49BE0-9BD4-4B7A-A6D0-5397152A1399.jpeg52B22441-20C6-46B5-BDA3-CC8BC73CC027.jpeg

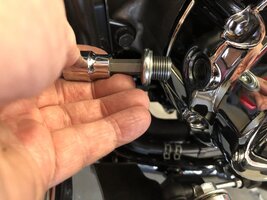
Next remove the crank cover, and the inspection plug from the front of the motor
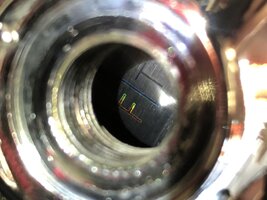
53421050-B446-45FF-9A63-754FB3308B3E.jpegFFF98EB7-62E0-4110-B78A-BE7B5380D6AB.jpegB5FA475C-D7DB-4938-A08C-3EAB42E5E22F.jpeg
Rotate the crank until the hashmark shows up in the inspection window and the cylinder is at TDC. Start with the rear cylinder ( photo shows mark for the front cylinder )
791BBF7A-ADB4-4CA9-BA05-FEDE29B00177.jpeg070EC2E9-9F69-4C08-9AFF-64F11F1CA8A4.jpeg

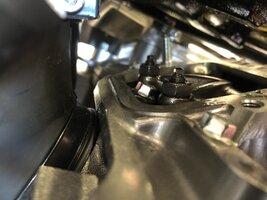
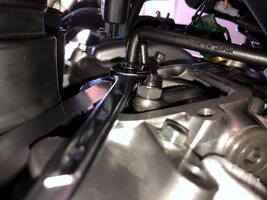
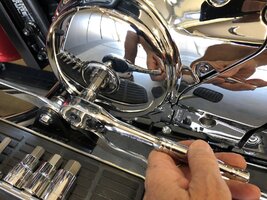
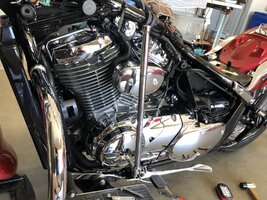
Now the valves can be set. Given the lack of room to work, I popped for the Suzuki special tool. I could’ve made a homemade tool, but what the heck, I’m worth it. 😄
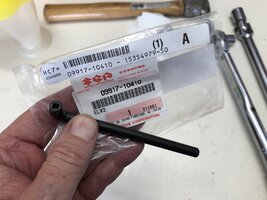
2F456F13-AC5B-4BAB-B082-B73869EF0066.jpeg177D22CC-9909-454B-9EA2-B430958A3D86.jpeg5586E03C-240F-4C34-9571-610CA0DC2200.jpeg

So, some were really easy, a couple were super hard to get to but I got er done! 😎 Most were within spec, but a couple were a little tight. I bought a used factory service manual from EBay. My feeler gauges aren’t speaking to me right now 😄, I had to bend the crap out of them to get into those contorted covers.
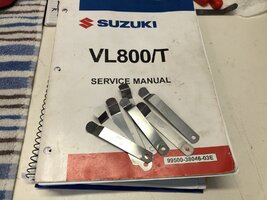
EFC86F91-59E3-407F-B334-B90D6D50699D.jpeg
Funny story, on day two when I was pulling the air intake out, I lost a little spring hose clip down somewhere in all that throttle body mess. I must’ve spent an hour looking for it, and finally decided to circle back to it in the morning.
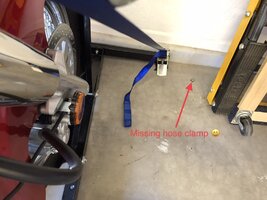
82320745-ACDF-4186-959E-772DE24B08A6.jpeg

So by now it’s 109 degrees out and I’m sweating like I’m melting. I still have to put some things back on the bike and do my inspections and tightening and lubing, but that stuff is easy. The hard work is done. I’m calling it a day.
It sure made me appreciate how easy adjusting the valves is on our XS650’s! 😄
 
Last edited:
Nice work Bob! It’s wild seeing how much is involved to do something as simple as a valve adjustment. People wonder why shop costs are so high, well hell you gotta take half the bike apart! Haha. Working on other new bikes and seeing this is what is making me consider a Moto Guzzi in the future.
 
Working on other new bikes and seeing this is what is making me consider a Moto Guzzi in the future.

Its no secret I’ve always been a fan of Moto Guzzis. The older ones especially have a reputation for being bullet proof and yeah those heads hanging out in the breeze, valve adjustments don’t get any easier than that. I had an old BMW airhead that took me longer to get my tools out than to adjust the valves.
 
I just adjusted the valves on my DR650 and their are some similarities, rockers look the same, and also the access to the crankshaft and TDC marking.

Yeah, all in the Suzuki family I guess. I actually really like the way they locate TDC for doing the adjustments. It eliminates any guesswork.
 
HAH, you're errant spring clip.
Back in the 70's when I was making weekend side money doing tune ups on bikes, got a single cam Honda 750 in to do. Had the valve caps off and dropped a small screw and couldn't find it anywhere. Convinced it went in one of the open inspection holes spent the day wrestling the engine out in prep to remove the cam cover and low there is was resting easily between a couple fins on the head. Couldn't believe it stayed there during the whole pull out process.
 
Time for my first major service! 😃

The first major service is at 600 miles. It’s been really hot here and I just haven’t been riding my bike much. The morning of the 4th of July, I got up early and put on 75 miles which put me up just over 600 miles. This service is fairly extensive and would set you back about $600 at the dealership. I have decided to do as much of my own work as possible. This actually represents several days work for me, done a little at a time. 😉 This service calls for,
Oil and filter change
Drain and refill the drive shaft differential
Inspect valve clearances
Check, tighten chassis bolts
Check brakes
and lubricate numerous friction points.

So immediately when I got home from that ride, I drained the oil and pulled the filter. I intend on using Suzuki‘s oil filters, so I went ahead and bought the factory filter wrench to make things easier. I also intend on using Suzuki oil , at least until my warranty expires. I am surprised at just how thin the oil is that the factory calls for. Modern engines I guess.
View attachment 218513View attachment 218514
I also drained and refilled my rear differential. I used Bel Ray Gear Saver for that.
View attachment 218515
That was all for day one.

Next day, prepping the bike for the valve clearance inspection. Man o man! These valves hard to access! 🙄
I knew the work area would be tight, but a whole lotta stuff has to come off to get to them.
First the instrument cluster has to come off. Then tip up the rear of the tank and pull the vent hose off, then tip it up some more and unplug the wiring for the gas gauge and pull the gas line off.
View attachment 218516View attachment 218517View attachment 218518View attachment 218519
How do you like the size of this tank tunnel. No wonder the tank is so wide.
View attachment 218520
Remove the air filter housing, disconnect the air flow sensor and the hose that supplies air for the air injection.
View attachment 218521View attachment 218522View attachment 218523

Prepare the air intake for removal, pull off wiring connectors and emissions hose, remove clamp from the bottom and work it up out of the frame,
View attachment 218524View attachment 218525View attachment 218526View attachment 218527

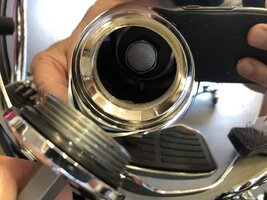
Remove chrome covers from top of the heads,
View attachment 218529View attachment 218530

Remove the air injection line from the rear cylinder , it runs right over the valve inspection covers,
View attachment 218538View attachment 218539View attachment 218540

Remove all the valve covers, the rear cylinder intake is especially hard to access. I was able to make good use of my box end offset wrenches.
View attachment 218545View attachment 218546View attachment 218547

Pull the spark plugs out……and here is where I ran into a snag. The spark plugs take an 18mm spark plug socket and I didn’t have one, not only that but they are deeply set in machined holes that require a thin walled socket.
So that’s where I stopped for the day, I ordered my special spark plug socket from Amazon and took a few days off while I waited for it to arrive.
The valve covers are underneath all this! :doh:
View attachment 218548

Not for nothing, but here is where the evaporative emissions canister is located, under the right side cover. At least they hide it. I’ve seen some bikes where this thing just hangs out in the open.
View attachment 218549

Next up, the valve adjustment. 🙄
That’s quite the process to get at the valves. Reminds me of getting at the plugs under the tank of my vstrom. At first $600 sounded like a lot but there seems to be quite a bit of labour involved. Good idea taping up the intake!
 
That’s quite the process to get at the valves. Reminds me of getting at the plugs under the tank of my vstrom. At first $600 sounded like a lot but there seems to be quite a bit of labour involved. Good idea taping up the intake!

I had a V Strom also, even though I had it for years, I never did any of the service work on it. When I bought it, it was a hold over model from the previous year and the new model had a big design change, so they were anxious to move it off the showroom floor and they offered me a deal on an extended warranty package that covered All the service work for years. That V Strom was a great bike, maybe the best all around bike I ever owned. 😉
 
Mailman, I had a 2004 Suzuki Volusia (the named changed to Boulevard C50 in 05). I put over 30K miles on it from 05 until 2017 when I
finished my 81 RestoMod. What a great bike, I never had a problem with it. Other than the 05 getting fuel injection, a new name and some
cosmetic changes it's the same bike.
 

Attachments

  • 2004 Volusia 800.png
    2004 Volusia 800.png
    1.5 MB · Views: 52
Mailman, I had a 2004 Suzuki Volusia (the named changed to Boulevard C50 in 05). I put over 30K miles on it from 05 until 2017 when I
finished my 81 RestoMod. What a great bike, I never had a problem with it. Other than the 05 getting fuel injection, a new name and some
cosmetic changes it's the same bike.

Oh nice! It’s good to hear you had a positive experience with your Suzuki! I hope mine treats me just as well! 🙂
 
Oh nice! It’s good to hear you had a positive experience with your Suzuki! I hope mine treats me just as well! 🙂
If you reach a point where your looking for a 6th gear, there's a mod that lowers the ratio just right for cruising. You switch the
rear diff. with one off a C90 or LT1500. There's a lot of info online if decide to look into it. I believe I did mine in 08 and I never wanted
it changed back out. When I sold the bike the new owner received the original low miles differential in a box

Ive read about that switch a roo! Something to think about. Requires a bit of machine work.
 
Back
Top