Welcome! What a great bike to restore. I’ve de-rusted several tanks using nothing more than household vinegar. There is every tidbit of info you need on here if you look. Keep feeding us pics!
-
Enjoy XS650.com? Consider making a donation to help support the site.
XS650.com receives a small share of sales from some links on this page, but direct donations have a much greater impact on keeping this site going.
You are using an out of date browser. It may not display this or other websites correctly.
You should upgrade or use an alternative browser.
You should upgrade or use an alternative browser.
New (to me) XS1B
- Thread starter blackknightwhosaysni
- Start date
Congratulations on your new bike!
If I could make a few suggestions, I don’t know how deep you’re planning on getting into this, but you made the comment that you don’t have a lot of experience. It’s easy to get enthusiastic about removing parts and I have seen a lot of people that are great about tearing bikes apart, but then get overwhelmed and then the project dies.
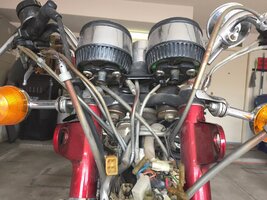
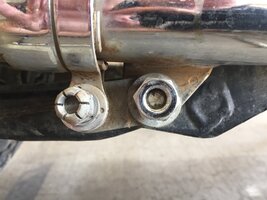
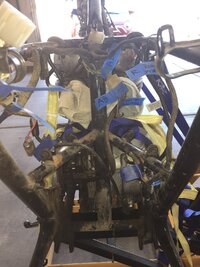
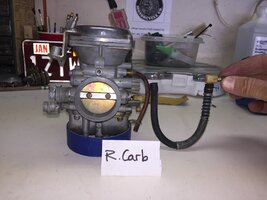
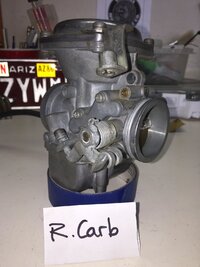
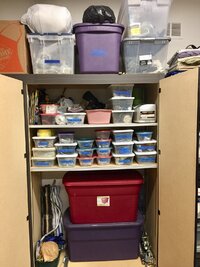
I restored an XS2 a while back and some tips I would make is, before you pull any parts off, take photos of everything from every angle, seriously you can’t take too many. Use your phone and store them on your computer for future reference. I’ve got over 1500 photos from before, during and after my build. I referred to my photos constantly during my rebuild. Mundane things you don’t think of , like cable routing, wiring harness routing and wiring connections, the order that mounting hardware goes back together, what the carburetor looks like before you take it apart, and during disassembly , and store your parts carefully, keep things that go together , together! Go to the dollar store and buy zip lock sandwich bags, and gallon size bags, and cheap food storage containers. Label your parts and keep all the little screws and hardware together.
Some examples of my reference photos,
Be meticulous in your approach, read everything you can, and you can turn this ,
Into this,

Best of luck to you!
Bob
If I could make a few suggestions, I don’t know how deep you’re planning on getting into this, but you made the comment that you don’t have a lot of experience. It’s easy to get enthusiastic about removing parts and I have seen a lot of people that are great about tearing bikes apart, but then get overwhelmed and then the project dies.
I restored an XS2 a while back and some tips I would make is, before you pull any parts off, take photos of everything from every angle, seriously you can’t take too many. Use your phone and store them on your computer for future reference. I’ve got over 1500 photos from before, during and after my build. I referred to my photos constantly during my rebuild. Mundane things you don’t think of , like cable routing, wiring harness routing and wiring connections, the order that mounting hardware goes back together, what the carburetor looks like before you take it apart, and during disassembly , and store your parts carefully, keep things that go together , together! Go to the dollar store and buy zip lock sandwich bags, and gallon size bags, and cheap food storage containers. Label your parts and keep all the little screws and hardware together.
Some examples of my reference photos,


Be meticulous in your approach, read everything you can, and you can turn this ,

Into this,
Best of luck to you!
Bob
Check out the Mailman’s XS2 restoration thread. It’s quite thorough and a great source of documentation. Just reading his thread could give you great insight of what you are getting yourself into.
More thoughts from the gallery…
If you are not 100% serious about that bike don’t touch it. It’s a very early bike, and not many of them are still around. Correct parts are expensive and quite often hard to find.
I don’t know what you paid for it, but I’ll say without even knowing, you can sell it as is to a collector, double your money and buy a bike in a much friendlier state to learn on and enjoy.
Getting that bike to a reliable, presentable state could take years depending on your time, finances and dedication to see it through.
Just something to think about.
If you do start to tackle it, read mailman’s restoration thread. All of it! See how much work it was, how many set backs he had to push through and use it as a blueprint. I can personally say, the end product he build is about as good as it gets. Stay organized.
Buy a shrubbery!I'm honestly astonished by the speed and number of responses that I've gotten. I wasn't specifically looking for an XS when I was searching for a first project bike. But, I think I'm lucky to have ended up with one and found this community. Thanks!
NOTE: Post a pic from the other side of the bike. The engine tappet cover should have a 3 stud cover like the other 3. If it is a 4 stud cover then before you do anything else check your engine #. That engine side-cover is from an 81-83, The arrow points to an oil glass this is the tell its from an 81-83
The oil filter cap bolts are at 9 and 3 o'clock when they should be at 10.30 and 4.30 as i have drawn them in green on the pic. The arrow points to an oil glass this is the tell its from an 81-83.
Yellow arrow is where the throttle cable should be hooked up to.
Do a series of pics a bit closer. As close as the cropped pic i have re-posted. Go over the whole bike and under the seat.
Last edited:
I believe in the very first pic posted it looks like there is a 3 stud cover on the left front valve and the passenger peg stanchions are correct. I’m not sure about the shocks but everything else looks very good.
blackknightwhosaysni
XS650 Member
NOTE: Post a pic from the other side of the bike. The engine tappet cover should have a 3 stud cover like the other 3. If it is a 4 stud cover then before you do anything else check your engine #. That engine side-cover is from an 81-83, The arrow points to an oil glass this is the tell its from an 81-83
The oil filter cap bolts are at 9 and 3 o'clock when they should be at 10.30 and 4.30 as i have drawn them in green on the pic. The arrow points to an oil glass this is the tell its from an 81-83.
Yellow arrow is where the throttle cable should be hooked up to.
Do a series of pics a bit closer. As close as the cropped pic i have re-posted. Go over the whole bike and under the seat.
View attachment 226107
Thanks for taking a look. I appreciate the information. I have other pictures, but haven't organized them to get them posted. Hope to get to it tomorrow. In the meantime, I went and took a couple of quick pictures of both sides of the engine.
Here's the left side of the engine:
Here's a closer view of the right side of the engine:
After taking the picture, I hooked up the throttle cable.
The VIN number on the neck of the frame and the number stamped on the front of the engine seems to match. Though, the engine number isn't very neatly engraved. Is that normal?
Yup! No place for a starter motor under the butt end a pretty good clue too. ;^)
blackknightwhosaysni
XS650 Member
Thank you for the sage advice. Following @willis's advice, I've bookmarked and started reading through your thread on the restoration. That is an amazing looking bike!Congratulations on your new bike!
If I could make a few suggestions, I don’t know how deep you’re planning on getting into this, but you made the comment that you don’t have a lot of experience. It’s easy to get enthusiastic about removing parts and I have seen a lot of people that are great about tearing bikes apart, but then get overwhelmed and then the project dies.
I restored an XS2 a while back and some tips I would make is, before you pull any parts off, take photos of everything from every angle, seriously you can’t take too many. Use your phone and store them on your computer for future reference. I’ve got over 1500 photos from before, during and after my build. I referred to my photos constantly during my rebuild. Mundane things you don’t think of , like cable routing, wiring harness routing and wiring connections, the order that mounting hardware goes back together, what the carburetor looks like before you take it apart, and during disassembly , and store your parts carefully, keep things that go together , together! Go to the dollar store and buy zip lock sandwich bags, and gallon size bags, and cheap food storage containers. Label your parts and keep all the little screws and hardware together.
Some examples of my reference photos,
View attachment 226058View attachment 226059View attachment 226060View attachment 226061View attachment 226062
Be meticulous in your approach, read everything you can, and you can turn this ,
View attachment 226063
Into this,
View attachment 226065
Best of luck to you!
Bob
blackknightwhosaysni
XS650 Member
I appreciate the sobering thoughts. I'll definitely keep them in mind.More thoughts from the gallery…
If you are not 100% serious about that bike don’t touch it. It’s a very early bike, and not many of them are still around. Correct parts are expensive and quite often hard to find.
I don’t know what you paid for it, but I’ll say without even knowing, you can sell it as is to a collector, double your money and buy a bike in a much friendlier state to learn on and enjoy.
Getting that bike to a reliable, presentable state could take years depending on your time, finances and dedication to see it through.
Just something to think about.
If you do start to tackle it, read mailman’s restoration thread. All of it! See how much work it was, how many set backs he had to push through and use it as a blueprint. I can personally say, the end product he build is about as good as it gets. Stay organized.
Definitely had the motor out at some point. I’m looking at the backwards bolts in the motor mounts.
Top advice about taking photo's Bob. Saved my ass a few times over the past year rebuild.Congratulations on your new bike!
If I could make a few suggestions, I don’t know how deep you’re planning on getting into this, but you made the comment that you don’t have a lot of experience. It’s easy to get enthusiastic about removing parts and I have seen a lot of people that are great about tearing bikes apart, but then get overwhelmed and then the project dies.
I restored an XS2 a while back and some tips I would make is, before you pull any parts off, take photos of everything from every angle, seriously you can’t take too many. Use your phone and store them on your computer for future reference. I’ve got over 1500 photos from before, during and after my build. I referred to my photos constantly during my rebuild. Mundane things you don’t think of , like cable routing, wiring harness routing and wiring connections, the order that mounting hardware goes back together, what the carburetor looks like before you take it apart, and during disassembly , and store your parts carefully, keep things that go together , together! Go to the dollar store and buy zip lock sandwich bags, and gallon size bags, and cheap food storage containers. Label your parts and keep all the little screws and hardware together.
Some examples of my reference photos,
View attachment 226058View attachment 226059View attachment 226060View attachment 226061View attachment 226062
Be meticulous in your approach, read everything you can, and you can turn this ,
View attachment 226063
Into this,
View attachment 226065
Best of luck to you!
Bob
Just found this thread. Welcome aboard - so much good advice here already. Yes, it's appropriate to give some sobering advice about how much work and expense might be involved BUT if you can put in the time and effort you will end up with a fantastic bike to ride around your neighbourhood. Plus a huge sense of achievement and involvement with the bike. It's not the same thing as just going to a dealer and buying the latest plastic rocket.
Tell us a bit more about yourself, your 2-wheel experience, your mechanical nouse if any? Keep the pictures coming, oh, and good luck.
Tell us a bit more about yourself, your 2-wheel experience, your mechanical nouse if any? Keep the pictures coming, oh, and good luck.
blackknightwhosaysni
XS650 Member
Here's a set of pictures I took the day after I got the bike home. They were meant to document what I started with. After looking them over, I realize that they are sort of scatter shot. I should have better focused per component or assembly.


Do you have a clear title for it ?
A couple of years work (at my pace anyway) and a truck load of money to turn this into a mint show bike.
But not so much to turn it into a daily ride.
To me, that bike is just crying out to be fixed up and used.
All too easy to get fired up with enthusiasm, and strip it down into little pieces, then get bogged down with everything and grind to a halt.
I've bought other peoples projects like that over the years, sad for them but a bargain for me.
blackknightwhosaysni
XS650 Member
I bought a cheap borescope on Amazon to take a look inside the engine. The videos are below. (Sorry for the lack of stabilization and general poor camera control.) Both cylinders are pretty crusty. There's definitely rust in the right cylinder and it looks like some metal shavings/flakes. I'd appreciate any thoughts on what you see. Right now, I'm thinking I'll take the engine off the frame and start a rebuild.
Left cylinder:
Right cylinder:
Down the oil fill:
Left cylinder:
Right cylinder:
Down the oil fill:
blackknightwhosaysni
XS650 Member
Here are some pictures of the inside of the tank. It looks pretty bad; a lot of rust and the remnants of what looks like a liner of some sort.


Here's a picture of some of the old gas and debris that poured out.

I have the tank filled with vinegar. I plan to agitate the inside surface of the tank with a drain cleaning brush and then some shaking with a chain. I'll post some after images. I'm guessing I'll need a lot of iterations of the process.
Here's a picture of some of the old gas and debris that poured out.
I have the tank filled with vinegar. I plan to agitate the inside surface of the tank with a drain cleaning brush and then some shaking with a chain. I'll post some after images. I'm guessing I'll need a lot of iterations of the process.
Yeah, that valve will never seal, off with it's head.
This a serious reflection point, is a project of this magnitude for you??
Something you WANT and are able to do?
This a serious reflection point, is a project of this magnitude for you??
Something you WANT and are able to do?
Last edited:
What you’re showing is generally typical of what you find in these older bikes. Obviously you need some valve work but that, rings and whatever the top end needs is not overly expensive or complicated. The bad? You gotta do some work. The good? You’ll know your bike very well by the time you’re finished.
Vinegar in the tank has worked very well for me. I just shook it with the nuts and bolts that needed rust soaking as well.
Vinegar in the tank has worked very well for me. I just shook it with the nuts and bolts that needed rust soaking as well.
