Reunited with XS650SH

The center stand on this thing is roached.
1680996662773.png


I had a centerstand from my XS650SK that got bent in an accident over 20 years ago. My neighbor has a press and was kind enough to allow me to use it. Now I have a gusseted '83 stand on my SH.
1680996872788.png

1680996937727.png


After that, I swapped the taillight lamps. Now LED.
1680997085775.png
1680997125320.png

1680997168970.png
1680997207799.png
 
I rode it,and pushed it hard. I did a few top gear WOT roll-ons from 2500 rpm to about 6000. It feels perfect and I believe the pinging is gone.

However:
IMG_2426.jpeg

Not much there in the way of color. Both plugs look the same. I was a bit surprised. The pipes have no discoloration.
 
Your plugs may be burning fine. What you have to do is look deep down into the plug and look for a ring of color around the base of the porcelain. I like to see it climbing not more than 1/3 of the way up the porcelain .....

Smoke Ring.jpg
 
Could it be the fuel you're running? If it runs well, I might try some ethanol free and see if ya get some color on the plugs, before more tuning. There's a Shell station in Hernando that reportedly sells 90 Octane ethanol-free https://www.google.com/maps/place/Shell/@34.8168651,-89.995697,17z/data=!3m1!4b1!4m6!3m5!1s0x887ff5825d61abd3:0xda3db541304293ed!8m2!3d34.8168651!4d-89.9935029!16s/g/11j2lvpfc4
We have ethanol free gas all around me. Since we moved here, my bikes rarely taste ethanol. These plugs haven’t burned any. JP, thanks for taking the time to look that up.
 
Today's project is an attempt to get the flashers working. The colors in the schematic don't appear to entirely match what's in the headlight shell. Today, I'll try the XS650SK template.
OK, so it's over a month later. This bike does not have a Dg (dark green) wire to the right turn indicators. It's light green. I checked over all the signal wiring with a meter. Done! No signal operation at all. I used the fault isolation steps in chapter 6 of the factory service manual. That took me to this.
1682214634215.png


I'm out of practice, but I can still solder.
1682214786627.png


I don't think I have to do anything else to take it to the Ozarks. I may futz more, but I don't think I have to.
 
I've driven it now 1,800 miles. I threw a leg over it the other night and something wasn't right. So, I switch bikes.

When I turn off the choke, I lose the left cylinder. It runs with the throttle opened up, but when I close the throttle, the exhaust is popping. I suspect crud in the pilot circuit.
 
I removed the carburetors and cleaned the debris from the left carburetor pilot jet. That should do it. There was debris in the tank from going after the epoxy liner with a round file.
IMG_2846.JPG
Our friend, Ross (@rhkansas) gave me the tip for securing the screens. My safety wire pliers came in handy. That fix was applied after the Ozark rally. It's a proven fix.

IMG_2847.JPG

While I'm at it, this is a perfectly good rotor. It's going to be a serviceable spare.

IMG_2848.JPG

I have a rewind by @Jim.

IMG_2849.JPG

Buttoned up and cleaned up. I won't be concerned about rotor failures for 20 years or so.

IMG_2850.JPG

Pretty much buttoned back up.

IMG_2851.JPG

1693082406261.png
1693082432880.png


Fortunately, this can wait until later.
 
I cleaned the left pilot jet. It's fixed. It idles on two cylinders. In 5th gear, it let the RPM drop below 2500. I opened the throttle to the stop. It pulls without complaint. While it's still not quite as smooth as my XS650SK, the high amplitude vibration from 4000 to 4800 is gone.
I never checked it, but I rode 25 miles and it didn't go dead, so it's safe to assume Jim's rotor is good. ;)
I installed a new clutch cable while I was in there too.
 
Something I forgot to mention, the rubber plug on the left intake barb was split. It could not have been longer than since March that it was installed. It is another inferior aftermarket part, but I won't say where I got it because I'm not 100% sure. It's one of those things that should probably be OE.

IMG_2860.JPG


The petcock outlet needs to be reclocked 90 degrees. Pointed straight down is a no go. I'll have a hole in the hose in no time. I need a shim with a 7mm hole diameter. Can I use a feeler gauge to judge thickness? I can't get what I need local. Suggestions? This aftermarket petcock is not plug and play.

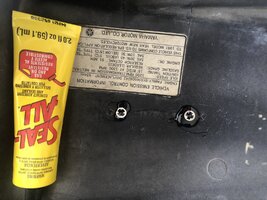
The "650 Special" badges on the side covers were rattling and making dust. Hopefully, my cure is adequate. I have not tried this stuff in the past. It cast less than half as much as a little tube of RTV.
IMG_2861.JPG
 

Attachments

  • IMG_2862.JPG
    IMG_2862.JPG
    344.4 KB · Views: 40
Last edited:
Maybe just double up the sealing washers on that petcock outlet. I don't think you need to turn it a full 90°, just get it angled a bit more towards the inside and I think it will be good.
 
Maybe just double up the sealing washers on that petcock outlet. I don't think you need to turn it a full 90°, just get it angled a bit more towards the inside and I think it will be good.
I'll run to the local autoparts house and see if they have a sealing washer that small. It's worth a try.
 
Back
Top