Shift shaft chain guard

GLJ

Never go faster than your guardian angle can fly.
Messages
4,118
Reaction score
16,997
Points
513
Location
Dixon IL USA
Last winter when putting my original engine back in my XS2 I had a small problem. My shift shaft chain guard was toast. Pretty typical.
upload_2020-6-14_9-2-41.png

I remembered Signal had posted a pic on a guard he had made. Did some searching and found it.
upload_2020-6-14_9-4-52.png

Did some research on a material to use and settled on Delrin. Ordered some and made a couple of them.
Installed one on my bike It fit nicely except for the wire to the alternator, no room for them to run in the original position. Had to reroute them under the shaft. Didn't like that real well but it was worth testing.
upload_2020-3-15_14-5-24-png.161931

upload_2020-6-14_9-13-58.png

That presented a new problem. It's still winter here. I managed to get out for a few short rides, not near enough for a good test. What to do, what to do. I needed a test rider in a warm area.
About then Mailman was putting a big honken chain on his bike and having a clearance problem with the factory guard. PMd him and asked if he would like to try one of these. He did. Sent him one. He installed and tested it but like me he did not like the way the wiring had to be rerouted. Back to the drawing board.
New design. 2 piece.
upload_2020-6-14_9-50-33.png

It works well. Allows the wiring to be routed in the original position. The one below has been in my bike for 1500 miles, I purposely have been running the chain looser than it should be. It shows where the chain has been hitting on it.
upload_2020-6-14_9-55-37.png

All in all I think it works very well. If anyone is interested I can post all the dimensions.
Or if anyone wants to buy one I would sell them. $12 + shipping.
 
About four months ago Greg sent me the first of three prototype shift shaft guards for testing. He kept refining the design until he wound up with the model that I’m testing now. It consists of two parts, a small collared piece that traps the wiring harness against the case , out of harms way, and the larger portion that protects the shift shaft.


C6CE8D57-4507-4494-A8A2-4894894E556F.jpeg


It is super simple to install, simply slip the two parts over the shift. The nature of the design makes it self centering.


40C503BB-43A5-4652-B6FD-891836B1C04E.jpeg

D5736CF9-6C66-4249-8187-FAA6FB9A97AD.jpeg
4E5057E1-5EFA-4605-A136-C04885FCD544.jpeg


After running this set up for approximately 600 miles , through a variety of conditions, bumpy rural roads to high speed super slabs, I pulled my side cover off for an inspection. I’m very pleased with how it is holding up. You can see marks from where the chain has contacted the guard, as you would expect, but the design of the guard allows it to just roll with it, instead of being gouged by the chain. The marks have not affected the thickness of the guard, which is approximately 3.5 mm thick.


5F1973F2-B0E8-4EB8-8A6C-100C34547C82.jpeg


Here are some more photos of the guard in it’s installed position.


2E9DD059-11CD-4491-B742-9B649D0E6B1B.jpeg
D3B01646-8A18-4BC8-9655-E70F3494BF63.jpeg
C731C7D9-CB75-4A50-8962-1BD51F913FE2.jpeg


It certainly is wearing better than the stock guard.


5C557478-FAE4-4B16-A069-B59BFDD7CBAE.jpeg


I really like the design of this guard and I plan to keep using it. I like the simplicity and durability of it. I am running a heavy duty o-ring chain that is physically much larger than my original chain. This new guard clears my chain way better than the stock guard.


Also an observation, when I installed it the first time, I put a light coating of grease on the shift shaft and the interface between the two pieces, thinking that it would make them more slippery and rotate more freely. However when I had it back apart for inspection , I tried it both with and without grease. I was surprised to find the grease actually increased the stiction. It spins much more freely in just its clean natural state.

I rate this two thumbs up!
-Bob
C2503805-E631-419E-9D53-372DFBDBCCA4.png
 
Last edited:
Looks very cool. Will this guard work if you want to run an 18t front?
One thing that’s a little worrying is the score marks indicating that the small piece is spinning on the harness.
Maybe a couple set screws in the small piece? Something to keep it from spinning and chewing on that harness?
64ED2A27-7DA4-4804-A9BD-1D3659018676.jpeg
 
Maybe a couple set screws in the small piece? Something to keep it from spinning and chewing on that harness?

The only problem with a set screw is that it would rub on the harness every time you shifted.
Maybe shorten the length slightly so it's not in contact with the larger piece?
 
Maybe shorten the length slightly so it's not in contact with the larger piece?
The reason for the length is that's what Bob needed for his wire loom. If it was shorter it would still set in the same place. It's pretty light scuffing. Bob did not see any wear on the loom. I guess time will tell if it's a problem.
upload_2020-6-14_11-31-55.png

I had to retape my loom where the original factory guard had worn through it.
upload_2020-6-14_11-37-45.png
 
Maybe shorten the length slightly so it's not in contact with the larger piece?

Here you can see how the small piece fits over the wiring harness. It’s a pretty snug fit.
EAB54646-1BA5-46C5-AEA5-C319C2A2F259.jpeg


One thing that’s a little worrying is the score marks indicating that the small piece is spinning on the harness.

Yes, I should’ve commented on that. There has been some spinning evidenced. I did inspect the harness and I could not see any wear on on it. That said, my harness cover is hard as rock from forty years of engine heat.
As I noted earlier, at first I had applied grease between the two pieces to make that joint more slippery. What I came to realize later was that it actually slips better when the two plastic pieces are dry.
 
Yes please. :geek:
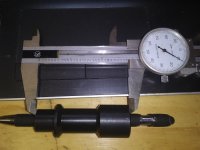
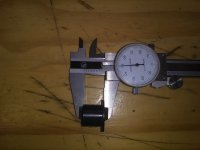
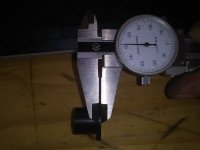
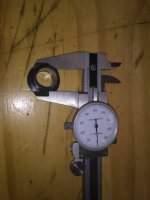
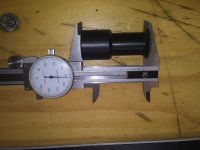
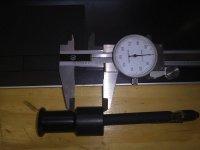
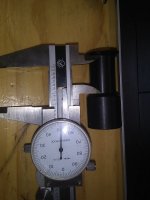
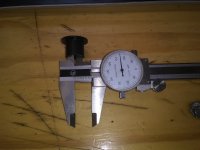
Hopefully these will tell you what you need to know. Measurements in thousands of an inch.
Material 1 inch Delrin.
I'm not a machinist or a draftsman this should give you a good enough idea to make one.
2810.jpg Overall length 2810 of both pieces together.
650.jpgOverall length of short piece 650
50.jpg Collar 50
700.jpg 700
2150.jpg Overall of large piece 2150
1000.jpg 1000
1050.jpg 1050
575.jpg both pieces bored to 575
 

Attachments

  • 760.jpg
    760.jpg
    115.8 KB · Views: 271
Excellent solution there GLJ!

Note: If my memory is still in shape, I believe Delrin also comes in a graphite impregnated version for bushings. If you want a smoother finish on Delrin/Acetal you can apply a flame to it. If you heat it too much the surface cracks. You apply the flame just long enough for the surface to go shiny. Delrin is very crystalline so the melting from machined finish to shiny is a very quick transition. When it cools it loses the shine but stays smooth/semi-matt. 8000 Grit will probably give just as good a finish, but flaming is quick on the lathe.
 
Have not been following this thread real close but just a little idea that came to me when I saw the picture of the marks from the guard rubbing on the harness. What about making that area a bit larger but then put a flat spot on one side to give clearance for the harness? Kind of a D shape at that end?

Time for second cup of coffee so maybe that's not a good idea, but at least it wasn't thought of after second glass of an adult beverage so maybe?
 
Back
Top