Worn adjuster screw tips and corresponding marks on the valve stem tops is pretty normal. You can replace the screws but it will eventually just do it again. I think it's a poor design personally. That's why I put the elephant foot adjuster screws in.
-
Enjoy XS650.com? Consider making a donation to help support the site.
XS650.com receives a small share of sales from some links on this page, but direct donations have a much greater impact on keeping this site going.
You are using an out of date browser. It may not display this or other websites correctly.
You should upgrade or use an alternative browser.
You should upgrade or use an alternative browser.
STANDARD issue…. a resurrection begins….
- Thread starter willis
- Start date
That’s the plan. I have a extra set leftover from my last engine build. The way things are looking, I’ll be installing a 750 bbk, upgraded timing chain adjuster, single outlet breather, and one piece clutch pushrod to go along with the CB elephant foot adjusters. For budget purposes I will stick with a stock cam and valve springs though. First step though is to get this motor all cleaned up before I finish disassembling it.That's why I put the elephant foot adjuster screws in.
Need some advice here. Tearing this motor down and the cylinders are stuck on. Pistons move free and everything is unbolted but they will not break free. I’ve even tried being persuasive with a hammer and block of wood. Suggestions?
Try a heat gun around the base?
I was not aware of this. I removed it but still no luck. I’ll try a heat gun but not sure it will hold enough heat in the garage. Will give it a shot.Also, you have removed the lower fitting for the oil pipe, right? It blocks the cylinders from lifting.
SUCCESS! I tried the heat gun but it did little to nothing. The shop is about 35 degrees so it was hard to get them hot enough. I eventually used a large chisel as a pry bar under the cam adjuster housing. It didn’t take much but was enough leverage to crack it loose. She’s a filthy beast but internally things looked decent. I’ll clean up these parts and box them up as extras for now. I think a light hone and new rings would have them in service again, but I’m going the BBK route, so off to storage they will go. The rods look great and the coating is in great shape with no noticeable damage in the small ends. Very happy!
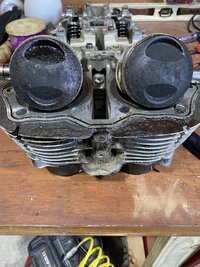
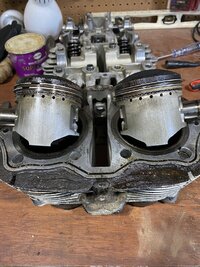
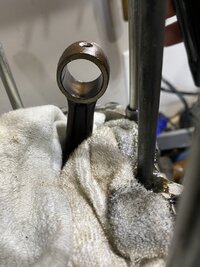
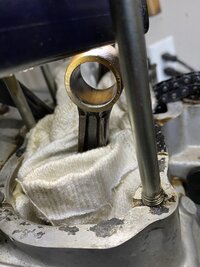
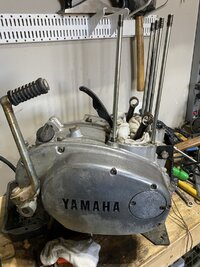
I used the new head gasket as a template to cut a cardboard cover to slide over the studs and rods to help keep and bugs or debris out. She will sit like this for now. I’m off work Monday and will make a valiant effort to clean up the cases then.
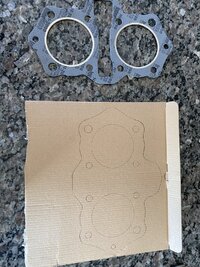
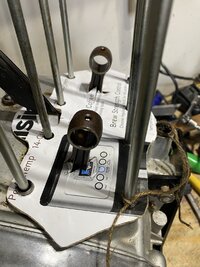


I used the new head gasket as a template to cut a cardboard cover to slide over the studs and rods to help keep and bugs or debris out. She will sit like this for now. I’m off work Monday and will make a valiant effort to clean up the cases then.


Pistons look fine 30 000 km ish
Is it to stretch it that oil has passed through on the on picture left exhaust valve.
With inspection valve and valve seat being of interest
Easy to perform the leak through test with petrol and having it upside down se if it leaks through
It does look as there is slight marks at bottom of Small end hole but can be the light at the photo situation
Got it chucked up in the press tonight and everything looks nice and square.
See? That’s how you do it! I’d be out there on my work bench , half assing it with a rat tail file!

I never knew about reamers before this. Thanks to everyone here for figuring this out for me. That’s why I love this place.
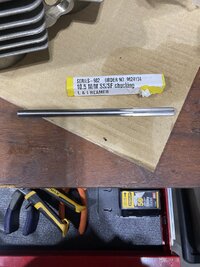
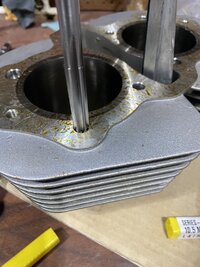
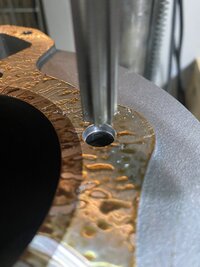
Bbk holes are reamed out to 10.5 mm and slides right on. I have another head and rocker set up that I had intended on using, but I cannot get it to pass the leak down test despite several rounds of lapping. So I decided to clean up the set that came off this bike. A lot of scrubbing with mineral spirits and rinsing in hot soapy water did wonders. The gaskets gave me grief but a couple of soaks in paint stripper loosened them up nicely.
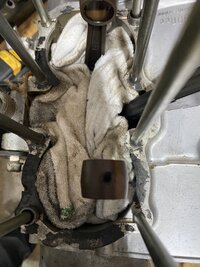
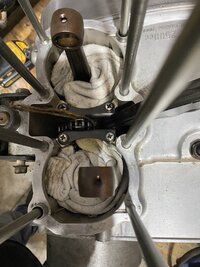
More paint stripper applied in the head to clean up the carbon revealed that someone was in here before. Looks like they tried to clean up the intake ports. Makes me a little nervous as I know that besides cleaning up the casting, you can do more harm than good. I’ll compare to my other head after lunch today to see how worried I should be.
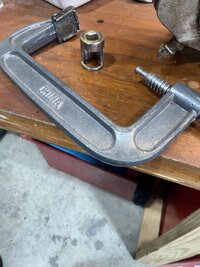
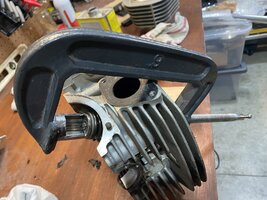
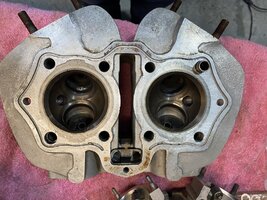
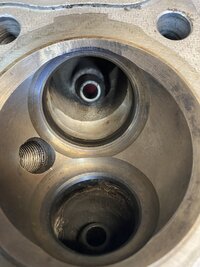
Mocked up for now and looking good. Getting excited to button it all up.
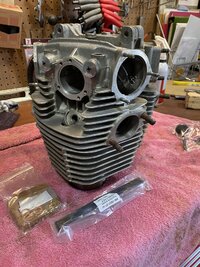


More paint stripper applied in the head to clean up the carbon revealed that someone was in here before. Looks like they tried to clean up the intake ports. Makes me a little nervous as I know that besides cleaning up the casting, you can do more harm than good. I’ll compare to my other head after lunch today to see how worried I should be.


Mocked up for now and looking good. Getting excited to button it all up.

Very nice! I like your homemade valve spring compressor. It doesn’t look like anyone got too crazy grinding on the intake ports.
Well shit. I started putting the head back together after cleaning the valves and discovered a bent valve. It kept getting hung up in the guide. I switched sides just to see if it was the valve or guide. Then I chucked it up in my cordless and confirmed it was bent. It looks like the face is bent and gets hung up in the last 1/4 of the stem. I’ve got some other used valves form the other setup. Can I just lap in the replacement valve and check for leak down? How do you check for guide damage?
Yes.Can I just lap in the replacement valve and check for leak down?
Best way is to measure 'em is with with ball gauges and mics. You can do a pretty good job without 'em though. Look close with a magnifier and see if it's rounded out/cacked any. Then seat the (replacement) valve, pop it off the seat about an eighth inch and rock it back and forth. Make careful note of the movement and compare it to the other 3 valves rocked the same way.How do you check for guide damage?
Unscientific... but with a good eye and feel in the hands, you can get a pretty good idea.
Borrowed a valve from my spare top end and got them all lapped in. I installed the springs to do a leak test, but the one valve sat noticeably lower in the keepers/spring collar. That’s when I remembered there were early and later styles of valves and keepers. Pulled the spare keepers from the stash and it fit much better, but still noticeably different than the other three. I’ve still got to pull them all apart again, because I failed to install the guide seals anyway  . Is there any harm in running one early and three late styles so long as the right keepers are installed in each?
 . Is there any harm in running one early and three late styles so long as the right keepers are installed in each?
As long as the right valve/keeper combination is in there... I can't think of a problem.Is there any harm in running one early and three late styles so long as the right keepers are installed in each?
Speaking for myself my nerves are not strong enough for having different moving parts in the valve and cam system
( Bearings have worn out )
Evey little knock or rattle misfiring out on the road later on I would believe had its cause in this . Not having the same " up to standard " parts
I believe I would go for the same everywhere.
The play in the valve stem. Here is an old experienced mechanic at the Yamaha dealer . That I have a good cooperation with
getting along well with
Some Younger people are afraid of him ..I took the valves and head to him having him feeling on the play giving it a pass. OK
As Jim says in # 156
If I remember right he rotated the valve shaft a little in between the sideways testing for play.
But I don't think mine had any wear to speak of.
Filters
I took a chance in thrift shop today ...Just for the fun of it ..
Bought one sheet of filter material
Appears to be used in Aquariums
https://hobby-aquaristik.com/EN/20470/filter-sponge-blue-fine-50x50x10-cm
about
20 " x 20 " x 4 "
I cut off small pieces and put in a jar with Gasoline been there 8 hours
Not affecting the material yet
Similar threads
- Replies
- 61
- Views
- 2K

