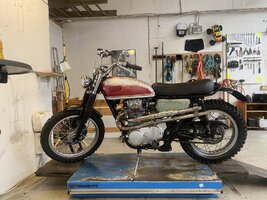
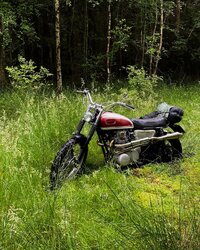
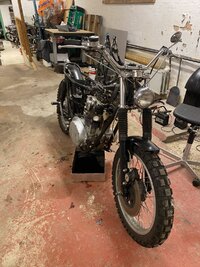
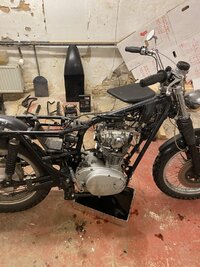
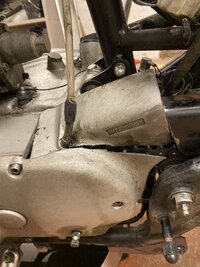
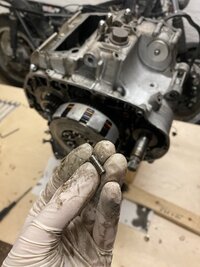
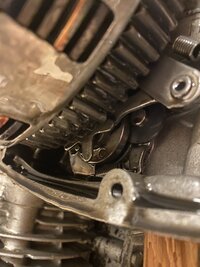
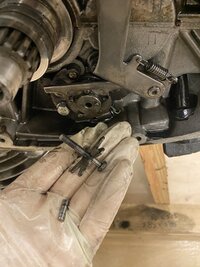
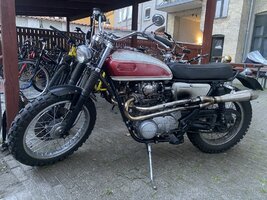
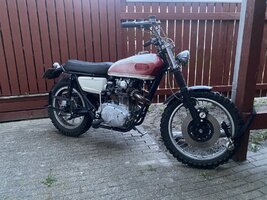
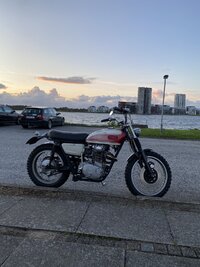
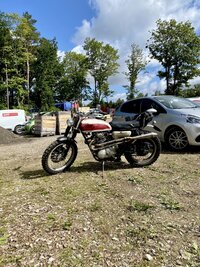
The new life of a 72' XS II - Build thread

To put it like this
I did try to buy from Heiden tuning once or twice -- Because XS shop was closed on vacation Me trying to save time
I wont do it again. If i don't have to.
I got a new part that I had to put in the Vice hammering straight to even work .With a non answering disappeared Seller.
I dont mind if the part is bent .It can happen .. But the not answering thing disappearing act is a deal breaker.
So if I had waited the week or two i Would have gotten usable parts Quicker from XS shop.
Sometimes one needs the part fast .If it is a summer quick repair.
 
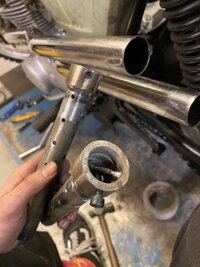
Redid my db killer, cut off the end cap and cut a new on the lathe to have a snug fit. Made a thread in it to secure it in the pipe, and welded the small rod in for easy removal. 0BAECB44-8AAE-4DDE-B950-13ECC025AEDF.jpeg
So far it seems to do the job okay, definitely creates a lot of back pressure but also an almost responsible amount of noise 🤷‍♂️

The bike rides quite well, I’ll have fiddle some more with the ignition and carbs to get it spot on. Main problem is the left hand switch, the on/off light switch is broken internally and these early models seem to be impossible to get a hold of - I might just 3D print a new and solder some stuff on it, but definitely prefer to find oem stuff.
 
Main problem is the left hand switch, the on/off light switch is broken internally and these early models seem to be impossible to get a hold of - I might just 3D print a new and solder some stuff on it, but definitely prefer to find oem stuff.

I know what you mean, my XS2 had the same broken switch, it’s a thin little stalk. I had to buy a whole other switch gear , just to get parts to repair mine. Ha! I see Jim beat me to referencing his most excellent repair! If I had to do it all over agin , I would try that.
 
I did see that fix a few years, quite clever.
The part that’s broken in mine is the stationary one where the different wires are connected via the copper plate on the moving switch part you linked to - an odd part to brake.
If I measure everything correctly it’s simple to sketch a 3D model and 3print it, the tricky part is making sure everything lines up, which would be time consuming 🤷‍♂️
Which is why I would prefer to find a used or new, but given how rare the early switches are, that might be easier said than done, annoyingly 😅

I’ll try fix it one more time, but no matter the glue it seems to brake..
 
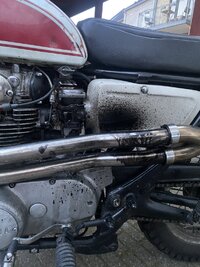
I fixed the switch a while back, so I got the bike registered and have for the last couple of weeks been playing around with the exhaust:
5DA3B221-C302-429C-B873-DF7C986BACD5.jpeg
I haven’t been able to get it quite enough, so yesterday I cut the exhaust shorter and mounted the 2-1 solution.
660D9CA7-C222-46EC-AAA9-821B982EDD15.jpeg

Unfortunately it doesn’t sound as good as the straight pipes with the large db-killers… but I will be able to fine tune it more easily without
 
Holy fucking shit..
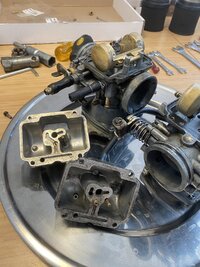
I ordered a few jets to fine tune the carbs now the exhaust is somewhat under control, I’m not sure how I didn’t notice this earlier, but I have two different type bowls.. 🤦‍♂️
1AD03B98-886A-4C6A-A9B1-C7FBC8688A09.jpeg
So now I have a few bs30/96 style jets and only one bowl which is supposed to run them - though I have actually ridden the bike for almost 500 km, where it’s ridden okay 😵‍💫 (not great hence the fine tuning)

Oh yeah I’m supposed to ride across Sweden in a week..
 
I'd be checking the float levels too. That float tang in your pic looks awfully bent. Normally (set correctly), they're pretty much parallel with the rest of the bracket .....

Set@25mm.jpg
 
Thanks 5twins, I’m guessing I’ll be opening the carbs a few times over the next few days 😅
Anyway my mate had a few spare carbs, so I got one of his float bowls to make a matching pair for the bs30/96 jets, and there were instantly more power 🥳
Now I can hopefully start fine tuning the carbs and adjust the floats ✌️

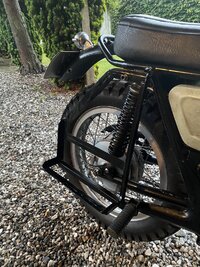
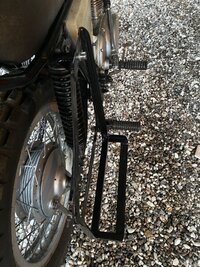
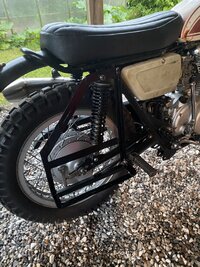
I had some time on hand today so I fabricated this bag mount, to fit an old bag I have laying around for my Sweden trip 🇸🇪
373115FB-8DFB-40FD-8B8E-BA33BED63452.jpegEB23EC0F-6B1E-4759-8351-7706949EFE83.jpeg
7F3308E6-7ABC-4117-BE15-172B2C70DD11.jpeg
 

Attachments

  • 511B1B77-9747-44A2-9B6F-75C08D5C2CF4.jpeg
    511B1B77-9747-44A2-9B6F-75C08D5C2CF4.jpeg
    487 KB · Views: 90
The floats were way out of spec, but that’s fixed now. Main jets went down to 127,5 and pilots up to 45, way more pull in the upper range, but still som popping on deceleration.
I’ll try a 125 main tomorrow to see if that’s better and perhaps a 47,5 pilot to see if that cures the popping.

2D7D56C5-EA8F-482E-B9E3-6182A5A7C752.jpeg

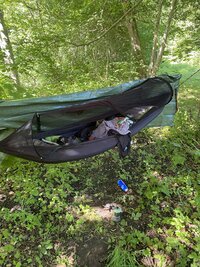
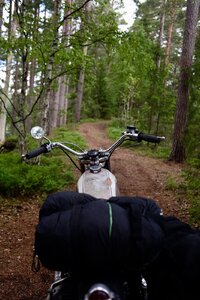
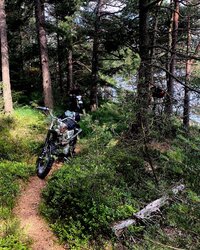
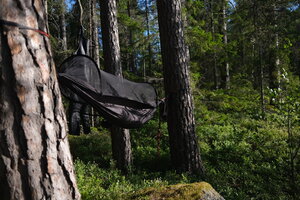
Last night I spontaneously rode into the woods around 10 pm, to test out a new hammock overnight and have a bit of fun in the trails, seems like the gear is up for it, though I am considering putting on a 36T rear sprocket to be able to ride sower
240C8795-5DE6-4468-8817-013CE9C2E09E.jpeg759CCA65-5EF1-4AFC-94B6-6F088446A1BB.jpeg
 
The 125 main seems good, might go one more down, the 47,5 was too large though so went back to 45.
E70179EF-0EE0-48E1-9485-E2DC602407F2.jpeg
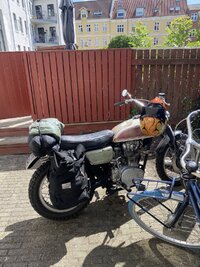
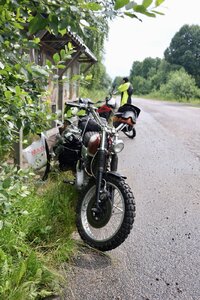
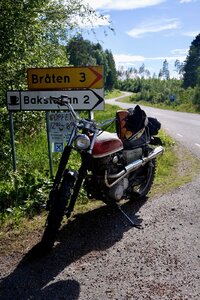
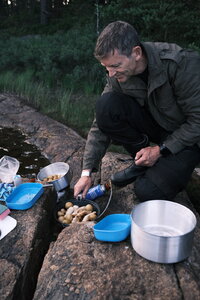
The ride through Sweden went really great the first few days.
0B793284-018D-42EE-992B-50A303065A1D.jpeg
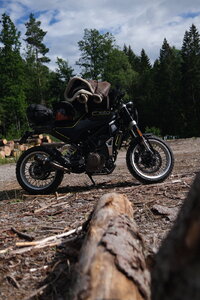
The bike handled both single track, Forrest paths and gravel roads like a bliss, though it did get stuck in some mud once, it’s clearly still quite heavy.
949D7065-7227-4DC9-AC05-D5613398A589.jpegEBE14732-BDE1-438E-831D-F1C01DC03BA7.jpeg50F75005-265A-4A71-AF08-F73BF97C559F.jpeg2D590000-DE20-4C8E-AEC5-56F5E6FAEE36.jpeg
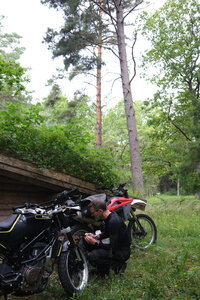
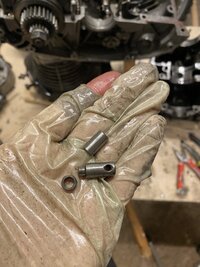
Midway through the trip the gearbox quit, I’m pretty sure it’s the small pin spacer that connects the gear fork to the gear drum, and possibly a bent gear fork - I’ll have to see when it gets shipped back to denmark, but I think I’m buying the pins from later models that doesn’t have the extra “spacer”, but just a solid rod, I have already broken one of these spacers before, costing a new 2nd and 3rd gear.
My insurance rented a husqvarna 401 svartpilen for me to continue my trip on, which did great all the way, a lovely little nimble bike 🏍
E8A240B1-4E6C-4E03-9FAD-50A7A2066577.jpegABF0F74F-71B3-48F8-B9F5-8F518E03FC97.jpegC17781D7-E7DE-4A50-92D5-D7EA9F3D55B2.jpeg
 
View attachment 112225 Here is my 75 Z1900 I have been working on. You can see the ss media. the wire size is .014 and the conditioned media is more round. I use this media to peen over the rougher surface after cleaning with the std cut wire. Blow it up and you can see the difference.View attachment 112226
Here are parts paintedView attachment 112227
Here is the two finishes. The caliper with the rough finish which paint holdson to nicely,and the cover which has beed blasted with the cut wire then with the conditioned wire. I also lightly burnished it further with 0000 steel wool useing hot water and Dawn dish soap.View attachment 112228
Here is the cover by itselfView attachment 112229
And my head without any burnishing with steel wool. With any blasting it would be wise to cover any portion of the internal engine. I use plummers putty to seal large oil passages and then cover with aluminum tape. As mention before I also use MDF covers cut to fit.
Another good method is vibratory ball polishing. This basically means submerging the parts in a mix of water and detergent, and steel balls of varying size. Then the whole vessel/container is vibrating, so the balls "peen" the surfaces into a smooth, satin finish. Generally even smoother and shinier than vapor blasting.
 
Last edited:
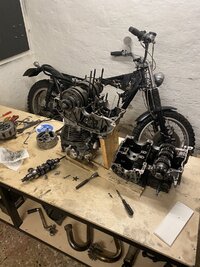
Finally getting the time to disassemble the bike to fix the gearbox, plus became a member of one more garage community.
CC194A78-A220-439B-A576-A961CA32DB1C.jpeg
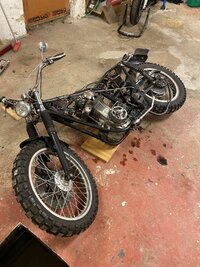
Tonights progress; remove a bunch of stuff and then the engine.
C7279978-AE7A-4501-8E80-CC27C89DCAA9.jpeg60786A77-9A49-4F05-97D0-F911B9316C6F.jpegFE9753A0-DF3C-4164-AC93-594D76CF1805.jpeg
I received (assumed broken parts) a new 2nd gear shift fork and the shift fork pins from the newer model, where they removed the roller in the end (which has broken two times now..), which I’ll hopefully have time to replace tomorrow and order any other damaged parts.
 
Why is it always the smallest things that make the biggest headaches..
a stripped bolt was the simple answer to why I couldn’t shift gears:
A84C5624-BF42-4913-AE95-A321D3266685.jpegB42D89DB-2B4D-41B6-B0B3-4E4A6F8C4AA2.jpeg4158C555-F9DB-4811-A767-BF80AE439833.jpeg
The 2nd gear shift fork was quite worn, so I don’t mind having to change that for the new one, as that was starting to show.
The new shift fork pins from the se models, is quite simply just the old style with the roller part cut of, I guess they deemed it didn’t wear out the shift drum, while clearly being a stronger design (but with more friction).
CDD48420-6C14-4CE7-BD8D-E8820001FC83.jpeg
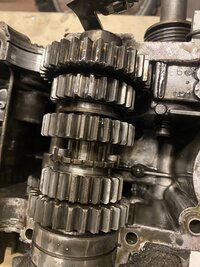
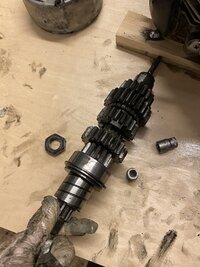
Inspecting the gearbox there’s no damage, which is expected since the damage was on the outside, but always nice to check.

CE9CCEEC-3E57-4355-B008-E1A4877D2C8D.jpegFF92ED2D-1C55-4445-B63D-EF2ACC2353E1.jpeg
 

Attachments

  • 657447B5-7FE6-485A-B774-0058281F5EE3.jpeg
    657447B5-7FE6-485A-B774-0058281F5EE3.jpeg
    487.8 KB · Views: 69
The bike is back on the road 💃 or was..
I assembled the gearbox again and adjusted all the classic stuff, and rode it a few hundred km, noticing the beginning of smoke from the exhaust and the carbs still not being completely dialed in.
78FAFBA4-B1BA-496D-8A67-5B831D620171.jpeg
1891A742-68BF-4C62-9A3D-6496303A9608.jpeg
time to get the carbs dialed in ✨
I changed the 45 pilot to a 42,5, before adjusting the air mixture the gas cable had gotten stuck, resulting in some really high revs cold, not sure if this made the difference, but on my way home from my garage the pilot definitely helped with a cleaner pull, although it kinda turned into a two stroke 😅
Time to order new valve seals and top gasket I’m guessing… 🥶 and probably just a few more jets
5DBA889D-544E-4358-B10E-D790AD787551.jpegA7042399-4662-4854-AE75-240699649521.jpeg
Aside from the oil, I still find it absolutely Beautiful and greatly in love with it, despite still having a few cosmetic aspects I’d like to improve on 🌺
8B021E2C-4C38-4EA7-870F-481A20463B80.jpeg
 
Time to order new valve seals and top gasket I’m guessing…
I can't really tell what all is going on with your oil leak from the pic. You mention in another thread replacing valve seals multiple times (unusual), so I thought I'd mention it might be time to check the valve and valve guide for wear and proper fitment.

The manual (below) describes using a dial gauge to check side-play (<0.1mm, 0.12mm ) of the valve (raised 10mm) in the guide, but one can also check clearance with a ball-gauge and micrometer.
1686316085406.jpeg
 
I can't really tell what all is going on with your oil leak from the pic. You mention in another thread replacing valve seals multiple times (unusual), so I thought I'd mention it might be time to check the valve and valve guide for wear and proper fitment.
I’ve been waiting in fear for the day someone might mention this 🥶
You are probably right, I’ll have to borrow a gauge and check, though I might just change the valve seals for now and ride the year out without a smoke machine between my legs and then pull the head when winter comes.
 
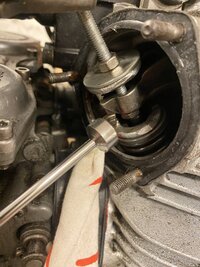
I did the quick change without removing the head, making the small tool:
2EBE2E0A-3370-471A-A664-83F833EA13D5.jpeg

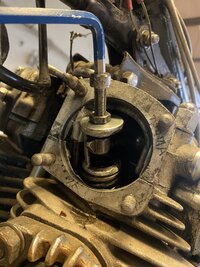
First I changed the right side which was worst (according to the oil in the right exhaust). I couldn’t find a m8 bolt with 1 mm thread, so I did it with an m6 and a nut - definitely more of a struggle, but I managed.
19227EB4-95F1-4FC5-BAA0-F3CD9F930CDD.jpeg9534F50D-7E73-4ED4-899C-0A155693CCB3.jpeg
Rode it 100 km to my other mc garage, most of the smoke is gone 🥳 it helped tremendously.
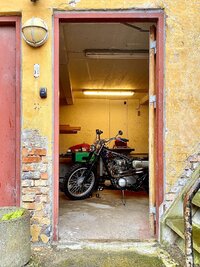
Couldn’t find a bolt there either so I made one, which helped ease the job.
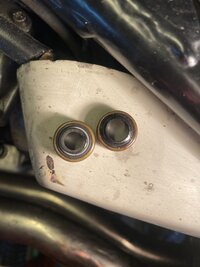
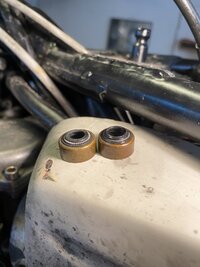
6BD1BB76-C977-41C7-A805-6A277EA0CC61.jpeg
You can clearly see a lot of wear comparing new with old, consider this has been in for approx 2000 km
88A911A7-D832-4BE6-B8E1-93E50F835FB4.jpeg2B47D740-C310-4BD4-BD59-898B0352ADB0.jpeg
I tried moving the valve through the spark plug hole, which wasn’t difficult; exhibit A

YouTube link

There’s both inward and sideways movement at the same time, so it looks a bit worse than it is, but still less than ideal 🏍️
Meaning I’ll probably have to change valves and guides this winter 😅 💸
I swear I won’t start an other bike project till I’ve finished my degree and got a proper job
 

Attachments

  • A0A4C666-850F-48E2-AD7F-344008D3B8B6.jpeg
    A0A4C666-850F-48E2-AD7F-344008D3B8B6.jpeg
    431.5 KB · Views: 39
  • 1EF06632-4901-4657-8AAB-943D6E838EF8.jpeg
    1EF06632-4901-4657-8AAB-943D6E838EF8.jpeg
    410.6 KB · Views: 36
Back
Top