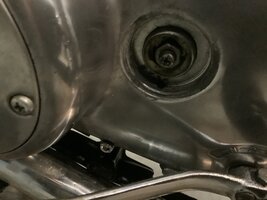
Thinkin' it through.... the washer's there to stop the gear from chewing into the aluminum cover... a thrust washer. So thickness isn't really that important, so long as it's steel and keeps the helical gear off the cover
-
Enjoy XS650.com? Consider making a donation to help support the site.
XS650.com receives a small share of sales from some links on this page, but direct donations have a much greater impact on keeping this site going.
You are using an out of date browser. It may not display this or other websites correctly.
You should upgrade or use an alternative browser.
You should upgrade or use an alternative browser.
The Patience build.
- Thread starter Wingedwheel
- Start date
Thanks Jim, I’ll see what I can come up with also. I was one shock mount crown nut short on the whole build(I think it was missing already) but I have several leftover washers of different sizes. It may be in with those.
Was standin' in the garage trying to remember where my spare oil pump was.... it was in arms reach.


I.D. is actually 8.3mm...


I.D. is actually 8.3mm...
Well I pulled the clutch side cover off and wouldn’t you know it, the damn gear shaft was in the hole like it’s supposed to be and the washer was on the end. I attribute my confusion to several factors but I’m sticking with heat and fatigue otherwise I’d just have to say I’m an idiot which is probably more the reason. I have to look at the bright side, I’m getting really good and really quick at getting in and out of these engines…..
I wasn't sure that I had that washer. One trip in there with a telescoping magnet, cover on, brought it out. I hope I can find it when I need it now.
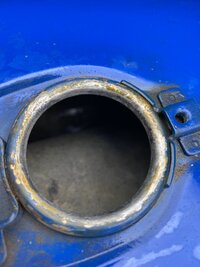
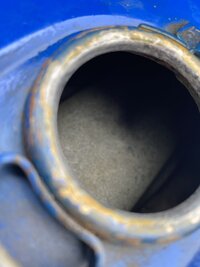
Had an issue where one of the butterfly screws on a parts carb that I needed the shaft and butterfly off of had a stripped head. I took some time, a little drilling and careful tapping to remove the butterfly and shaft. I have to also mention the carbs I received with this bike were parts and pieces. Everything was there but it had to be built. The gaskets in the kits I ordered from Cruznimage were wrong. I think there could be an issue in labeling as I wondered why I would have ordered 4 kits? Yep that’s what came with my order which I ever bothered to look at them until now. It looks like the kits for my XJ project when I took a closer look but the label does say XS650. In any case We were able to re-use everything, check for a seal and it appears to be fine. I also finished cleaning out the tank. I wished I had taken a better before pic as it was terribly rusty. I’m very pleased on the job the vinegar did. I pulled the petcocks, rinsed the tank out and ran my small blower until the tank was very dry. To absorb any water that may have remained I poured a small bottle of alcohol into the tank and ran the blower again. Once that was dry I flashed the inside with a little gas and called it good.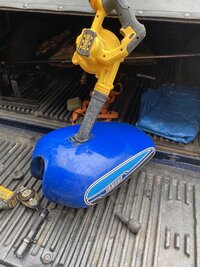
I’m almost there but seem to be having an issue with the clutch now. I also got some of the wiring in the headlamp done. I don’t have the lights completely lined out but the starter and ignition is ready to go. I’d love to see it start but until I figure out the clutch issue I don’t want to fill the engine with oil.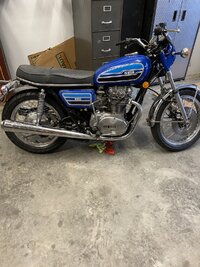
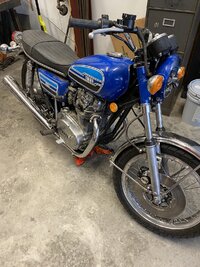
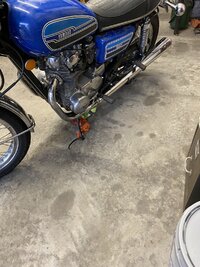


I’m almost there but seem to be having an issue with the clutch now. I also got some of the wiring in the headlamp done. I don’t have the lights completely lined out but the starter and ignition is ready to go. I’d love to see it start but until I figure out the clutch issue I don’t want to fill the engine with oil.


Last edited:
Back to the clutch. The pushrod adjuster is where I’m having issues. I don’t think it’s in there right as I can’t get to the nut to loosen it because it’s recessed for some reason. If I can figure it out tomorrow I’ll post pics
Last edited:
If it's recessed, you're probably missing the ball inside the worm.Back to the clutch. The pushrod adjuster is where I’m having issues. I don’t think it’s in there right as I can’t get to the nut to loosen it because it’s recessed for some reason. If I can figure it out tomorrow I’ll post oics
That cleaned up nicely. With the vinegar treatment will it be prone to rusting again? I need to clean my tank this winter and planned to use Evaporust as it seems to leave behind a surface that tends to not rust so quickly.Had an issue where one of the butterfly screws on a parts carb that I needed the shaft and butterfly off of had a stripped head. I took some time, a little drilling and careful tapping to remove the butterfly and shaft. I have to also mention the carbs I received with this bike were parts and pieces. Everything was there but it had to be built. The gaskets in the kits I ordered from Cruznimage were wrong. I think there could be an issue in labeling as I wondered why I would have ordered 4 kits? Yep that’s what came with my order which I ever bothered to look at them until now. It looks like the kits for my XJ project when I took a closer look but the label does say XS650. In any case We were able to re-use everything, check for a seal and it appears to be fine. I also finished cleaning out the tank. I wished I had taken a better before pic as it was terribly rusty. I’m very pleased on the job the vinegar did. I pulled the petcocks, rinsed the tank out and ran my small blower until the tank was very dry. To absorb any water that may have remained I poured a small bottle of alcohol into the tank and ran the blower again. Once that was dry I flashed the inside with a little gas and called it good.View attachment 214919View attachment 214918View attachment 214920
I’m almost there but seem to be having an issue with the clutch now. I also got some of the wiring in the headlamp done. I don’t have the lights completely lined out but the starter and ignition is ready to go. I’d love to see it start but until I figure out the clutch issue I don’t want to fill the engine with oil.View attachment 214921View attachment 214922View attachment 214923
Yeah, that's what it looks like. The set screw pushes on a ball and that pushes on the pushrod. The ball is supposed to be captive, but sometimes they fall out anyway.
Jim I know that ball is in there. When I cleaned the gunk grease out of there I put it back in and covered it with grease to hold it.If it's recessed, you're probably missing the ball inside the worm.
It didn’t appear to flash after I washed it out and dried it but I put a little gas on it right away before it got a chance.That cleaned up nicely. With the vinegar treatment will it be prone to rusting again? I need to clean my tank this winter and planned to use Evaporust as it seems to leave behind a surface that tends to not rust so quickly.
Well, there's another ball inside the countershaft. Did you have the pushrod out? Maybe that one fell out?Jim I know that ball is in there. When I cleaned the gunk grease out of there I put it back in and covered it with grease to hold it.
I took the pushrod out to replace the seal but I made sure the ball did not come out. I’m not sure why the adjuster screw nut is recessed like it is. That’s why I asked, when you separate that mechanism can you put it together with the parts backwards?
Thinking about that it doesn’t seem possible to do that but something is wrong. Possibly a PO issue that I am unaware of. I know the tranny was acting funny until I took things apart.
So that's where the adjustment screw was when you got the bike.... you haven't changed it?Thinking about that it doesn’t seem possible to do that but something is wrong. Possibly a PO issue that I am unaware of. I know the tranny was acting funny until I took things apart.
Nope, took it apart and cleaned and regreased but no adjustment changes. However, I’m thinking I put the cover on then pulled it back off a little to check harness route. Perhaps the grease on the ball stuck it to the shaft and it fell off.So that's where the adjustment screw was when you got the bike.... you haven't changed it?
Yes, you've installed the female part of the worm backwards, lol. The metal part you have sticking out of your case on the outside should face inwards. The plastic side of the worm should be towards the outside .....


Thanks for verifying that 5T
That was the issue as far as that mechanism and as most of my mistakes, a quick fix…… I adjusted the lever tension and the rod and now I have what I feel is a “normal for these bikes” clutch lever, however I’m still not getting it to disengage the engine when I pull the lever. Plenty of tension and I can feel it when I squeeze the lever but put it in gear and squeeze and still can’t roll it.
That was the issue as far as that mechanism and as most of my mistakes, a quick fix…… I adjusted the lever tension and the rod and now I have what I feel is a “normal for these bikes” clutch lever, however I’m still not getting it to disengage the engine when I pull the lever. Plenty of tension and I can feel it when I squeeze the lever but put it in gear and squeeze and still can’t roll it.
Similar threads
- Replies
- 61
- Views
- 2K

