Have you checked the cam chain adjustment? It will sound like loose valves if it's loose. Check it while the engine sits there idling. You want to see a small amount of in-out movement on the pushrod, maybe 1 to 2mm. No movement means it's set too tight. More than the mentioned amount can cause engine noise very similar to loose valves. You can tighten the adjuster down to see if it eliminates the noise. You can actually tighten it too much, until the the plunger practically stops moving, then back it off until you get the desired amount of in-out movement. That way you know you're set just a little bit looser than too tight.
-
Enjoy XS650.com? Consider making a donation to help support the site.
XS650.com receives a small share of sales from some links on this page, but direct donations have a much greater impact on keeping this site going.
You are using an out of date browser. It may not display this or other websites correctly.
You should upgrade or use an alternative browser.
You should upgrade or use an alternative browser.
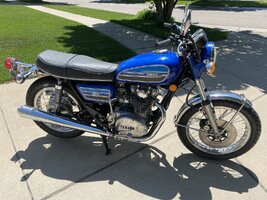
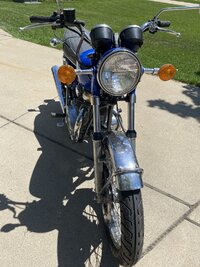
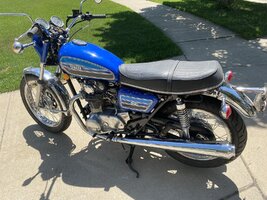
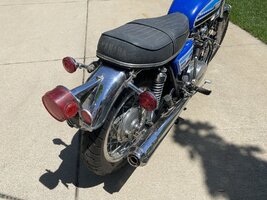
The Patience build.
- Thread starter Wingedwheel
- Start date
I set it according to the manual but I’ll give that a shot tomorrow.
It was difficult to stop the engine on the T mark as it wanted to move just a little past it when I was adjusting valves and I noticed the opposite side intake had a lot of slack. Is that normal for it to have that much slack against the cam lobe?
Yes, that manual method is easy to screw up. The "check-while-idling" method is pretty much foolproof. I adapted it from Yamaha's TT/XT/SR500 cam chain adjusting procedure, from the "Note" at the bottom .....

We can't use the upper part, about setting the motor to the "T" mark. There's always pressure on the cam from valves in one cylinder or the other so it won't work.
We can't use the upper part, about setting the motor to the "T" mark. There's always pressure on the cam from valves in one cylinder or the other so it won't work.
Sounds like your valve adjustment may be off. When you're on the "T" mark, TDC on the compression stroke for one cylinder, the other cylinder will be at TDC on it's exhaust stroke. The exhaust valve will be just finishing up closing and the intake valve will be just about to open. There should be no slack in either one. The fact that you found some (lots according to you) indicates that intake valve is way loose.
What you described is correct and that’s how I set them, what I’m saying is when those two are being set the opposite side exhaust is not loose but the intake is. You can rattle it up and down. Does that make sense?
The opposite cylinder will be at valve overlap when it's at TDC. Exhaust not yet fully closed and intake not yet fully open. Like 5t says, both valves should be tight against the adjuster.
Jim I think we’re saying the same thing but I don’t think I’m communicating my question correctly. When the engine is at the T mark and let’s say it’s cylinder #1 that’s getting ready to fire. That’s where there is valve overlap and those are the ones you set at that point. It’s the #2 thats tight on exhaust on loose on intake that I’m seeing or am I really getting this backwards?
When the engine is at the T mark and let’s say it’s cylinder #1 that’s getting ready to fire. That’s where there is valve overlap and those are the ones you set at that point....
The overlap is on the opposite cylinder from the one you set the gaps on.or am I really getting this backwards?
For instance, #1 is TDC with both valves open (overlap). You set the gaps on #2.
It’s amazing what sleeping on something will do for you. I have no idea what I did but the valves were loose for sure. I reset them all, checked static timing and when I fired it up so quiet!(well as quiet as one of these engines can be). I also checked the cam chain tensioner as suggested and it was spot on with a slight in/out movement. Thanks for everyone commenting and keeping me on track. I don’t know why I’m having these small hiccups because this is not my first rodeo. I’m gonna step back for a couple days until more items show up. I need to work on the brake line situation and in order to keep my switch I’ll have to go with two lines. Perhaps I’ll just have them made since everyone is listing the upper as OOS.
https://www.amazon.com/Inline-Fuel-...6443&sprefix=Right+angle+fuel,aps,112&sr=8-18
Ordered a couple of these because the straight ones I have don’t have room and the line wants to crimp.
Ordered a couple of these because the straight ones I have don’t have room and the line wants to crimp.
5t were you able to get the shielding off the old wires or did you put new on your wires?
Was wondering what to use too? Purpose for abrasion resistance?5t were you able to get the shielding off the old wires or did you put new on your wires?
Yes, I remove the protection sleeve from an old wire, cut it in half, and put a half on each new wire. You don't need to cover nearly all the wire like the factory did, just the 6 inches or so where it exits from under the tank. Besides, using nice colored wires, why would I want to cover them all up? lol.

The protection sleeve has a strip of glue up inside it a couple inches long. Squirt some WD40 or similar down in between the wire and sleeve, straighten out an old wire coat hanger and stick it down in there. Work it around and you can break the glue bead free. The glue bead remains in the sleeve and this has the added bonus of re-adhering to the new wire once on there for a while.
The protection sleeve has a strip of glue up inside it a couple inches long. Squirt some WD40 or similar down in between the wire and sleeve, straighten out an old wire coat hanger and stick it down in there. Work it around and you can break the glue bead free. The glue bead remains in the sleeve and this has the added bonus of re-adhering to the new wire once on there for a while.
Very cool, thank you I wondered about the adhesive they used.
Similar threads
- Replies
- 61
- Views
- 2K


