I take a bunch of pics and notes before I tear a wheel down, also measure the rim offset. If I'm using the old rim again, I like to mount it up in exactly the same way it was, so I mark the hub in line with the valve stem hole .....
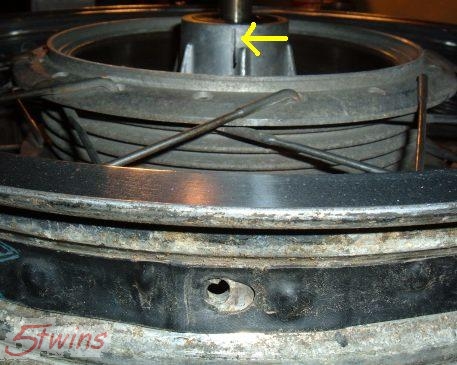
There is usually some writing or stampings on either side of the valve stem hole so I'll note which side that was with the brake side of the wheel facing up .....
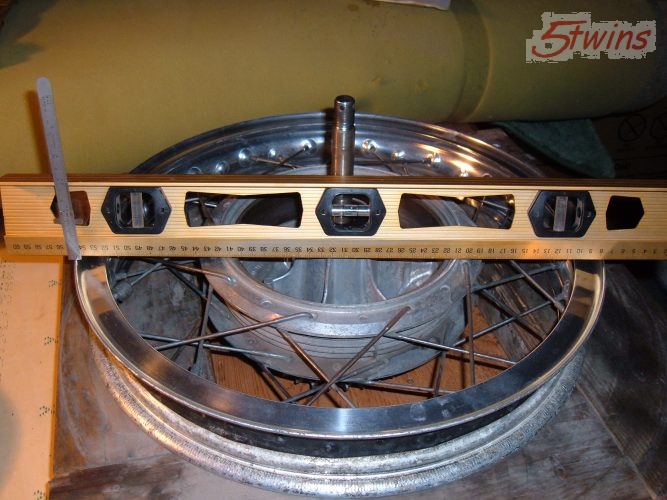
Measuring the rim offset so you get the rim properly centered on the hub is much easier beforehand than having to figure it out using math afterward. For a rear drum, I lay a straight edge across the drum and measure down to the rim. On the flanged alloy rear rims, there is none, their outer edge aligns with the brake drum. I'm not sure if your steel rim will do that, not sure it's width matches the alloy wheel. The wheel in the pic below is a TX750 rear. It does have a slight offset (about 4mm) because it's drum is a little wider .....
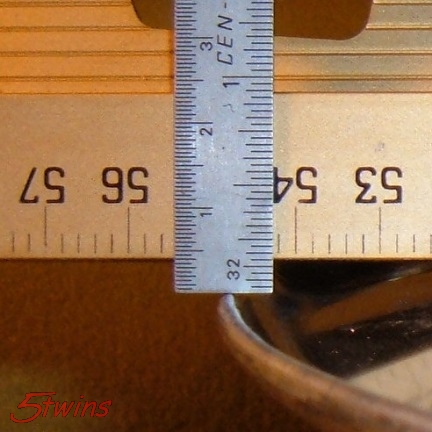
For the front, I have the disc mounted and lay the straight edge across that. It gives a better, wider surface to hold the straight edge against compared to the much smaller diameter disc mounting bolt circle on the hub. The important fact you need to know if using math to figure this out is that the rims get centered over the spoke flanges, not the hub, at least on the rear. On the front, the hub is symmetrical so the rim ends up centered on both. On the rear, the hub sticks out more on the sprocket side so centering the rim on the spoke flanges doesn't center it on the hub itself.
There is usually some writing or stampings on either side of the valve stem hole so I'll note which side that was with the brake side of the wheel facing up .....
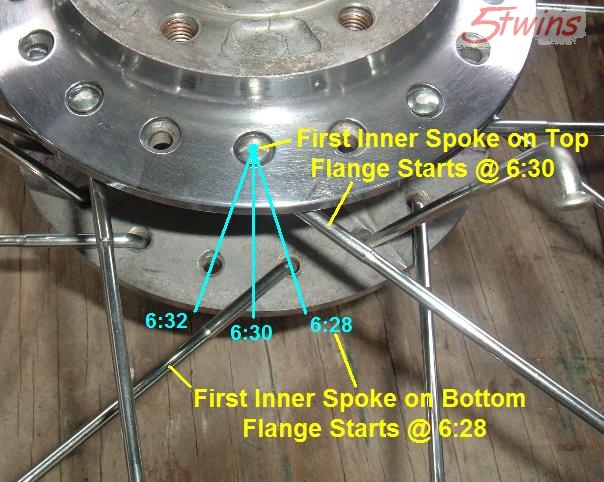
Measuring the rim offset so you get the rim properly centered on the hub is much easier beforehand than having to figure it out using math afterward. For a rear drum, I lay a straight edge across the drum and measure down to the rim. On the flanged alloy rear rims, there is none, their outer edge aligns with the brake drum. I'm not sure if your steel rim will do that, not sure it's width matches the alloy wheel. The wheel in the pic below is a TX750 rear. It does have a slight offset (about 4mm) because it's drum is a little wider .....
For the front, I have the disc mounted and lay the straight edge across that. It gives a better, wider surface to hold the straight edge against compared to the much smaller diameter disc mounting bolt circle on the hub. The important fact you need to know if using math to figure this out is that the rims get centered over the spoke flanges, not the hub, at least on the rear. On the front, the hub is symmetrical so the rim ends up centered on both. On the rear, the hub sticks out more on the sprocket side so centering the rim on the spoke flanges doesn't center it on the hub itself.


")


