What have you done to your XS today?

Having never rewired a whole bike harness before, I was finding it a bit of a struggle.
Wires everywhere like a kaleidoscope of colour and copper. And wiring in the M-Gadget unit it becomes obvious that normal gauge motorcycle wires make it harder.

Then today I came across Alarm System Multi Strand cable. Genius; who thought of that?
Available in any number of strands, and all in its own insulated jacket.
If you are considering wiring a M-Unit especially with M-Gadget Speedo / Tacho; just get some.
The Speedo uses the same fine wire to the micro connectors. So the 'alarm' wire makes it much easier.

View attachment 223664

PITY I JUST FOUND THIS STUFF ........:doh:Duhh!!!

A couple of threads that could do with this information if your inclined to.
https://www.xs650.com/threads/help-me-finishing-wiring-my-‘78-with-an-m-unit.54914/#post-595631
https://www.xs650.com/threads/wiring-harness-musings.18925/
 
Does "what did you acquire for your XS today?" count as what have you done to your XS?
- picked up a set of XS1100 wheels to do a 19" rear wheel conversion on an old Special that will be the next build
- bought one lot of XS parts sight-unseen consisting of two engines without cylinders (dunno why), a set of Special wheels, a pair of Special fenders, three stators and two giant plastic tubs of miscellaneous bits, all of which appear to be bagged and tagged. Stuff will be delivered this weekend, so will be fun rooting through the new stash!
... So my sight-unseen lot of parts got delivered yesterday; some good, some not so much, some indifferent. The two engines both have their transmissions, one has a crank (dubious), one doesn't. No cylinders or pistons (???) and their heads are disassembled. All the bagged-and-tagged stuff is the valve gear for the two disassembled heads. A nicely drilled front disc, a selection of Mikuni main jets, an odd pair of front single-piston calipers which do not appear to be XS parts, several points-type stators, starter motors, clutches. All-in-all OK, but nothing to get overly excited about.
 
20220902_112757.jpg20220902_112902.jpg
All done.
34 tooth rear sprocket, new chain, new front sprocket, new tire and wheel switched out from a stalled project, a bit better rear fender from same. Rides much nicer on account of the 17/34 gearing, also the old wheel had a tight bearing in it which must have produced some vibes.
Nice factory 84 tank and side covers for a change and since I have been saving them so long better get some use out of them.
This morning an oil change, no nasties on the magnets, so I hope to just ride it till storage time.
 
View attachment 224021View attachment 224022
All done.
34 tooth rear sprocket, new chain, new front sprocket, new tire and wheel switched out from a stalled project, a bit better rear fender from same. Rides much nicer on account of the 17/34 gearing, also the old wheel had a tight bearing in it which must have produced some vibes.
Nice factory 84 tank and side covers for a change and since I have been saving them so long better get some use out of them.
This morning an oil change, no nasties on the magnets, so I hope to just ride it till storage time.
That is a lovely Special you have resurrected. I love it.

I replaced my chain & sprockets right before my Eureka Springs trip. I sourced from 650 Central. He only had a 33 tooth sprocket in stock, so I went with it. It does make for comfortable cruising at 65 mph on the highway, but I definitely prefer the 34 tooth sprocket the rest of the time. I miss the OOMPH from the 34.
 
  • Drained the oil.
  • Extracted a broken alternator stator mounting bolt.
  • Removed points and advance housings from the head (not used with Vape ignition system) and discovered the fancy Heiden Tuning covers don't come with new o-rings and one cover was missing mounting screws. Rrrrrrr.
  • Adjusted timing chain.
  • Adjusted valves.
  • Installed Heiden Tuning primary and secondary oil filter kits. It was a PITA to get the outer cover on the secondary oil filter kit.
  • Fixed kickstart return mechanism. The Clymer manual was useless but I found a good YouTube video.
  • Test fitted Vape ignition rotor and stator.
 

Attachments

  • Oil Filter - Primary - Heiden Tuning.jpg
    Oil Filter - Primary - Heiden Tuning.jpg
    318.3 KB · Views: 54
  • Oil Filter - Secondary - Heiden Tuning.JPG
    Oil Filter - Secondary - Heiden Tuning.JPG
    225.8 KB · Views: 51
Having the same issue getting my secondary oil strainer cover off. What method did you use to eventually get yours off?
 
Strange. I have those Heiden filters on my SJ and I've never had any problems with them.

On my Heiden Tuning secondary outer cover, the counterbore tolerances are a little tight, such that there is interference with the head of the socket head cap screw when tightening. And it was a bit tricky to get the gasket holes lined up.
 
Gary, can you explain on that puller? It is not making sense in my feeble mind.
yup it's handle is long. the two bolts are just pins, let you twist the cover, pop goes the gasket glue, cover off.
Then after fifteen minutes or so carefully scraping the old gasket and whatever crappy sealer :cussing: 
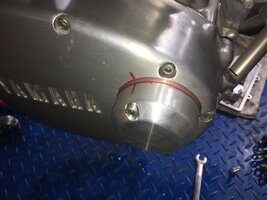
the PO used out of that deep hole in the cover :mad:
you're golden.
The Mk 2A version has smooth pins welded into the handle.
 
Brilliant work as usual Gary. 10 minutes of drilling and grinding bolts down and she popped right off. Thanks again!View attachment 224431View attachment 224432
The mark 2A tool dimensioned.

xs650 side oil screen cover tool.jpg


keywords
side filter screen cover cap tool removal stuck gasket pins home made special tool dimension size spacing holes bolts centers center help
 
Last edited:
Back
Top