I hope all goes well.I just though having a spare or 100 might not be a bad idea
No Ozarks for me probably a major surgery or 2 instead
-
Enjoy XS650.com? Consider making a donation to help support the site.
XS650.com receives a small share of sales from some links on this page, but direct donations have a much greater impact on keeping this site going.
You are using an out of date browser. It may not display this or other websites correctly.
You should upgrade or use an alternative browser.
You should upgrade or use an alternative browser.
What have you done to your XS today?
- Thread starter I am Carbon
- Start date
-
- Tags
- maintenance
Thank you for sharing.
Tlted_Jelli
XS650 Enthusiast

I've got the guys and gals at the Mayo Clinic in on these adventuresI hope all goes well.
I'm good to go
Just missing the Ozark trip bums me out but ...
Next year

Be well Mikey.I've got the guys and gals at the Mayo Clinic in on these adventures
I'm good to go
Just missing the Ozark trip bums me out but ...
Next year
Best wishes for all to go well and a speedy recovery!I just though having a spare or 100 might not be a bad idea
No Ozarks for me probably a major surgery or 2 instead
Thanks !
Off to the Mayo I'm in good hands
Off to the Mayo I'm in good hands
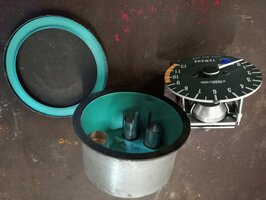
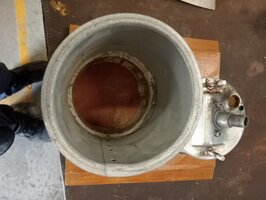
Took the tacho apart to see if I could get it working again as the drive was floating around loosely inside and one of the two screws that secure the dial face had been rolling around on the dial for a while.
Got the drive back in position and applied some Loctite high strength to keep it there and a drop on both dial face screws as well.
Seems to work ok, though I only tried it in the garage giving it a few revs.
Tomorrow I will try and put the screen back on.
Any tips to folding the ring back over?
I used skull's method to get it apart slowly with a bent screwdriver.
Attachments
^Once it's back together I lay them down on a wood surface with a towel between the clock and table and then tap the edge back down. Small tack hammer with a flat drift will do it.....easy as you go. Be prepared to spend almost the same amount of time that it took you to undo it.
Agreed; slightly rounded edges on your tools really helps, work around and around several times don't try to beat it down all in one shot. This keeps you from getting too much metal stretching. some electrical tape and a big ole hose clamp around the metal band is very helpful both taking it off and putting it back on.^Once it's back together I lay them down on a wood surface with a towel between the clock and table and then tap the edge back down. Small tack hammer with a flat drift will do it.....easy as you go. Be prepared to spend almost the same amount of time that it took you to undo it.
I got all fancy with an aluminum fixture but the hose clamp does the job too.


I don't show it but some sort of drift, again with rounded edges, grind it up out of an old bolt would work fine, help bending it back down smoothly.
^Once it's back together I lay them down on a wood surface with a towel between the clock and table and then tap the edge back down. Small tack hammer with a flat drift will do it.....easy as you go. Be prepared to spend almost the same amount of time that it took you to undo it.
Thank you both for your help, I was concerned about creasing the bezel when I fold it back down on a sheet of timber with rubber on top to avoid scratches to the face.Agreed; slightly rounded edges on your tools really helps, work around and around several times don't try to beat it down all in one shot. This keeps you from getting too much metal stretching. some electrical tape and a big ole hose clamp around the metal band is very helpful both taking it off and putting it back on.
I got all fancy with an aluminum fixture but the hose clamp does the job too.
View attachment 237933View attachment 237934View attachment 237935View attachment 237937
I don't show it but some sort of drift, again with rounded edges, grind it up out of an old bolt would work fine, help bending it back down smoothly.
Great idea with the tape and clamp and also the idea of using rounded edges, I'll grind something up to suit.
First I've got to have another look at it, I took it for a short ride and the tacho is working but at idle it reads zero and with slight revs it kind of jumps up.
I used 3/8th drive socket extenssion, (round edges) with a tack hammer and the gauge sitting on a stack of paper to cushion the blow and lessen the chance of damage to the bezel. pics in the thread where you saw and used my idea to take the bezil off.
I started out using Gary's method of electrical tape and a hose clamp but found the bumps where the hose clamp screw is dimpled the ring. The problem was, you don't discover this until the thing is all back together and you take the tape off, lol. I needed something better, thicker, so I cut the top lip off an old plastic container .....


Along with a short section to fit in at the screw, this works very well .....


To install, I crimp the ring partway closed with pliers then finish with a 1/4" drive spinner handle and a small hammer .....


Along with a short section to fit in at the screw, this works very well .....
To install, I crimp the ring partway closed with pliers then finish with a 1/4" drive spinner handle and a small hammer .....
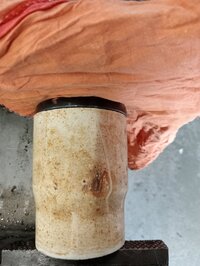
I slowly and carefully tapped it down with a 1/4 drive extension that has the bevelled edges and small hammer then used a short piece of 90 mm PVC pipe with a thin metal flange from a house roofing gutter down pipe inserted into it so I had a metal face on the end of the PVC, then slid it over the tacho and put it in the vice with a piece of timber on the bezel face and tightened the vice to flatten out the small dimples left over from tapping/ folding.
Worked well but ideally the tin flange should be trimmed so there is no overlap to get a flatter face on face.


Worked well but ideally the tin flange should be trimmed so there is no overlap to get a flatter face on face.
Attachments
Sent out my spare wheel for powder coating. went with a bronze and gloss clear
Attachments
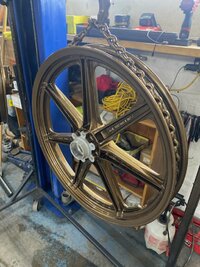
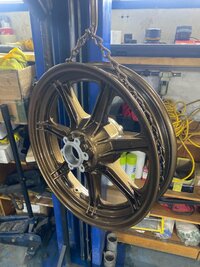


Those look very good!Sent out my spare wheel for powder coating. went with a bronze and gloss clear
Fantastic powder coating, great color...
Polished and replaced my rear wheel, who said it was tricky? It's dead easy, got it trued up in less than half an hour afterwards.
Similar threads
- Replies
- 32
- Views
- 1K