Dinner200
XS650 Member
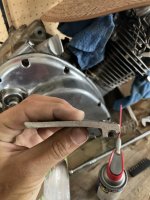
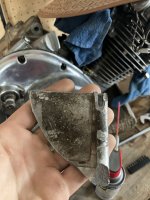
Do you have some photos? Again the biggest issue is the chunk that broke off is deformed so I’m not sure how to get it to fit rightYou could re-approach the idea of using JB Weld.
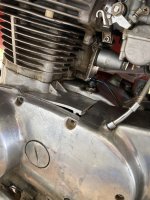
I had almost identical damage to one of my XS650 cases. After much cleaning and scuffing, I applied layers of the epoxy to the inside, all over the crack joint area. On top, I shaped a rather thick aluminum cover plate to cover the crack and provide stabilization. I used the epoxy to attach it.
This repair has now lasted for about 4 years of use.