XS500 Master cylinder/brake line

minus150

XS650 Member
Messages
24
Reaction score
19
Points
3
Location
Nevada
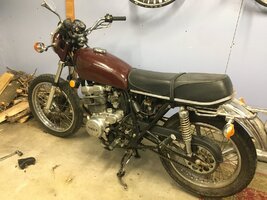
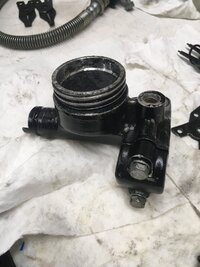
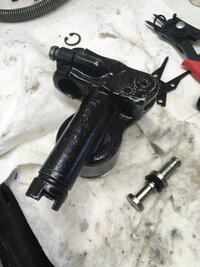
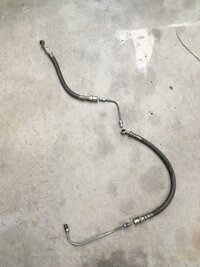
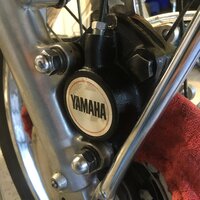
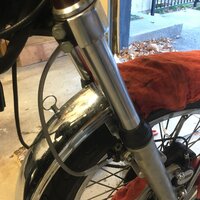
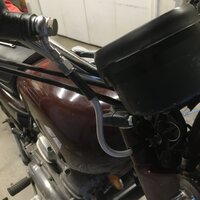
I'm rebuilding a 5/8" bore front brake master cylinder on an XS500 and it looks to me like the brake hosing should be replaced. This model has a brake fluid pressure sensor, with one hose out of the m/c to the sensor, and then another hose from the sensor to the metal line out of the caliper. It is the single rotor brake. I'm considering just bypassing the sensor and running a new, single hose directly from the m/c to the metal line out of the caliper. Any thoughts? Is this an awful idea? I can't find new original hose replacements and since the issue is old hoses, I'd rather not buy other old hoses to make an OEM replacement.

I know the correct place to ask would probably be the XS500 forum, but it's gone forever now. Hoping the models might be similar enough for some crossover.
 

Attachments

  • IMG_6525.JPG
    IMG_6525.JPG
    325.5 KB · Views: 111
  • IMG_6527.JPG
    IMG_6527.JPG
    251.8 KB · Views: 117
  • IMG_6526.JPG
    IMG_6526.JPG
    268.9 KB · Views: 118
Welcome to the Forum !
Yes, I think that you can bypass the sensor and install an inexpensive braided aftermarket brake line.
You'll need to provide the length you think you'll need.
I'll do some digging on this.
.
.
 
I don't think that's a brake fluid pressure sensor, I think it's a hydraulic brake light switch. So, if you eliminate it, you'll need to add some other sort of brake light switch. I'm pretty sure they make banjo bolts with them built in.
 
MikesXS seems to have most or all of the brake parts you would need to replace your lines and keep the brake light switch intact.
.
.
 
Right you are, the switch I mistook for some kind of fluid pressure sensor is actually the rear stop lamp switch which I will not be bypassing. I thought it was related to the "brake lining" indicator on the tachometer... now that I can't find mention of in the manual or online.

I shopped Mike's XS and didn't find matches. Either the length or fitments appeared off on the hose items I looked at. I was able to find what appear to be the right hoses at Yamahawarehouse so I put an order there.

Is there a consensus on whether the pipes need replacing along with the hoses?

For posterity, from top (m/c) to bottom (caliper), each part end to end measures
1. 11.25"
2. 5.25"
3. 15"
4. 9"
 

Attachments

  • IMG_6529.JPG
    IMG_6529.JPG
    278.9 KB · Views: 103
  • IMG_6528.JPG
    IMG_6528.JPG
    329.2 KB · Views: 105
the switch I mistook for some kind of fluid pressure sensor is actually the rear stop lamp switch which I will not be bypassing. I thought it was related to the "brake lining" indicator on the tachometer... now that I can't find mention of in the manual or online.
Well technically you were correct that it's a pressure sensor. An increase in line pressure activates a switch that feeds power (or provides a ground) to the brake light. It "senses" that pressure increase.
The "brake lining" light is controlled by a switch in the rear brake plate that holds the brake shoes. When the brake cam that moves the shoes reaches a certain point, it activates a switch that turns on the light... telling you the shoes are worn.
I'm not familiar with your bike, but it's also possible the tach has been swapped from a bike that used that system... and yours doesn't. :shrug:
 
I installed new hard lines, new banjo bolts and crush washers, and replaced the rubber hosing with braided steel. The master cylinder is rebuilt and producing pressure when I use my thumb to plug the m/c out at benchtest. However I cannot seem to pressurize the line. I have no resistance whatsoever at the lever. Bleeding for 15 minutes results in fluid moving through the line, but no change in lever feel.

No fluid or fluid sounds are found anywhere along the line. My manual calls for 54 - 69 ft lbs on the caliper bridge bolts, but the hex heads started to round before I got there. The bolts are old, maybe original to the bike. The manual suggests replacing the bolts each time the caliper is split and rejoined, so I am overdue there. I don't have a clear suspect at this time, my hunch is some issue at the caliper.
 

Attachments

  • IMG_6539.JPG
    IMG_6539.JPG
    373.1 KB · Views: 102
  • IMG_6538.JPG
    IMG_6538.JPG
    402.2 KB · Views: 103
  • IMG_6537.JPG
    IMG_6537.JPG
    270.8 KB · Views: 102
Caliper rebuilt, including getting the spooge out from behind the sealing rings? pistons moving freely"?
Helps a lot to prefill the caliper with fluid.
 
The caliper is halfway rebuilt. I changed the seals on the outer caliper half, but the inner piston didn't budge with compressed air. My hope was pressurizing the line with fluid would get the stuck piston to move, but no dice there. Good tip on prefill, hadn't thought to try that.
 
Good stuff & what a sharp looking caliper! I do wonder, is the caliper/line prefill done purely to save time, or is it a required step of the bleeding process? With how little fluid it takes to fill the brake system I'm surprised it'd take so long to bleed this thing normally. Could be I am lacking patience, I'm just curious roughly how long it takes to bleed this system or at what point I should start getting a little pressure at the lever.
 
I do wonder, is the caliper/line prefill done purely to save time, or is it a required step of the bleeding process?
Both. Saves time, doesn't require anything (like a vacuum pump to suck the fluid through) and is pretty much foolproof.
For whatever reason, the early Yamaha brakes are known to be a bit finicky as far as bleeding.
 
Yes, patience is one of your best tools for this bleeding. It can take 30 minutes or more.
Just letting the system sit overnight sometimes helps.
I pump the lever quite slowly and methodically.
Applying something to the lines that vibrates can assist in moving along any tiny bubbles.
.
.
 
My manual calls for 54 - 69 ft lbs on the caliper bridge bolts, but the hex heads started to round before I got there.
This is an unusual circumstance; you could check to see if you grabbed the 18 instead of the 17mm socket.
Make sure you are using a good 6 point socket.
Or you might have a crack in the side of your 17mm socket.
.
.
 
Back
Top