XS650 tracker build(first build)

Howdy!

Got the cam chain on the cam finally. I didn't break the chain when i took it apart and have been fiddling with it here and there before realizing removing the bearings was the only way. went on super easy and so did the bearings afterwards. going to be making more progress and hopefully finishing the motor in the next couple days. just need to install boyer ignition, xscharge pma, swap sump filter/gasket, and set valve clearances and i should be good to go(fingers crossed)

In addition, i also go the frame finished up yesterday. dont make fun of my shitty welds! haha. The color is blackberry metallic, which looks black 90% of the time until its in direct sunlight, then it sparkles! I plan on getting the swing arm and shocks installed today, waiting on headset bearings to get the front end on. used a dime to seal the hole from the steering lock removal, just for shits and gigs..

lastly, got the "bates" style headlight mounted to the fender. tacked the mount to the underside and everything lined up well. pretty hidden for the most part so im happy!
60757203681__71A273E3-8989-489C-85B7-47DC59521806.JPG
u2Pta+ZAQm6QLxfq%Y%y%A.jpg
%atVEY+aQQGtB6+YrNSvoQ.jpg
gcVW0E9rQh2v+enVK0fiSg.jpg
%VJyDiuwQiaklx764DBZAg.jpg
 
- Got the Swing arm greased up proper and in the frame as well as getting the rear fender mounted.
- Motor Bolts all torqued and ready to go. i have shitty sealing washing for the outside 4. after more research think i am going to order the copper ones.
- got an EBC vintage rotor from 650 central and am having mounting issues. thing i am going to have to file the caliper a couple mm to clear the rotor. wondering if anyone else has run into this?
- Got the Mikes XS PMA and Boyer Ignition installed in the motor, still have not wired anything up.
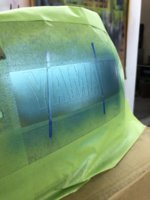
- Made progress on the gas tank. at this point, all graphics have been layed down, and its just a matter of getting everything glassy smooth!
rgj7cLfhR9+sBFcAc1mrCw.jpg

bLDizy7FTKGO8Txv4%GvSQ.jpg
HbPKLtPZR9CpnzclNH49rA.jpg
+Rr9AFKZSiu9VWUU3jROAQ.jpg
571C6552-5700-4877-878E-A0DA971B5238.jpg
XmkDc3gRSbiUa+tU8Sbrjw.jpg
P3B8YL%dQyqQP4pYeaCBTw.jpg
 

Attachments

  • 60780782969__83C571DD-31CF-4D25-A48A-788C8FEB8C90.JPG
    60780782969__83C571DD-31CF-4D25-A48A-788C8FEB8C90.JPG
    169 KB · Views: 228
  • 2Dj5SH3DRgeCKlgXnc6YoQ.jpg
    2Dj5SH3DRgeCKlgXnc6YoQ.jpg
    175.6 KB · Views: 189
Got the motor in the frame!! and only knicked a couple spots. haha. also got the headset bearings installed and the fork installed.
Got the tank mostly finished. final coat of clear is on, just need to let it cure a little then cut and polish it.
found some quick release clips i am going to try and make work for the seat. they are used for fenders, but utilize a flush button which i will mount under the electronics tray.

7hIo9ZeATXeQV7bC95HgOQ.jpg
qebMI4ojTKGuFQVqqVWKtg.jpg
60797892807__946E1EB9-E48E-40FB-A913-0217767567AA.JPG
 
Been making solid progress on the moto with not much to show for it. getting to the point of researching wiring and electronics in general which has always been the scariest part for me.

--got the intake and carbs on. I got these from 650 central as well as a handful of other items and have been extremely happy with the customer service as well as the wait times/products. not one to give companmies shout outs, but michael is an awesome guy and knows his stuff. \\

--got the brake shoes and hub cleaned up and everything reassembled. ready to get tires on the wheels now.

-- installed front and rear blinkers. all motogadget LED. For the front 2 i drilled holes in the side of my headlight and installed them there. for the rear, i drilled the fender and installed them there.not sure how i feel about placement yet, may rotate the fender forward a little to tuck them a little more. last thing i want to do is get rubber washers to create at least a minimal seal on the hole.

--lastely, just about finished with the motogadget pro gauge install. made a braket that mounts in the front 2 handlbar bolts, it is then rotated toward the rider and 20mm spacers are used. pretty happy with the location and looks very clean. also in a great location to join the handlebar switch wires leading under the tank.

fullsizeoutput_2a4.jpeg
qDOgdP7rSqSYm4fEbZCKYQ.jpg
%P0xXnl%SrS3ztSQoztjnQ.jpg
l8BuTKBDSKe6J3gbmRo+lw.jpg
99d3%L6VTP6wpRXT2ci4fQ.jpg
Qg6raSrsQ3emVGEV626t7Q.jpg
YRWDAIaCSsa6bi0fyiNipw.jpg
usuQNWn7T4yK5gBT97YF5Q.jpg
 
Back
Top