XS650E Restoration

LA_Rider

Tinkerer
Messages
18
Reaction score
39
Points
13
Location
LA, Ca, USa
After reviewing dozens of utuub vids on how to rebuild Mikuni BS38 caburetors, I vectored over to PepBoys for some chemicals, only to discover that they have closed their doors for a couple of months while they have changed company name and are remodeling all of the stores. So I bummed around and found another parts house, OReilly in Reseda. Bought a can of Berryman's carb cleaner and basket, and a couple aerosol cans of carb cleaners, some orange-grit hand wash and as an experiment, a squeeze bottle of ArmorAll. Idea is to squirt some on the 30 yro slide diaphrams, hopefully to help restore plasticity. Although I suspect that ultimately, I'll have to purchase two new diaphrams.

Also, I hunted around on eBay for a used 2ft/lb ~ 100ft/lb torque wrench. I discovered many 20ft/lb ~ 300ft/lb torque wrenches, but not many for the lower ranges. I also watched a bunch of utuub vids on how to calibrate various model torque wrenches, as almost everything today is manufactured in China, I've come to realize that Chinese products are generally a crap-shoot for accuracy and-or reliability. I really can't afford a $300 ~ $1400 used/new digital torque wrench, I am constrained by budget, although I prefer good tools, when I can afford it. I saw one video where the fellow test/calibrated and then repeatedly re-tested five different brands of mid-price budget torque wrenches, $50 ~ 100 buck wrenches. The only torque wrench that passed all the tests, to both the videographer and as well as my own surprise, was the Harbor-Freight wrench, even surpassing the apparently better quality Tecton wrenches. Over the years, I've experienced mixed feelings regarding HF tools. Some have been ok, some have been crap. While I was over at Harbor Freight to pickup a box of nitril gloves, I happen to see a 5ft/lb to 80ft/lb torque-wrench, for $25. Going through the XS650 website doc's directory I found a document that disclosed the various torque settings for most of the bike, which I noted, the range being 7ft/lbs up to around 67ft/lbs and one torque setting being as I recall for the front axle something akin 80ft/lbs. So, if that el-cheap torque-wrench is within calibration, which I have as yet to determine through testing then, it'll be good! Otherwise, I'm gonna have to figure-out where to attain a torque-wrench that I can actually afford.

I still have to dig the bike out of the hole its in and I plan to disassemble the carburetors to rebuild them. I'll take a few photos as I go, for folks perusal.

LA Rider
 
The only torque wrench that passed all the tests, to both the videographer and as well as my own surprise, was the Harbor-Freight wrench, even surpassing the apparently better quality Tecton wrenches.

Don’t tell anybody but my torque wrenches are Harbor Freight also. I have a 3/8” for the higher torque settings and I have a small 1/4” drive that I like to use for the lower torque values, just convert the foot pound settings to inch pounds.
as an experiment, a squeeze bottle of ArmorAll. Idea is to squirt some on the 30 yro slide diaphrams, hopefully to help restore plasticity.

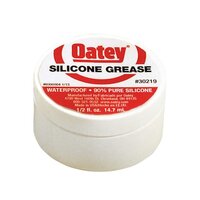
I like to use plumbers silicone grease for rubber parts. Smear some on your diaphragms and throw in a plastic bag while your carburetor parts are being cleaned, then wipe them down before installing them. Different brands of this stuff is sold at virtually all home centers and it’s made for lubricating rubber.
CEC4BE57-9B73-466E-8F10-34154B67FA87.jpeg
 
Don’t tell anybody but my torque wrenches are Harbor Freight also. I have a 3/8” for the higher torque settings and I have a small 1/4” drive that I like to use for the lower torque values, just convert the foot pound settings to inch pounds.


I like to use plumbers silicone grease for rubber parts. Smear some on your diaphragms and throw in a plastic bag while your carburetor parts are being cleaned, then wipe them down before installing them. Different brands of this stuff is sold at virtually all home centers and it’s made for lubricating rubber.
View attachment 211310
Thanks, I'll give that grease a try.

Anyone know if a 1980 XS650 center stand fits a 650E?

I removed the side covers to discover that both of the airboxes are missing off the carburetors. They sprouted legs and walked off!! I looked around on eBay and its mish-mash of boxes with missing parts. Are there any boxes from other XS650 models that fit and work properly on the 650E?

TIA,

LA Rider
 
I put hardened rubber parts in either a glass jar or zip tie bag, spray in a heap of silicon spray and seal the bag. It takes a while, but does work. Wintergreen oil is also supposed to work wonders, but I've never tried it.
Am I the only one who uses petrol to clean carbs. Most of the debris built up in carbs is petrol soluble. For harder stuff, beads.
Mineral oil (baby oil) also works for this purpose.
 
The airboxes for your model have pipes on them for the engine breather hoses to attach to. '76-'79 boxes have those so should work. '74-'75 boxes don't have the pipes but might fit.

AirboxK&Ns.jpg


I purchased the above boxes for my '78 off eBay for about $30, mainly because of the filter elements I could see peeking out from inside them. They're K&N replacement elements and sell for around $80 a pair .....

AirboxK&Ns2.jpg


Yes, a 1980 centerstand will fit. Any from '74 on should fit. Just be aware there is an inherent weakness in these stands - the tangs tend to break off eventually .....

BrokenTang.jpg


They can be repaired and should be braced. In fact, you should brace it before it breaks .....

Braced Stand2.JPG


Yamaha was aware of this issue and braced the stands on the last few models. If you're shopping for one, you might as well look for one of those .....

82 Stand2.jpg
 
As far as torque wrenches go, ideally you'll want a couple. They are most accurate through the middle of their range so that 5-75 ft/lb one will be good for most of the engine and chassis stuff, but fall short if doing things near it's upper or lower limit. Mostly, you'll be working near it's lower limit, on 6mm fasteners. Their torque value ranges from 5 to 8 ft/lbs, or about 60 to 96 in/lbs. You'll want a small in/lb wrench that goes up to 150 or 200 in/lbs for these, and I find I use it the most out of all my different size torque wrenches. That's because 6mm fasteners hold many of the often removed items like the side covers and the oil pan. And on oil bearing covers, you want to use a torque wrench so all the fasteners get equally tightened. This is the best way to seal it and make it oil tight.
 
I put hardened rubber parts in either a glass jar or zip tie bag, spray in a heap of silicon spray and seal the bag. It takes a while, but does work. Wintergreen oil is also supposed to work wonders, but I've never tried it.
Am I the only one who uses petrol to clean carbs. Most of the debris built up in carbs is petrol soluble. For harder stuff, beads.
ToglHot,

I wondered about that after reading the other reply. As for cleaning with gazoh-leene, heh heh, there was a time growing up when we were being taught in school to not use petrol due to its toxic nature and explosiveness. Here, years later, it never occurred to me to use petrol...that's societal programming for ya. It works. And at 7 bucks a gallon its still cheaper than Berrymans!!

Thanks for the tips.

LA Rider
 
As far as torque wrenches go, ideally you'll want a couple. They are most accurate through the middle of their range so that 5-75 ft/lb one will be good for most of the engine and chassis stuff, but fall short if doing things near it's upper or lower limit. Mostly, you'll be working near it's lower limit, on 6mm fasteners. Their torque value ranges from 5 to 8 ft/lbs, or about 60 to 96 in/lbs. You'll want a small in/lb wrench that goes up to 150 or 200 in/lbs for these, and I find I use it the most out of all my different size torque wrenches. That's because 6mm fasteners hold many of the often removed items like the side covers and the oil pan. And on oil bearing covers, you want to use a torque wrench so all the fasteners get equally tightened. This is the best way to seal it and make it oil tight.
Yeah Man! That's great info, thanks. I'll look around for an in/lb wrench.

LA Rider
 
The airboxes for your model have pipes on them for the engine breather hoses to attach to. '76-'79 boxes have those so should work. '74-'75 boxes don't have the pipes but might fit.

View attachment 211401

I purchased the above boxes for my '78 off eBay for about $30, mainly because of the filter elements I could see peeking out from inside them. They're K&N replacement elements and sell for around $80 a pair .....

View attachment 211402

Yes, a 1980 centerstand will fit. Any from '74 on should fit. Just be aware there is an inherent weakness in these stands - the tangs tend to break off eventually .....

View attachment 211403

They can be repaired and should be braced. In fact, you should brace it before it breaks .....

View attachment 211404

Yamaha was aware of this issue and braced the stands on the last few models. If you're shopping for one, you might as well look for one of those .....

View attachment 211405

Yep, that is precisely what happened to my center stand, the 'tang' broke off, and I've noticed on eBay that there are a couple of the stands having severely bent tangs...also the most expensive units for sale too. I've never done any welding but I would like to learn and have the tools. One of these daya maybe I will? But the photos you posted says it all.

Thanks...

LA Rider
 
I
ToglHot,

I wondered about that after reading the other reply. As for cleaning with gazoh-leene, heh heh, there was a time growing up when we were being taught in school to not use petrol due to its toxic nature and explosiveness. Here, years later, it never occurred to me to use petrol...that's societal programming for ya. It works. And at 7 bucks a gallon its still cheaper than Berrymans!!

Thanks for the tips.

LA Rider
I'm pretty sure carburetor cleaner has some toxic stuff in it too.
 
ToglHot,

I wondered about that after reading the other reply. As for cleaning with gazoh-leene, heh heh, there was a time growing up when we were being taught in school to not use petrol due to its toxic nature and explosiveness. Here, years later, it never occurred to me to use petrol...that's societal programming for ya. It works. And at 7 bucks a gallon its still cheaper than Berrymans!!

Thanks for the tips.

LA Rider
I've been using petrol for cleaning engines all my life, still do as it's the best and most effective. Just make sure you wear a mask or respirator. I never used to, but now I only have one lung, thanks to smoking for 30 years, I do wear one now.
 
I'm beginning restoration of my XS-650E. I am really looking forward to doing this. I enjoy the challenge of restoring things, but I've never done anything like a motorcycle. I've restored all manners of gadgets but mostly electronic gadgets.

The astute amongst you may 'see' that I've cooked a few the photos (using gimp), removing visually confusing background clutter, etc. Here are a few photos for y'all to gander at.

Original instrument cluster, speedo & tach dial-faces are heat distorted. I found an XS500 cluster that is perfect, except has slightly different markings on the dial-faces. For now, its an acceptable compremise.

Cluster_1_20220316.jpg


Here is snap of the top of the right side Mikuni carburetor, showing its dirtyness, all these years in a garage, but its only been recent that the side road was paved, so lots of dirt accumulation.

Carb Left Top_20220316.jpg


Snap of the airbox breather hose and inline fuel filter, with a glimpse of the carburetor slide condition....nasty.
Fuel Filter & Hose_20220316.jpg


Fuel petcock is frozen off, with a side shot of a Mikuni BS-38 (?) carburetor.
Petcock & Left Carb_20220316.jpg


Right side shot of grodie crankcase and center stand missing 'foot tang'
Dirty Left Crank Case_20220316.jpg


Oily jug and filthy crankcase...

Left Jug Oily Btm Fins_20220316_181814.jpg


Top to bottom gasket is leaking, hopefully not warped..
Left Oily Bottom Fins_20220316.jpg


This doesn't too bad on the outside, heh heh.
Twin Left Top_20220316.jpg


Something is leaking? What does that plug cover?
Carb Left - Oily Bottom Fins & Leaky Crank Case Plug Seal_20220316.jpg


And then finally, maybe somebody can shed some light as to what this label is portending?
Frame Label-1_20220316.jpg
Frame Label-2_20220316.jpg


Hopefully I haven't put in too many photos. I'd snap a photo of the entire motorcycle but it is so buried in a pile garage junk I can't. I still have to dig it out, make a workspace, and throw away 40 years of once treasured stuff...now all junk.

Then, I'll start taking things apart and photographing as I go. Here's a bit of trivia, my XS-650E was a gift from my mother, she bought it for me as she was worried that I was expending too many hours working on my rack-mount computer in 1979, --I was the engineering manager of a computer manufacturing company at the time.

Here's a snap of my mom. The photo depicts her standing in front of her airplane and her Harley-Davidson the day she earned her 'wings'....pilot license. Enjoy...

LA Rider's Mom - her Harley Davidson 74 nucklehead & Taylor J2 Cub Airplane - El Paso Tx - 1937.jpg

 
Just to avoid future confusion, when you refer to stuff on the bike as right or left side, it's done from the position of you sitting on the bike, not standing in front of and facing it. So, what you've referred to as the right side, right carb, etc. is actually the left side, left carb, etc.

That being said, the carbs don't look too bad. It's normal for them to get brown stains inside like that from use. Your petcocks are vacuum powered and have no "OFF" position. Yours is stuck in the "PRIME" position, a setting that bypasses the vacuum function and just flows normally. So, your petcock is basically on. Put any gas in the tank and it will piss right out of the petcock, lol.

That fitting on top of your motor that's leaking a little is your neutral switch. They often come loose and leak. Try snugging it up with a wrench. But, they have a plastic center that sometimes gets loose and that causes the leak. Some guys on here have fixed that, maybe they'll chime in.

It's common for the head gaskets on these to leak because the head bolts come loose. Often a re-torque will fix it and stop the leak.

I have no idea what that sticker is or means. It's not from Yamaha.
 
5Twins, great info. As for right/left, I was trying to remember whether my camera reverses the image or not? Thanks for the correction.

Maybe the bike isn't in too bad a condition, but is a bit dirty. When I was riding it,, I rode it everyday for about 5yrs until my work started flying me all over the place, and it just slipped into the ages.

What is that silver Dollar size plug over the shift leaver that is leaky? Is that an inspection port?

As for the label, I did not put it on the bike, it was on the frame when it is bought from the dealer back in 1979. I did a search on the 'Net, but did not find anything.

So, when I start working on it, I should re-torque everything? What is a recommended strategy for that? Loosen all the bolts then retighten/torque, or just re-torque in situ?

I should check compression? Is that done with the engine running? Stick a pressure gauge into a spark plug hole, cycle the engine somehow?

Thanks....LA Rider
 
The circular cover on l/h crankcase above gear lever hides the clutch adjuster. The leak doesn't look too excessive, but could be coming from the clutch actuation rod, or from the chain & sprocket - if you used to keep the chain well lubed - or could be coming from behind the drive sprocket.

Compression is checked with the engine not running. Usually, both spark plugs are pulled out, the test gauge is screwed into one then the other cylinder. Add a little oil in through the plug hole first. Then, kick the engine over a few times. Compare the readings from both cylinders. You can use the electric starter if it works and you have a good battery.

I see a lot of cleaning in your future. Use Muc-off or similar commercial product. Brush kerosene into really filthy oily areas.

I agree with tx650a-van-islander's comment about your mom.
 
Back
Top