1983 Heritage Special Chopper Rebuild w/ David Bird Hardtail

sentricity

XS650 Enthusiast
Messages
58
Reaction score
0
Points
6
Location
Cottage Grove, MN
Ok, well I have managed to put this off long enough. I originally bought the bike in great running condition for $700 down in NC off a mechanic who didn't want to "mechanic" it:)

full


I chopped it into a brat(ish), '60s(ish) thing. It was fun, but time for a change.

full


Don't mind the model... My 5 year old ham.

full


full


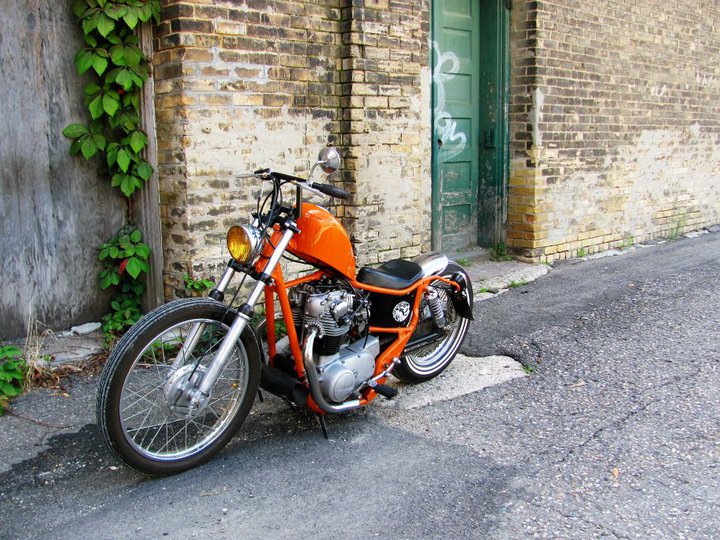
I mounted up a '75 DT400 front wheel for the drum brake and 21" rim, turned all the lugs off the forks, lowered it 2.5", removed all the tabs from the triple trees and built some tight window bars.

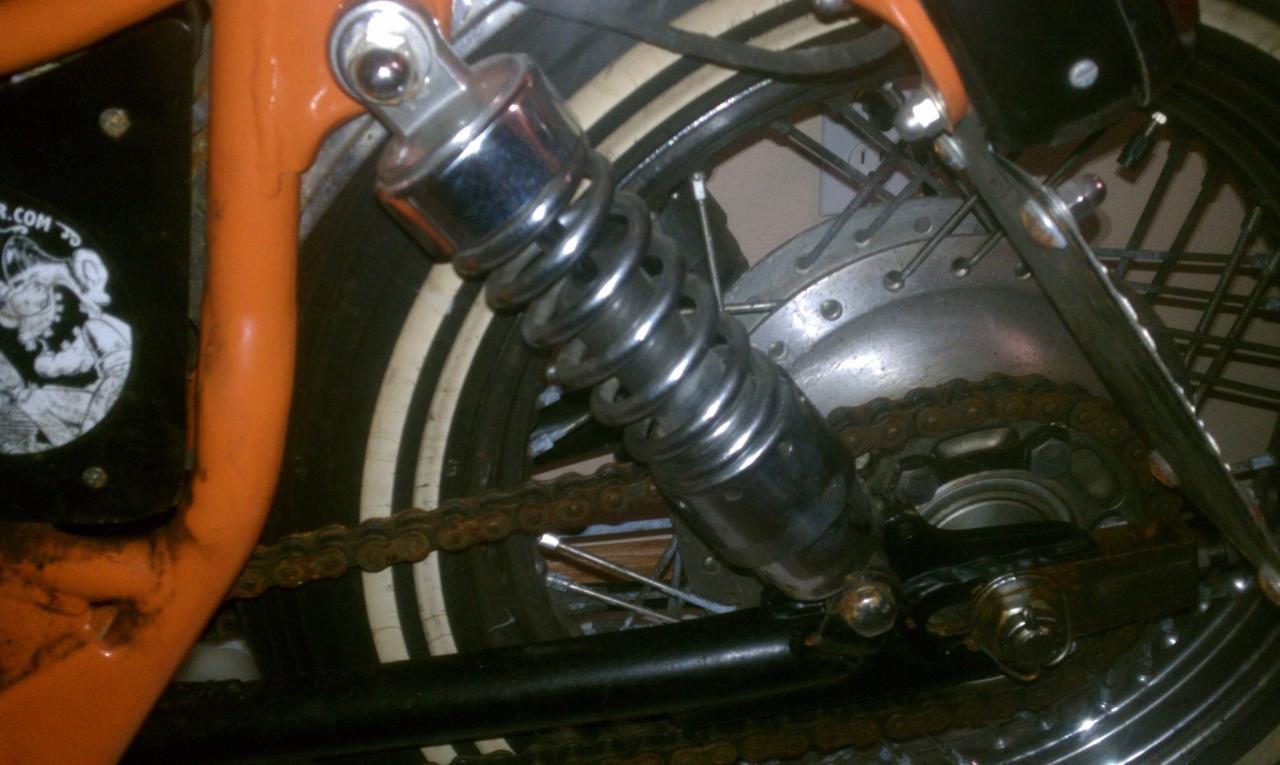
The tank was an older aftermarket Frisco Sportster tank, the seat was made my me and upholstered locally in MN. I lowered the seat rail and bent forward the rear spring mounts and had Rebel shocks. I ran the 48 spoke stock 16" rear rim and a Shinko dual white stripe wheel.

My pride of that build is the horseshoe style "oil tank" under the seat that housed the battery, fuses and coil.

The engine was freshened up with rings, hone, valve job, XSJohn's (RIP) needles, seals and various hardware. I bead blasted the entire engine and painted the lower jugs for that Trump look.

The headlight is a '30s fog lamp and the taillight is a '40s Chevy pickup taillight. I painted it orange, and by accident, it ended up being a very close match to HD orange.... Ooops
 
Well I have wanted to hard tail it for some time, so after returning from Virginia for several months and a leaky barn later, I find this.

full


full


full


Moisture is not kind to bare aluminium.

So the hunt for a hardtail began. I am moving to southern California in a few months so I gotta be fresh to ride.

I always like the looped David Bird style rear ends, but I wanted to keep it zero stretch. I loathe these bike stretched. I searched and searched for quite awhile
and finally found a picture from another user here of a David Bird zero stretch looped tail. Yup, that's it. While I was at it I wanted a Wassel tank... I got lazy
and ordered the Lowbrow P-Nut tank. Both items are top notch quality.

full


full


Looks like no top engine mount for me.

full


Mucho better.

Now we de-construct.

full


full


And break out the hack saw.

full
 
After mocking up the hard tail, which fit great, I burned in the back bone without the supplied gusset (it will be gusseted once I mount the seat) and the lower tubes.

full


full


full


full


And there we have it, the elusive 0" stretch, 2" drop David Bird Looped Hardtail.
 
I have always been one to take on more of a challenge than I probably should. I wanted to get rid of the stock 16" rear wheel, as it was too fat for the style I am after in this bike. I could have just swaped out the rear for a earlier model 18" rear drum wheel, but why stop at 18" when I can build a custom 19" rear?

A trip to the junk yard landed me a '75 rear wheel and '74 front wheel, both 36 spoke. I could not reuse my rear hub as it was 48 spoke heritage special lacing. I had some spokes to modify, 36 of them....

full


full


You will see pictures of the rear wheel later. I mounted up a 3.25"x19" Dunlop K70 Gold Seal tire (skinny!)
 
I was looking for a ribbed rear fender to run, but did not like the $150 price tag that was coming along with new and NOS fenders, so I lucked out a scored a $35 ebay special under the "custom Triumph chopper fender" title and wouldn't you know it was perfect. Tweak here, tweak there and it is 4" wide, nice little duckbill, and contoured perfect for my rear wheel.

Over the next couple weeks I got the fender mounted, built a sissy bar and started on all the little stuff that was thrown in the trash bin with the tail I cut off.

Foot pegs came first, 2" higher/ 1" forward of stock. 7/8" tubing, slugs through the frame and mounted with 3/8" bolts threaded the entire slug thickness.

The rear brake pivot was next, tubing sleeved with a bronze bushing. The linkage was too short, so I fab'd a stock looking rod from scratch. Then the pedal wasn't even close so I fab'd that and reused the pedal and splined lug.

The shifter was too short so it was cut up and lengthened.

The rear brake stay was too short, once again chopped and rebuilt.

Then came the kick stand. The stock one just pissed me off all the time so a new one was in order. I built the lug and stand from scratch. Welded it on with the prettiest and most solid welds I have ever MIG'd in my life... and the leg hit the foot peg mount. CRAP!

full


full


full


So after cussing for a few minutes and throwing a wrench or two, I fired up the torch and cut the lug off. I figured it would be easier to mill a new one. So when I wen to fit the new one, I double checked all the clearances....

full


full


full


full


It tucks up beautifully. I'm pretty damn proud of that.

In the pictures you can kinda see the foot peg mounts and the brake stuff on the other side. I will post up better pictures in a couple days.

And lastly for tonight, as it sits, back on it's own three legs (well two wheels and kickstand)

full


Let's not forget the gratuitous Ass shot (told you it was skinny)

full


More to come....
 
As promised, the right side of the bike.

full


full


full


The pivot was sleeved with a bronze bushing inside to allow better movement without being lubed. The pedal itself was chopped up and lengthened, only the splined portion and the pedal were reused. I had to flatten the rod as it passes by the foot peg for clearance between the engine and the peg.

Here is a shot of the brake stay rod. It was resized with 5/8" tubing and the ends were reused to keep the factory look.

full


Next I mounted up the front seat pivot. I built this a little different than all the cookie cutter pivots on the market, just to be different. The seat is made by Sully's Seat Works. It is pretty high quality and very reasonable cost.

full


full


full


full


Then I mounted up the license plate and tail light. Cool little feature with the tail light mount, the tubing will hide the wiring and route it inside towards the front of the bike.

full


full


full


That's about it for yesterday. I still have to fab the spring mounts for the seat and the battery box (it'll blow your mind)
 
Good luck w/ the build bro! Love the DB tails, had it on my last bike and I think I am going with 0 stretch on the next. Didn't like the 4, felt like there was a gap of nothing between the carbs and tire.
 
Pretty damn sweet!

I love the DB tails but that triangular deal at the bottom of the seat post has always bugged me. Looks amazing either way though!
 
Nicely done. Was a tight bike before, but has more soul now, if there's such a thing.

BTW, I grew up in Kasson-Mantorville... my Stepdad/family have been doing the fireworks at Silver Lake on the 4th since forever. Good luck in Cali, but I bet you'll miss home eventually.
 
love the original way of doing the tail light mount. Also, on the kickstand! that's great - looks like it ended up just right.
I like this bike a whole lot. :)
 
Love the old skool vibe. Definitely the look I'm after with mine.
What is the "oil bag" from?

It was modeled after a late '50 Triumph Oil Tank. I was gonna try and find one and gut it, but couldn't find one cheap enough. Plus I would have felt bad cutting up a nice original piece.

So I built it from scratch.
 
Nice looking bike. Any problems running no upper motor mount? I'm thinking about ordering the P-nut tank myself...
 
Back
Top