Putting the motor back together

alfredo

1978 xs650 Special
Messages
1,034
Reaction score
16
Points
38
Location
Los Angeles, CA
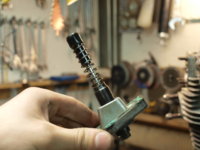
Ok. I took the top end apart and had the head bored out to fit my new oversized pistons. Also had the valves redone by the same machine shop.

Now, putting it back together. . . . . . :shrug:

I get how to get the pistons and new cam guides back on. Also, I have a clymer with the proper bolt patter, but does anyone have torque specs on everything?

Also, what position do I put the cam at? Is there a specific way I need to align everything to be TDC?

first motor build so go easy ;)
 
Your Clymer has the torque specs. It also tells you about cam timing.
Before you put the pistons and jugs on, put your rotor and stator on. Pull the rods up to the top. This puts your rods at TDC. Now look at your timing marks. They should be at TDC. If not take a pic of the marks. Use this pic to reference TDC later as you install the cam and time the ignition.
On the cam, timing is with the notch by the sprocket to the left side of engine pointing straight up. On the right side of sprocket a dimple out by the teeth goes even with the sealing surface.
This is set with the cam chain tight on the front side of the engine. Slack to the rear. Once installed put in the chain adjuster set tension close. Now check the marks. If they still line up, good to go. If not you need to reset the chain on the sprocket one way or the other. The easiest way to do this is back off the cam chain adjuster and slide the cam bearings off one end of the cam. This will give you slack enough to slip the chain around the teeth of the sprocket.
Ensuring you get it right now is much better than trying to reset it after it's in the frame.
All this isn't hard to do. Just needs to be right.
 
thanks for the info. Still haven't put it back together as I have moved and had little time, but plan to next week. Will most likely be asking more questions ;-}
 
yes on the clymer.. i have seen pictures of bikes that were put together without the timing marks lined up....Why you would put it back together when it is different from the pictures in your manual is beyond me...The clymer goes through it very well so go slow and double check your work. Pay attemtion to how your cam is in, as it can go in backwards and the timing and advance can be on the wrong side.
 
Use about 30 ft/lbs on the 8 large acorn nuts, not the 26 or so speced in the manual .....

CylinderHeadTorque.jpg
 
observation-when i put mine back together, I could not get a socket on the bolt under the breather, so I just snugged it with a wrench. that was the only prob i found with the torqueing. OH, use the brass washers under the large acorns that mike's sells. they hold the torque better than the rubber coated ones.
BE CAREFULL!!!
 
To access that M6 bolt at the rear and the M8s under the spark plugs (once the points and advance housings are installed), you'll need one of these, a wobble adapter .....

WobbleExtension.jpg
 
You can take the breather box off. You should anyway, to clean it out and be sure it flows freely. Put it back on after the engine is back in the bike. You can leave the points and advancer housings off till then too.
You should torque the bolts the first time in three steps, let the engine set over night, retorque the head. After that install the engine.
Checking the torque on the 8 big chrome nuts should be checked after you get it running, let it warm up good then shut it down, retorque the 8 big nuts, start it up and ride it 50 miles, shut it down retorque. Do it again after 100 miles, recheck the torque at 250, 500 and 1000, Keep checking until it holds the torque. It may hold at 100 miles and it may hold at 1000 miles. Better to check and be sure.
Once you feel it is holding torque checking at yearly intervals will be ok. I like to do that as part of the spring wakeup routine.
 
So. . . . it took longer than week to get back to the motor, but I started back up yesterday.

I have a few questions though:
1) What size bolts go underneath the spark plug holes? I have the head and new pistons on and ready to tighten it down, but not sure where the bolts went to or what torque they should be.
P1030964.jpg


2) Ditto from number one, but the bolt that is above the cam chain tensioner. .
P1030965.jpg


3) It's been a few months since I redid the clutch and the motor has been transported a few times in the stand since then too. My question in this picture is what goes in this hole? Its right to the left of the chain drive. . . I was pretty sure that this is where the long rod with the ball went in from the clutch side. I replace my two short pieces with the one long rod from mikes, but looking at it here makes me think I am missing something . . . . am I???
P1030948.jpg
 
12 mm head bolt next to the spark plug and a 10 mm head bolt above the cam chain tensioner. Refer to the manual for the torque specs. That one at the rear is easily stripped so be carefull..... It's a bitch to put it together just to have to take it apart.
Clutch pushrod goes into the last one pictured.

Thanks! :thumbsup:
 
3) you are not missing anything from that photo, it is the clutch pushrod hole. Do replace that seal, as it is a notorious leaker.
 
Hello "Alfredo"

I´m in the same situtation as you.......re-building an XS engine for the first time. Hope it´s OK if I "hi-jack" your thread once in a while?

Today I got the head back on and installed the cam and chain. Now I had to use some plastic tubes on top of the head and screw it all down to get the cylinder flush against the case. Only then I could get the new camchain on, it was kind of tight!?

After that I installed the adjuster and here is my question. I was not able to look for the adjuster pin to flush.....so I would know when the tension was right. The pin flushed almost right away as I started to screw the "bolt" in. Why is that??
Anyway I mesured the deepth on the locknut with a slide gauge and then I screwed the "bolt" about 1mm further so the I was able to mount the locknut. At the end it became VERY!! tight. Am I doing wrong here?
The engine is a 3L1 - 82.

/BigBoreSwede
 

Attachments

  • FB238986.JPG
    FB238986.JPG
    242.2 KB · Views: 312
  • FB218936.JPG
    FB218936.JPG
    249.2 KB · Views: 288
  • FB188004.JPG
    FB188004.JPG
    235.8 KB · Views: 299
Once you get the rocker box on and torqued down you will get more slack in the chain.
The new chain is packed with grease, in the pins and rollers. Once you get the engine running and the grease works out and oil gets worked in, you will gain more slack.
You will need to adjust the chain several times in the first 1000 or so miles. Once the chain gets broken in it won't need adjusting as often, check and adjust as necessary evey oil change.
I used a couple deep sockets to snug the head down to get the chain on when I did the 750 kit. I have heard that some headgaskets are thicker than others, this can make the chain harder to install.
And once you get the head torqued you will need to let it set over night and retorque. Then install the engine, set over night retorque.
Get the engine running, let it warm up, shut it down, set over night, retorque. At this point the 8 large nuts are the most apt to need more torque. The two under the spark plugs, maybe.
Now start the bike and ride it 50 miles, let set over night, retorque.
Ride the bike 100 miles, let set, retorque.
Ride it 250 miles, let sit, retorque. If the 8 nuts are holding the torque you can stop retorqueing. I would check the torque at 500, 750 and 1000 miles. At some point they will hold torque. Then recheck at the start of the season should be part of the spring wake up procedure.
 
No mention of timing the cam when you installed the chain. You did do that, right?

Also, I sure hope Alfredo's pics are "before" and not "after" ones. Things don't look near clean enough to be going back together. Dirt, grease, grime, old gasket remnants, yikes !!!
 
No mention of timing the cam when you installed the chain. You did do that, right?

Also, I sure hope Alfredo's pics are "before" and not "after" ones. Things don't look near clean enough to be going back together. Dirt, grease, grime, old gasket remnants, yikes !!!

Cleaning as I go yes ;) Won't be the cleanest build, but hopefully will work just fine.
 
Back
Top