"half dead on arrival" had to chop it

RFLIVES

Resident Sidecar nut
Messages
625
Reaction score
1
Points
18
Location
Northern VA
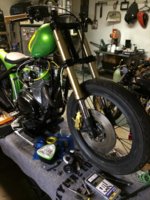
As I was building my XS sidecar rig. I picked up this on craigslist for $500 bucks just because it was there. I was not digging the PO's work I never really wanted a hardtail but this was the perfect candidate.
7436A2B3.jpg

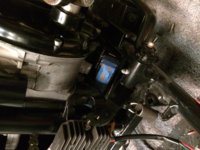
The wiring was just a snarled mess I think blue wire must have been on sale as that is all he used along with wire nuts and a pcv pipe as a electronics box. It didn't run go figure. I decided to strip it

IMG_0634_zps99dfb77a.jpg


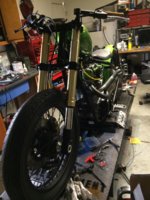
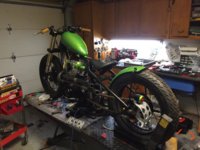
And drop it off to Jon and the crew over at Monstercraftsman at last years timonum show. They welded on a voodoo vintage mk2 tail and a cantilever seat kit.
IMG_0019_zps143169a5.jpg
 
Last edited:
I picked up a set of GSXR fork legs on craigslist. and pieced together the rest of the stuff I needed to do the fork swap.

D135C189.jpg


I pressed out the stock stem and had a machinist friend spin up a bushing and pressed it into the GSXR lower tree. Thin with a set of xs and cx500 steering head bearings and some shims it all bolted together. No I don't remember what race went where.


Don't forget to make some notches so you can get the wrong races out while you are figuring this all out
A9951DB2.jpg
 
1BDDEAFC_zpsef2b5a51.jpg


Got some clip-ons from Dan-Moto, a Biltwell slim line seat and some Monstercraftsman mid brackets witht the Biltwell pegs

FE2CECB5_zpsc3274a89.jpg
 
Then I stuck it in the corner for a year while doing a "cafe job" on a good friends cx500
F3F68A00_zps7a582314.jpg

2B900A0E_zpse3385467.jpg

I finally got it back on the bench and got the kickstand on and started a top mount / coil bracket. I have to wait for the pamco kit to come in so I can finish it. Nice to finally do some thing other than bolt shit that I bought on.
 
Got a set of "ya mama" pipes in the mail along with a hugh's pma and a pamco. Need to find a rear fender to finish up mock up
8FD7FE02_zps79389b84.jpg
 
I was driving by and saw that the new HF was open right around the corner from my house.So I stopped in to grab some flap disks. and saw this hanging on the shelf for $3.99 pew-pew-pew Laserz!

524795DE_zpsc67f198e.jpg


8CE712BF_zps1da15dcd.jpg

My laser eyes already knew that the wheel needed to go over to the right a 1/8th-1/4 I will fashion a mount to my magnetic based dial indicator instead of holding it crooked like so.
The beam is plenty strong this is 8 feet away
8877F19B_zps1a29805e.jpg

This just reinstates the need for a Lathe to make some new wheel spacers
 
Here's some updates. Powdercoated the tank and fender. Finished the fork swap had to buy and learn how to use a metal lathe to finish the spacers. Just all the little things are left.
 

Attachments

  • IMG_0153.jpg
    IMG_0153.jpg
    240.4 KB · Views: 240
  • IMG_0152.jpg
    IMG_0152.jpg
    274.7 KB · Views: 271
  • IMG_0150.jpg
    IMG_0150.jpg
    208.1 KB · Views: 285
  • IMG_0147.jpg
    IMG_0147.jpg
    141.4 KB · Views: 243
  • IMG_0146.jpg
    IMG_0146.jpg
    134.2 KB · Views: 287
The wagon is a radio flyer I stripped and powdercoated. It has magnesium go kart wheels and billet hubs. The axles had to be re-worked with tubing and all-thread. I made the rear armrest out of tube as well it has a tab in the rear for a whip flag. She was the coolest kid at the pumpkin patch last year.
 

Attachments

  • IMG_0748.jpg
    IMG_0748.jpg
    177.1 KB · Views: 210
  • IMG_0750.jpg
    IMG_0750.jpg
    202.2 KB · Views: 212
Last edited:
That's quite a wagon. Move over Danika Patrick!

What type/brand of lathe did you get?

Thank I got the HF 7x10 I looked for an old south bend for 2 years and could never beat someone to it. So i got this knowing it would have severe limitations but it was something to learn on. Those wheel spacers are the first thing I have made to any kind of spec. Still looking for a real one.
 
Got some more work done tonight. was going to just run a cap but I really wanted a battery. I hate fake oil cans it's just one of my pet peves. I came up with this simple solution to put a antigravity 4 cell in the cavity left by removing the starter. The box can be found unbent for $30 from http://www.billetproofdesign.com/ I f.abbed up a bracket and welded it up. Its a tight fit but it tucks in there real nice
 

Attachments

  • IMG_0180.jpg
    IMG_0180.jpg
    165.6 KB · Views: 234
  • IMG_0179.jpg
    IMG_0179.jpg
    173.6 KB · Views: 242
  • IMG_0181.jpg
    IMG_0181.jpg
    213.7 KB · Views: 258
New head and rocker box after a tappet nut incident.
9149A9B3-91B6-41CB-AD73-88A5EF9233FF.jpg
282FC393-6DB0-4587-9CA1-C89049020E08.jpg

Spent a little time cleaning up the rest of the engine. New cam chain guide. had the valves cut and fresh gaskets.
C428DA3C-2F14-4064-8F9E-70DEBB1940CB.jpg
37CA238B-F157-4872-8B78-5320C01B2E58.jpg
897593FE-5A45-4E90-B4AA-69969A973540.jpg
 
Back
Top